I still remember my first PC build like it was yesterday – the excitement, the nervousness, and the inevitable common pc building mistakes to avoid. I was so eager to get my hands on the latest hardware that I rushed through the process, only to find myself troubleshooting for hours. It was a costly lesson, but one that taught me the importance of patience and attention to detail. As a maker and custom PC builder, I’ve seen my fair share of mistakes, from faulty wiring to incompatible components. But the truth is, most of these mistakes can be avoided with a little knowledge and planning.
In this article, I’ll share my expertise to help you steer clear of the most epic fails in PC building. You’ll get honest, no-hype advice on how to identify and avoid common pitfalls, from choosing the right components to installing the operating system. My goal is to empower you with the knowledge and confidence to build a PC that meets your needs and exceeds your expectations. So, if you’re ready to take the leap and build your dream machine, let’s get started on this journey together and explore the common pc building mistakes to avoid that can make all the difference between a successful build and a frustrating experience.
Table of Contents
Guide Overview: What You'll Need

Total Time: 2 hours 30 minutes
Estimated Cost: $0 – $100
Difficulty Level: Intermediate
Tools Required
- Torx Screwdriver (for removing CPU cooler and motherboard stand-offs)
- Phillips Screwdriver (for removing case screws)
- Thermal Paste (for applying to CPU die)
- Cable Ties (for cable management)
- Multimeter (for troubleshooting electrical issues)
Supplies & Materials
- Motherboard Stand-offs (to prevent motherboard damage)
- CPU Cooler (compatible with your CPU socket)
- RAM Modules (compatible with your motherboard)
- Storage Drive (such as a hard drive or solid state drive)
- Power Supply (with sufficient wattage for your build)
Step-by-Step Instructions
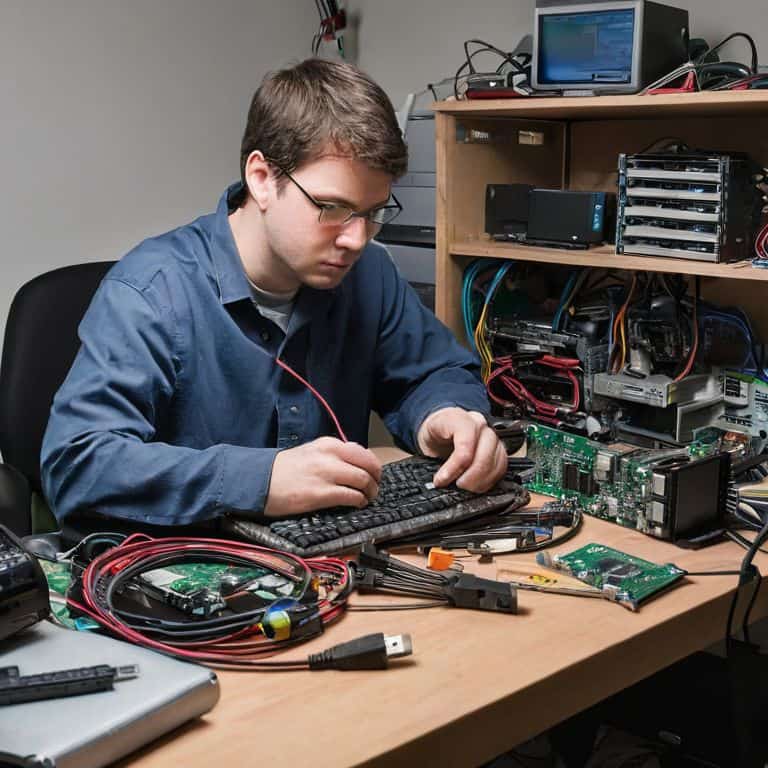
- 1. First, let’s talk about grounding yourself – it’s a crucial step that many beginners skip, but trust me, it’s essential to prevent any damage to your components. Static electricity can be a real killer, so make sure you touch a grounded metal object or wear an anti-static strap to discharge any static electricity from your body. I like to use an anti-static mat on my workbench, it’s a simple but effective way to keep everything safe.
- 2. Next, unpacking and organizing your components is key to a smooth build process. Take your time to carefully unpack each component, and make sure you have all the necessary parts and tools before you start building. I like to lay out all my components on a large table or workbench, and then group them by category – it makes it easier to find what you need when you need it. Don’t be like me, and try to build a PC on a cluttered desk – it’s a recipe for disaster.
- 3. Now, let’s move on to handling the CPU – this is one of the most delicate components in your build, so be careful not to touch the pins or the surface of the CPU. If you’re using an Intel CPU, make sure to handle it by the edges, and if you’re using an AMD CPU, use the provided handling tool to prevent any damage. I’ve seen too many CPUs get damaged during the build process, so take your time and be gentle.
- 4. When it comes to installing the motherboard, make sure you align the mounting holes correctly, and use the provided stand-offs to secure it to the case. Don’t overtighten the screws, as this can damage the motherboard – just snug them up and you’re good to go. I like to use a motherboard installation tool to make the process easier, but if you don’t have one, just be patient and take your time.
- 5. Next up, connecting the front panel headers can be a bit of a challenge, especially if you’re new to building PCs. Take your time to carefully connect the power button, reset button, and LED indicators to the correct pins on the motherboard. I like to use a diagram or a photo of the motherboard to help me identify the correct pins – it’s easy to get them mixed up, so double-check your work.
- 6. When it comes to installing the RAM, make sure you handle the modules by the edges, and avoid touching the gold contacts. Align the notches on the RAM module with the tabs on the motherboard, and gently push it in until it clicks into place. Don’t force it, as this can damage the RAM or the motherboard – just be gentle and patient.
- 7. Finally, cable management is key to a clean and efficient build. Take your time to route the cables neatly, and use cable ties or zip ties to keep them organized. I like to use a cable management system to keep everything tidy, but if you don’t have one, just use some common sense and route the cables in a way that makes sense. A well-managed cable system can make all the difference in the world, so don’t skip this step.
Avoiding Common Pc Building Mistakes
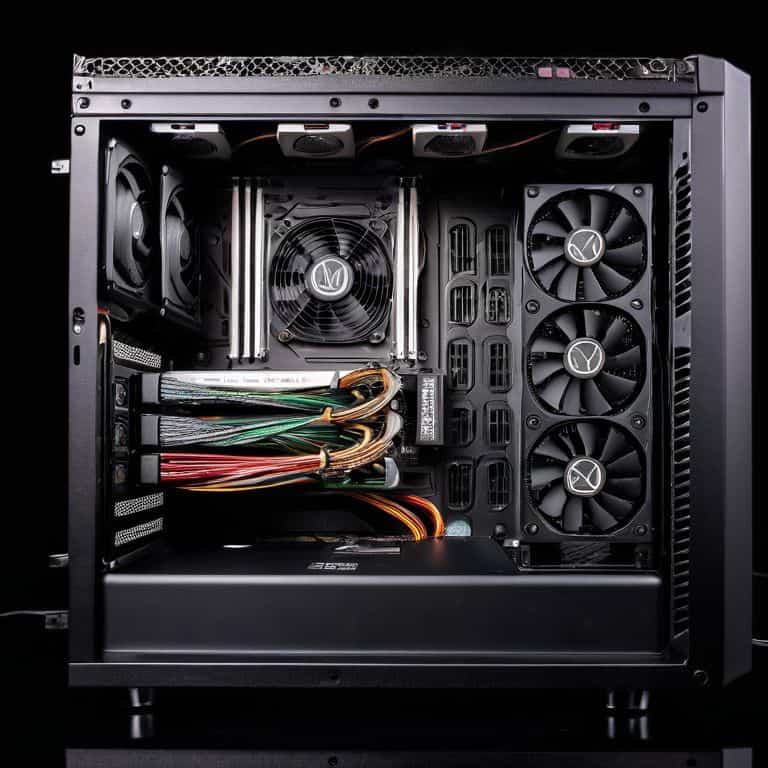
When it comes to building a PC, overheating prevention tips are crucial to ensure your system runs smoothly. One often overlooked aspect is proper airflow within the case. I’ve seen many builds where the CPU cooler is obstructed by poorly routed cables or inadequate case fans. To avoid this, make sure to choose a pc case that meets your pc case selection criteria, including sufficient room for airflow and easy cable management.
Another critical step is gpu installation. Gpu installation best practices dictate that you handle the card by the edges to prevent damage to the sensitive components. It’s also essential to secure the card firmly to the motherboard to prevent any movement that could cause damage. I always recommend double-checking the cpu cooler comparison to ensure you’re getting the best performance for your build.
In my experience, a well-planned power supply sizing guide can make all the difference in a successful build. It’s essential to calculate your power requirements accurately to avoid any issues down the line. To help with this, I’ve put together a pc building tools checklist that includes everything you need to get started, from screwdrivers to cable ties. By following these tips and being mindful of your build’s specific needs, you’ll be well on your way to creating a powerful and efficient PC.
Gpu Installation Best Practices
When it comes to installing your GPU, I’ve seen folks make some costly mistakes. First, make sure you’ve got the right slot – don’t try to force it into a PCIe x1 slot if you need an x16. Next, handle the card by the edges to avoid static electricity damage. Gently push it into the slot, ensuring it’s fully seated and the screws are secure. Don’t overtighten, or you might damage the motherboard or the GPU itself.
I also recommend connecting the power cables before installing the GPU, it’s just easier to manage the cables that way. Double-check your motherboard manual to see if your GPU requires any specific power configurations. With these simple steps, you’ll be golden – your GPU will be safely installed, and you’ll be ready to tackle those demanding games or graphics projects.
Overheating Prevention Tips Inside
To keep your PC running smoothly, you’ve got to keep it cool. I’ve seen too many builds go up in flames – literally – because of overheating issues. Make sure you’ve got a solid cooling system in place, whether that’s a beefy air cooler or a liquid cooling setup. Don’t be afraid to get creative with your case fans, either – a little airflow can go a long way.
Proper cable management is also key to preventing overheating. Keep those cables tidy and away from your components to ensure good airflow. I like to use cable ties or zip ties to keep everything organized. Trust me, it’s worth the extra few minutes of setup to avoid a overheating nightmare down the line.
Don't Get Zapped: 5 PC Building Mistakes to Sidestep

- Ground yourself before handling components to prevent static electricity damage
- Verify your CPU cooler compatibility to avoid a overheating nightmare
- Double-check your motherboard manual for the correct RAM installation slots
- Secure your GPU firmly to prevent it from becoming a pricey projectile
- Label your cables to avoid a spaghetti-like mess and make future upgrades a breeze
Key Takeaways to Build Like a Pro
Always ground yourself and your workspace to prevent static electricity damage to your components, it’s a simple step that can save you from a world of trouble
Keep your cooling system in check, dust buildup and improper fan installation can lead to overheating, which can shorten the lifespan of your PC’s components and decrease its performance
Double-check your GPU installation, ensuring it’s securely seated and properly connected, as a loose or incorrectly installed GPU can cause system crashes, artifacts, and even damage to the card itself
Words of Wisdom
The only mistake worse than making a mistake in PC building is being too afraid to try again – and again, and again, until you get it just right!
Frankie Miller
Building Like a Boss: Conclusion
We’ve covered the most critical aspects of avoiding common PC building mistakes, from overheating prevention tips to GPU installation best practices. By following these steps and being mindful of the potential pitfalls, you’ll be well on your way to creating a powerful, custom gaming PC that meets your unique needs. Remember, the key to a successful build is not just about slapping parts together, but about understanding how they work in harmony. Don’t be afraid to get your hands dirty, and always keep in mind that a ‘void warranty’ sticker is merely a challenge waiting to be overcome.
Now that you’ve got the knowledge, it’s time to unleash your inner maker and start building. Don’t let fear of mistakes hold you back – every great builder started somewhere, and the only way to learn is by doing. As you embark on your PC building journey, keep in mind that it’s okay to make mistakes – they’re an opportunity to learn and improve. So go ahead, take the leap, and join the ranks of the DIY masters who refuse to be limited by closed-ecosystem products. With patience, persistence, and a willingness to learn, you’ll be creating custom PCs like a pro in no time, and the sense of accomplishment will be all the more sweet.
Frequently Asked Questions
What are some common signs that my PC is overheating and how can I troubleshoot the issue?
Ah, overheating – the silent killer of PCs! Keep an eye out for warning signs like random shutdowns, slow performance, or that annoying ‘thermal overload’ error. Check your CPU and GPU temps, and make sure your cooling system is doing its job. I’ll walk you through some troubleshooting steps to get your rig running smooth again.
Can I install multiple GPUs in my PC and if so, what are the best practices for doing so?
Absolutely, you can install multiple GPUs in your PC, but it requires some planning. You’ll need a motherboard that supports multi-GPU setups, like SLI or Crossfire, and a power supply that can handle the extra juice. I’ve done it myself, and trust me, it’s a game-changer – just make sure to check your motherboard manual for specific requirements and plan your cable management carefully.
How can I ensure that my CPU is properly seated and secured to prevent damage or poor performance?
Alright, let’s get that CPU locked in! Ensure the socket is clear of debris, then gently insert the CPU at a 45-degree angle. Secure it with the mounting mechanism, but don’t overtighten – you don’t want to damage the die. Double-check the manual for specific torque specs, and you’re golden!