


I still remember the first time I built my own mechanical keyboard from a best budget mechanical keyboard kit. It was a game-changer – the tactile feedback, the customizable keys, and the sheer satisfaction of creating something with my own hands. But what really got me excited was the realization that I didn’t have to break the bank to get a high-quality typing experience. The myth that you need to spend hundreds of dollars on a premium keyboard is just that – a myth. With the right kit and a bit of DIY spirit, you can create a killer mechanical keyboard that rivals the big brands.
In this article, I’ll share my hands-on experience with best budget mechanical keyboard kits, highlighting the pros and cons of each, and guiding you through the process of choosing and building your own custom keyboard. You’ll learn how to avoid common pitfalls, choose the right switches, and assemble your keyboard like a pro. My goal is to empower you to take control of your typing experience, without falling for the marketing hype or overspending on features you don’t need. By the end of this guide, you’ll be equipped with the knowledge and confidence to build your own best budget mechanical keyboard kit and join the ranks of DIY keyboard enthusiasts who refuse to settle for mediocre typing.
Table of Contents
- Guide Overview: What You'll Need
- Step-by-Step Instructions
- Best Budget Mechanical Keyboard Kits
- 5 Killer Tips for Assembling the Best Budget Mechanical Keyboard Kits
- Key Takeaways for Building Your Dream Mechanical Keyboard
- The Rebel's Creed
- Unleashing Your Creativity with DIY Keyboard Kits
- Frequently Asked Questions
Guide Overview: What You'll Need

Total Time: 4 hours 30 minutes
Estimated Cost: $50 – $150
Difficulty Level: Intermediate
Tools Required
- Soldering Iron (with a fine tip)
- Wire Cutters (for trimming wires)
- Pliers (for gripping small parts)
- Keycap Puller (for removing keycaps)
Supplies & Materials
- Mechanical Keyboard Kit (including PCB, switches, and keys)
- Diodes (for switch matrix)
- Resistors (for voltage regulation)
- USB Cable (for connecting to computer)
- Switch Stabilizers (for stabilizing longer keys)
Step-by-Step Instructions
- 1. First, let’s get our hands dirty and start by unboxing our budget mechanical keyboard kit. You’ll typically find a set of keys, a PCB (printed circuit board), a set of switches, and some basic tools like a screwdriver and a keycap puller. Take a moment to familiarize yourself with each component and understand how they’ll come together to form your custom keyboard.
- 2. Next, we need to prepare the PCB for assembly. This involves soldering the switches to the board, which can be a bit intimidating if you’re new to soldering. Don’t worry, it’s easier than it looks, and with a steady hand, you’ll be done in no time. Make sure to follow proper soldering techniques to avoid any cold joints or short circuits.
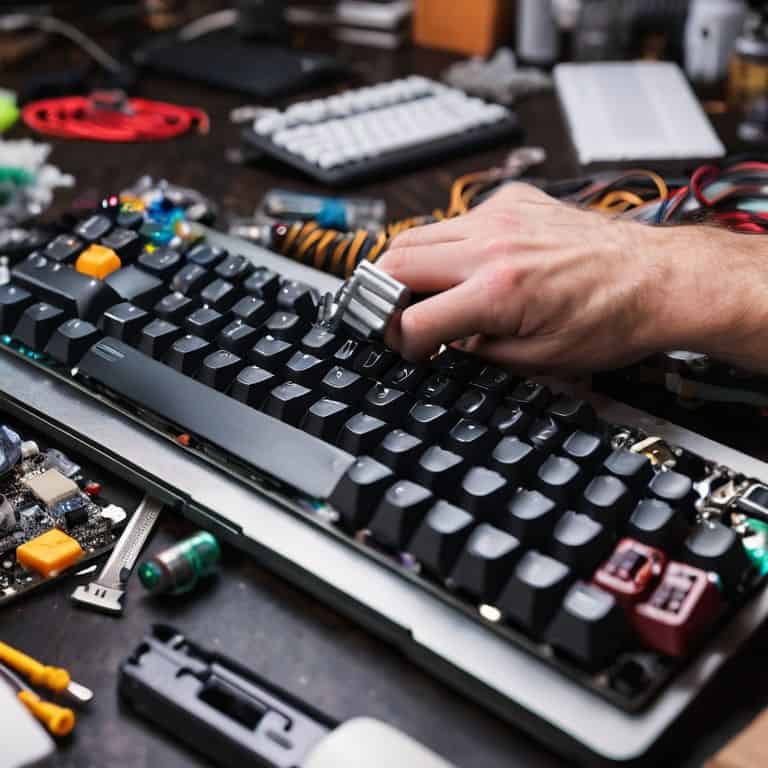
- 3. Now it’s time to install the switches. This is where the magic happens, and your keyboard starts to take shape. Be careful not to bend the pins on the switches, as this can cause problems down the line. Take your time, and make sure each switch is securely soldered to the PCB.
- 4. With the switches installed, we can move on to assembling the case. This usually involves attaching the PCB to the case using screws or stand-offs. Make sure everything is properly aligned and securely fastened to avoid any wobbly keys or rattles.
- 5. The next step is to install the keycaps. This is where you get to customize the look and feel of your keyboard. Take your time, and make sure each keycap is securely attached to its corresponding switch. Don’t be afraid to get creative with your keycap choices – after all, this is your custom keyboard.
- 6. Now that our keyboard is taking shape, it’s time to add the electronics. This includes installing the USB connector, any additional features like RGB lighting, and of course, the microcontroller that brings everything to life. Be careful when handling the electronics, as they can be fragile and sensitive to static electricity.
- 7. Finally, it’s time to test our creation. Plug in your keyboard, and make sure everything is working as expected. Test each key, and make any necessary adjustments to the switches or keycaps. If everything checks out, congratulations – you’ve just built your very own custom mechanical keyboard on a budget. Take a step back, and admire your handiwork – you should be proud of yourself for taking on this project and coming out on top.
Best Budget Mechanical Keyboard Kits
When it comes to affordable custom keyboard options, there are a few things to keep in mind. First, you’ll want to consider the type of switches you want to use. Mechanical keyboard switch types can vary greatly, from linear to tactile to clicky, so it’s essential to choose the one that suits your typing style. I personally prefer tactile switches, as they provide a nice balance between feedback and quietness.
Building a gaming keyboard on a budget requires some compromise, but that doesn’t mean you have to sacrifice quality. Look for budget friendly keyboard switches that offer a good balance between price and performance. Some popular options include Kailh and Outemu switches, which are known for their durability and consistency. When choosing a switch, consider the actuation force, travel distance, and sound level to ensure it meets your needs.
In addition to switches, custom keyboard keycap designs can also enhance your typing experience. With a wide range of designs available, you can personalize your keyboard to fit your style and preferences. Whether you prefer a sleek and minimalist look or a more elaborate design, custom keycaps can add a unique touch to your keyboard. By combining the right switches and keycaps, you can create a truly unique and functional keyboard that meets your needs and budget.
Affordable Custom Keyboard Options
When it comes to affordable custom keyboard options, I’m all about exploring the world of DIY kits. These aren’t just cheap alternatives; they’re a gateway to creating a keyboard that’s tailored to your typing style and preferences. From choosing the perfect switch type to selecting a custom keycap set, the possibilities are endless. And the best part? You don’t have to break the bank to get started.
I’ve worked with several budget-friendly DIY kits, and I’m impressed by the quality and versatility they offer. With a little patience and some basic tools, you can build a custom keyboard that rivals high-end models. Whether you’re a gamer, a writer, or just a keyboard enthusiast, there’s a DIY kit out there waiting for you to unleash your creativity and bring your dream keyboard to life.
Building Gaming Keyboards on a Budget
When it comes to building gaming keyboards on a budget, it’s all about finding the perfect balance between performance and price. I’ve experimented with various combinations of switches, keycaps, and PCBs to create a gaming beast without breaking the bank. One of my favorite hacks is to repurpose old keyboard parts and merge them with new, affordable components. For instance, you can swap out the switches on an old keyboard with newer, more responsive ones, giving you a significant upgrade without the hefty price tag.
By getting creative with DIY keyboard building, you can achieve high-end performance at a fraction of the cost. I’ve seen gamers build fully functional mechanical keyboards for under $100, and with the right guides and tutorials, you can do the same. It’s time to think outside the box and unleash your inner keyboard modder – the possibilities are endless, and your wallet will thank you!
5 Killer Tips for Assembling the Best Budget Mechanical Keyboard Kits
- Choose the right switch type for your needs – linear, tactile, or clicky, each has its own unique feel and sound, so don’t be afraid to experiment
- Consider the material and construction of the keyboard case – aluminum, steel, or plastic, each has its pros and cons in terms of durability and aesthetics
- Don’t overlook the importance of keycap quality – custom keycaps can elevate your typing experience, but also factor in the cost and compatibility
- Plan your cable management in advance – a cluttered workspace can be frustrating, so think about how you’ll route your USB, audio, and other cables before you start building
- Keep an eye out for community-driven projects and open-source designs – these can be a treasure trove of inspiration, resources, and support for your DIY mechanical keyboard journey
Key Takeaways for Building Your Dream Mechanical Keyboard
By choosing the right DIY mechanical keyboard kit, you can save up to 50% of the cost compared to buying a pre-assembled keyboard, and still get a high-quality typing experience
With a little patience and some basic DIY skills, you can build a custom mechanical keyboard that fits your budget, whether you’re a gamer, programmer, or just someone who loves typing on clicky switches
From affordable custom keyboard options to building gaming keyboards on a budget, the world of DIY mechanical keyboards is full of possibilities, and with the right guide, you can unleash your inner rebel and create a keyboard that’s truly one-of-a-kind
The Rebel's Creed
A budget mechanical keyboard kit isn’t just about saving cash, it’s about unleashing your creativity and taking control of your tech – it’s the ultimate middle finger to closed ecosystems and overpriced, mass-produced keyboards.
Frankie Miller
Unleashing Your Creativity with DIY Keyboard Kits
So, you’ve made it through the guide and are now equipped with the knowledge to build your very own custom mechanical keyboard. Let’s recap the key points: we’ve explored the best budget mechanical keyboard kits, dived into the world of building gaming keyboards on a budget, and discussed affordable custom keyboard options. Remember, the goal is to have fun and create something unique that reflects your personality. Don’t be afraid to experiment and try out new things – it’s all part of the DIY experience.
As you embark on your DIY keyboard-building journey, keep in mind that it’s not just about the end result – it’s about the process, the learning, and the sense of accomplishment that comes with it. Embracing the DIY spirit means being open to new challenges and possibilities. So, don’t be limited by what’s available in stores; instead, unleash your creativity and build something that truly makes you happy. With these budget-friendly options and a bit of patience, you’ll be well on your way to creating your dream keyboard – and who knows, maybe even starting a new hobby.
Frequently Asked Questions
What are the most important factors to consider when choosing a budget mechanical keyboard kit?
When choosing a budget mechanical keyboard kit, I look for switches, keycap quality, and PCB compatibility. Don’t compromise on these – they make or break the typing experience. Consider the type of switches you need, like linear or tactile, and ensure the keycaps are durable. A solid PCB will make customization a breeze.
How do I ensure compatibility between the keyboard kit and my computer or gaming setup?
Compatibility is key. When choosing a keyboard kit, ensure it’s compatible with your computer’s operating system and ports. Check if it’s USB, PS/2, or wireless, and verify your setup can handle it. Don’t assume it’ll just work – double-check the specs to avoid any headaches down the line.
Are there any significant compromises on quality or performance when opting for a budget mechanical keyboard kit?
Honestly, with budget kits, you might sacrifice some premium features like customizable backlighting or high-end switch types, but the core typing experience can still be incredibly solid. I’ve built plenty of budget boards that rival their pricey counterparts in terms of performance and feel.