


I still remember the day I decided to ditch my laptop’s clunky hard drive and upgrade to a sleek SSD. It was like a breath of fresh air – my laptop was suddenly faster, more responsive, and a joy to use. But what really sparked my enthusiasm was the realization that I didn’t need to be a tech expert to make it happen. In fact, learning how to replace a laptop hard drive with an ssd was a game-changer for me, and I’m excited to share my experience with you. The common myth that upgrading your laptop’s storage is a daunting task is simply not true – with the right guidance, anyone can do it.
So, what can you expect from this article? I’ll walk you through the entire process of replacing your laptop’s hard drive with an SSD, from preparation to completion. You’ll get honest, no-hype advice on what to expect, and I’ll share some practical tips I’ve learned along the way to make the process as smooth as possible. By the end of this guide, you’ll be empowered to take control of your laptop’s performance and make the upgrade that will take your computing experience to the next level. Whether you’re a tech enthusiast or just looking to breathe new life into your trusty laptop, this article will show you that learning how to replace a laptop hard drive with an ssd is easier than you think.
Table of Contents
Guide Overview: What You'll Need
Total Time: 1 hour 30 minutes
Estimated Cost: $100 – $300
Difficulty Level: Intermediate
Tools Required
- Phillips screwdriver (for removing laptop screws)
- Torx screwdriver (for some laptop models)
- Plastic spudger (for prying open laptop case)
- Cloning software (for transferring data from old hard drive to new SSD)
Supplies & Materials
- SSD drive (compatible with laptop model)
- SATA cable (if not already included with SSD)
- Thermal tape (for securing SSD to laptop case)
- Laptop screws (for reassembling laptop case)
Step-by-Step Instructions
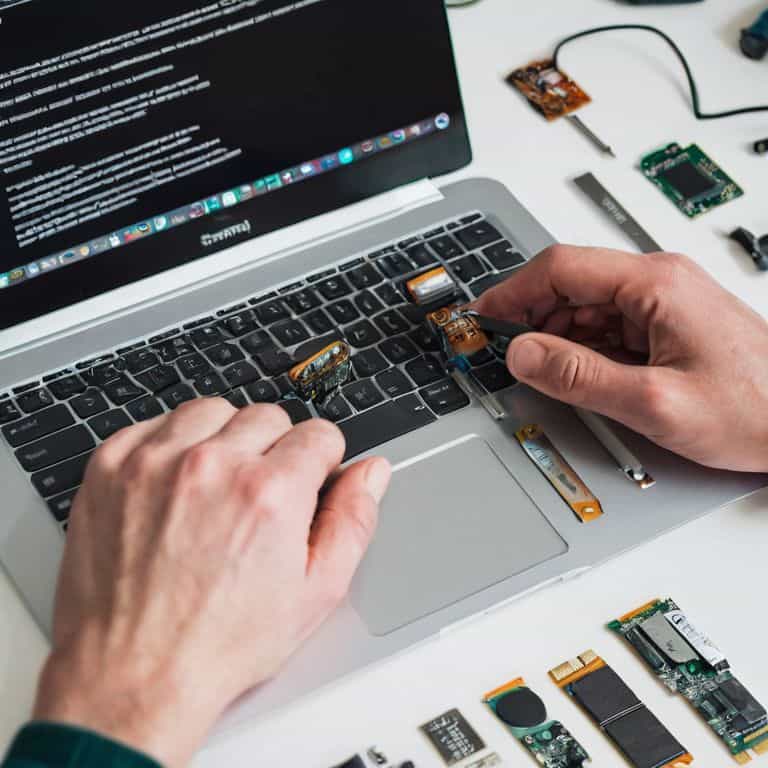
- 1. First, prepare your tools and workspace by gathering a few essential items: a screwdriver set, a plastic spudger, and an anti-static wrist strap. Clear a flat surface, like a desk or workbench, and make sure it’s free from any clutter or distractions that might get in the way of your DIY adventure.
- 2. Next, ground yourself to prevent any static electricity damage to your laptop’s internal components. Put on your anti-static wrist strap and touch a grounded metal object, like a tap, to discharge any static electricity from your body. This is a crucial step that many people overlook, but trust me, it’s worth the extra minute to ensure your safety and the safety of your device.
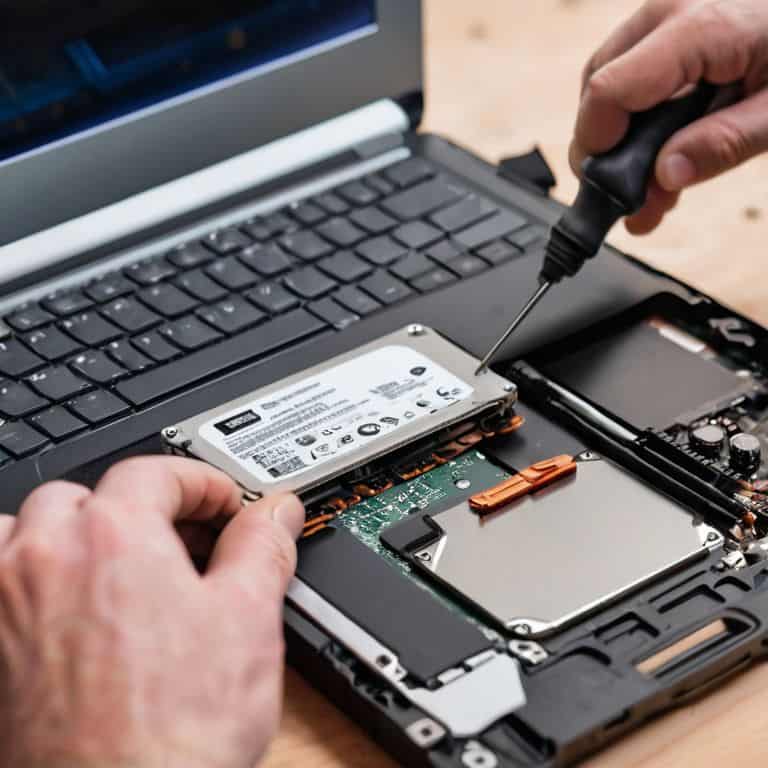
- 3. Now it’s time to shut down your laptop and unplug the power cord. Make sure you’ve saved all your work and closed any open applications. Flip your laptop over and locate the screws that hold the bottom panel in place. These screws are usually marked with a warranty void sticker, but don’t let that intimidate you – we’re about to take control of our technology.
- 4. Remove the screws using your screwdriver set, and gently pry open the bottom panel using your plastic spudger. Be careful not to damage any of the surrounding components or the panel itself. You might need to apply a bit of pressure, but don’t force it – if it doesn’t come off easily, check that you’ve removed all the screws.
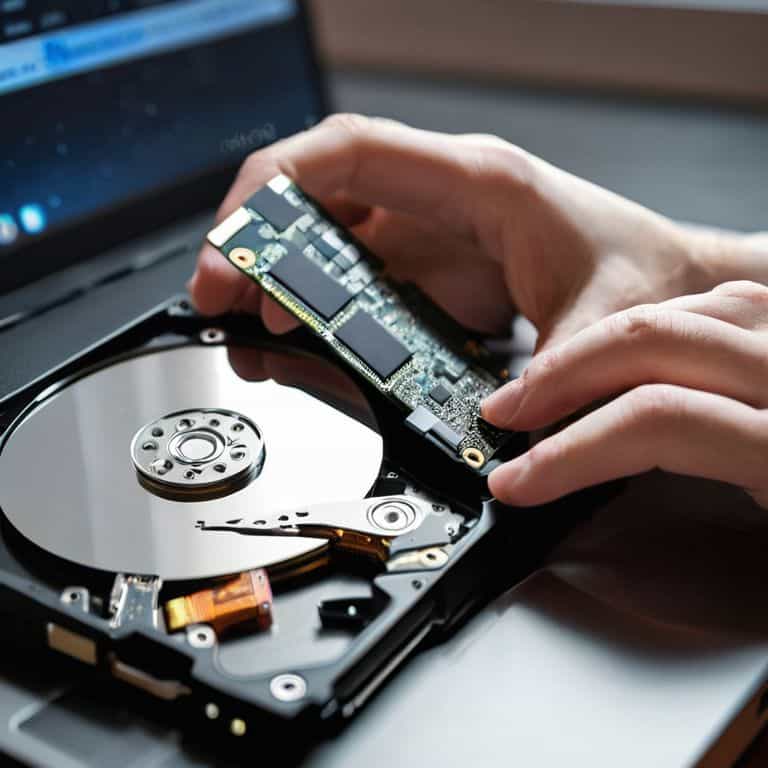
- 5. Once you’ve accessed the internal components, locate the hard drive and identify the type of connection it uses. Most laptops use a SATA connection, but some older models might use a different type of connector. Take note of the connection type and the orientation of the hard drive, as you’ll need to replicate this when installing your new SSD.
- 6. Carefully disconnect the hard drive from the motherboard by gently pulling on the SATA cable. You might need to use a bit of force, but be careful not to damage the cable or the connector. Once the hard drive is disconnected, you can remove the screws that hold it in place and lift it out of the laptop.
- 7. Now it’s time to install your new SSD. Take your shiny new drive and connect it to the motherboard using the SATA cable. Make sure the connection is secure and the drive is properly seated. Replace the screws that hold the drive in place, and double-check that everything is secure before moving on to the next step.
- 8. Replace the bottom panel and reconnect any other components that you might have disconnected during the process. Make sure all the screws are tightened securely, but don’t overtighten them – you don’t want to damage the panel or the surrounding components.
- 9. Finally, boot up your laptop and install your operating system on the new SSD. You might need to create a bootable USB drive or use a recovery disc, depending on your laptop’s manufacturer and model. Follow the on-screen instructions to complete the installation process, and enjoy your newly upgraded laptop with its blazing-fast SSD.
Rip It Out and Rebuild
As we dive into the world of laptop performance optimization, it’s essential to consider the benefits of using an SSD over a traditional hard drive. Not only will you experience a significant boost in speed, but you’ll also enjoy a more responsive and efficient laptop. When it comes to laptop storage upgrade costs, it’s worth noting that SSDs are becoming increasingly affordable, making them a viable option for those looking to upgrade.
One crucial step in the process is using hard drive cloning software to transfer your existing data to the new SSD. This will ensure a seamless transition and minimize downtime. It’s also a good idea to familiarize yourself with ssd benchmarking tools to get an idea of your laptop’s performance before and after the upgrade. By doing so, you’ll be able to appreciate the significant improvement in speed and responsiveness.
To get the most out of your new SSD, consider exploring laptop ssd installation tips to optimize your setup. This might include adjusting your power settings or configuring your SSD for optimal performance. By taking the time to fine-tune your setup, you’ll be able to enjoy a faster, more efficient laptop that’s capable of handling even the most demanding tasks.
Hard Drive Cloning Software Secrets
When it comes to cloning your old hard drive, the right software can be a game-changer. I swear by free tools like Clonezilla or Macrium Reflect – they’re powerful, easy to use, and won’t break the bank. For this project, I’ll be using Macrium Reflect to create an exact replica of my laptop’s hard drive. This way, I can ensure a seamless transition to the new SSD, with all my files, programs, and settings intact.
By using the right cloning software, you’ll avoid the hassle of reinstalling your operating system and favorite apps. Trust me, it’s a huge time-saver. Just make sure to create a backup of your important files before starting the cloning process, and you’ll be all set for a smooth upgrade to your shiny new SSD.
Laptop Ssd Installation Tips
When it comes to installing that shiny new SSD, there are a few things to keep in mind. First, make sure you’ve got the right screws and adapters for your laptop’s specific model. I’ve got a drawer full of spare parts from past projects, and I can tell you that having the right tools can make all the difference. Next, handle that SSD with care – it’s a delicate piece of tech, and you don’t want to damage it before you even get it installed.
Take your time, and don’t be afraid to consult your laptop’s manual or online forums if you’re unsure about anything. And remember, that ‘void warranty’ sticker is just a challenge – you’ve got this! With a little patience and elbow grease, you’ll be enjoying a faster, more responsive laptop in no time.
3 Key Takeaways for a Successful Laptop SSD Upgrade
By replacing your laptop’s hard drive with a solid state drive, you can significantly boost performance, reduce loading times, and breathe new life into an older machine
Properly cloning your hard drive to the new SSD is crucial, and using the right software can make all the difference – don’t be afraid to experiment and find the method that works best for you
With the right tools and a bit of patience, you can successfully upgrade your laptop to an SSD, unlocking faster speeds, improved reliability, and a more enjoyable overall computing experience
The Liberation of Upgrades
Upgrading to an SSD isn’t just about speeding up your laptop, it’s about unleashing its full potential and taking back control from the clutches of outdated technology – every swap is a victory for the DIY spirit!
Frankie Miller
Empowered to Upgrade: A New Era of DIY Tech
You’ve made it through the step-by-step guide and have successfully replaced your laptop’s hard drive with a shiny new SSD. Along the way, you’ve picked up some valuable tips and tricks, from laptop SSD installation secrets to the best hard drive cloning software for the job. By taking matters into your own hands, you’ve not only upgraded your laptop’s performance but also gained a sense of technical empowerment. Remember, this is just the beginning of your DIY tech journey, and there are many more projects waiting for you to tackle.
As you bask in the glory of your newly upgraded laptop, take a moment to appreciate the satisfaction of a job well done. You’ve voided your warranty, but you’ve also gained something much more valuable: the knowledge and confidence to take on any tech project that comes your way. So go ahead, get creative, and start brainstorming your next DIY adventure. Whether it’s modding an old game console or building a custom PC from scratch, the possibilities are endless, and I’ll be right here, cheering you on every step of the way.
Frequently Asked Questions
What are the most compatible SSD brands for my specific laptop model?
For your laptop model, I recommend checking out SSDs from Crucial, Samsung, or Western Digital – they’re usually a safe bet. But, before you buy, double-check your laptop’s specs to ensure the SSD you choose is compatible. I like to use online forums and the manufacturer’s website to verify compatibility, it’s a DIYer’s best friend!
How do I ensure a secure and complete transfer of my data from the old hard drive to the new SSD?
Dude, don’t worry, I’ve got you covered! For a secure transfer, use a reliable cloning software like Acronis or Macrium. It’ll create an exact replica of your old hard drive on the new SSD, including your OS, files, and settings. Just hook up both drives, run the software, and let it work its magic – your data will be transferred safely and completely!
Are there any special considerations or precautions I should take when physically handling the SSD to avoid damaging it during the installation process?
Handle that SSD with care, my friend! Static electricity is its worst enemy, so touch a grounded metal object or wear an anti-static strap before handling. Also, avoid touching the gold contacts or circuit board – it’s like handling a fragile puzzle piece. Keep your work surface clean and dry, and you’ll be golden!