I still remember the first time I voided my warranty on an old gaming console – it was like a switch flipped, and I realized I didn’t have to be held back by what the manufacturer thought I should or shouldn’t do. That’s when I discovered the joy of building my own retro gaming console with Retropie, and I’ve never looked back. If you’re interested in learning how to build a retro gaming console with retropie, you’re probably tired of being told that it’s too complicated or that you need to buy some overpriced, pre-made solution. But the truth is, with a little patience and the right guidance, you can create your own custom gaming beast that plays all your favorite childhood games.
In this article, I’ll show you exactly how to get started with building your own retro gaming console using Retropie. I’ll share my personal experience, including the mistakes I made along the way, and provide you with a step-by-step guide to help you avoid common pitfalls. You’ll learn how to choose the right hardware, install the Retropie software, and configure your console for optimal performance. By the end of this guide, you’ll have a fully functional retro gaming console that you can customize to your heart’s content, and you’ll be able to enjoy all your favorite classic games in a whole new way.
Table of Contents
Guide Overview: What You'll Need

Total Time: 4 hours 30 minutes
Estimated Cost: $100 – $200
Difficulty Level: Intermediate
Tools Required
- Raspberry Pi Model 4
- MicroSD card at least 8 gigabytes
- HDMI cable for connecting to TV
- USB controller compatible with retropie
- Power supply for Raspberry Pi
- Case for Raspberry Pi optional, but recommended
- Ethernet cable for internet connection
- Keyboard for initial setup
- Soldering iron for optional modifications
Supplies & Materials
- Retropie software download from official website
- Retro game ROMs download from reputable sources
- Cooling system optional, but recommended for intense gaming
- Heatsink for Raspberry Pi
- 2 inches x 4 inches lumber for building custom case
- Wood glue for assembling custom case
- Sandpaper for smoothing out custom case
Step-by-Step Instructions
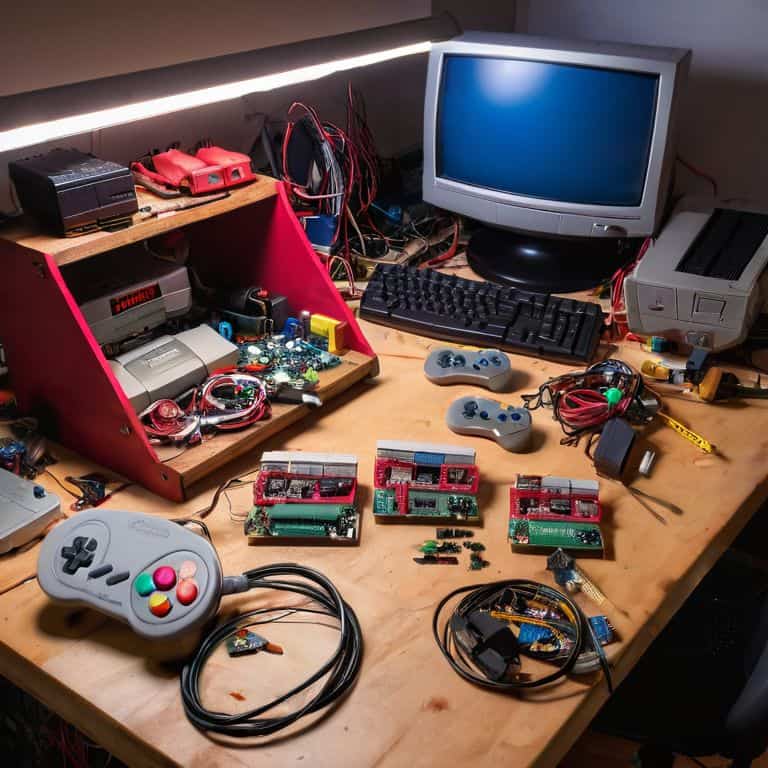
- 1. First, let’s start by gathering our materials, which include a Raspberry Pi, a microSD card, a power supply, and a case to put everything in. I like to use an old retro-style case to give it that authentic feel. Make sure you have all the necessary tools, such as a screwdriver and some wire strippers, to make the process smoother.
- 2. Next, we need to install the Retropie software on our Raspberry Pi. This is the brain of our operation, and it’s what will allow us to play all our favorite retro games. I recommend using the latest version of Retropie, and you can find the installation instructions on their official website. Don’t worry if you’re not tech-savvy; it’s a pretty straightforward process.
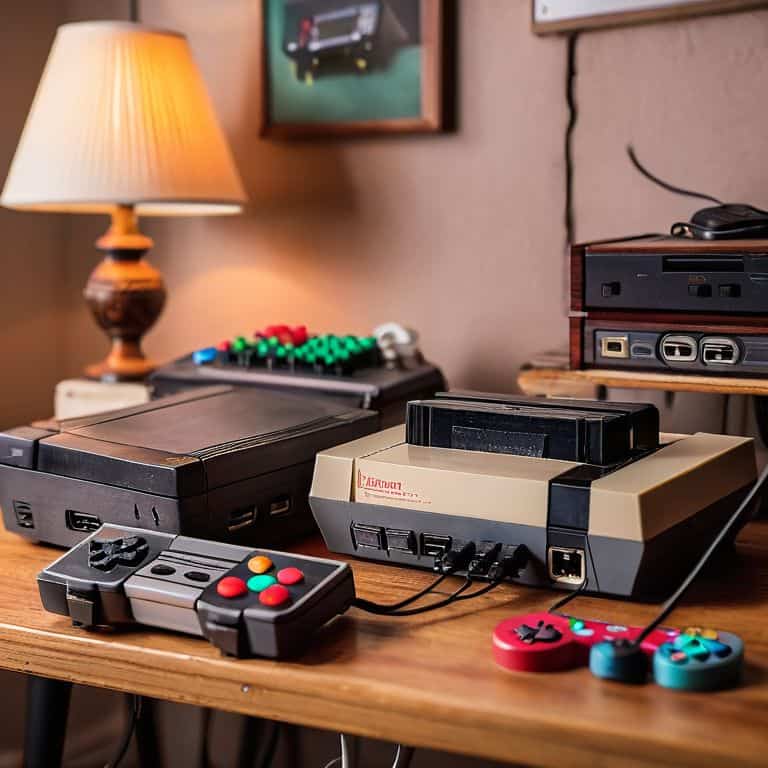
- 3. Now that we have our software installed, it’s time to configure our controllers. I like to use original retro controllers, but you can also use newer ones if you prefer. The key is to make sure they’re compatible with our Raspberry Pi and Retropie software. You can find tutorials online on how to configure your specific controller, and I recommend taking the time to get it just right.
- 4. With our controllers configured, it’s time to add some games to our console. You can find a wide variety of retro games online, but make sure you’re only downloading games that you own or are free to use. I like to organize my games by genre and console, making it easy to find what I’m in the mood for. You can also add artwork and other metadata to make your gaming experience more immersive.
- 5. Now, let’s assemble our console. This is the fun part, where we get to see everything come together. Start by connecting your Raspberry Pi to the power supply, then connect your controllers and any other peripherals you’re using. Make sure everything is securely fastened to the case, and that all the cables are neatly managed.
- 6. Once our console is assembled, it’s time to test everything. Plug it in, turn it on, and make sure all your controllers and games are working properly. This is also a good time to troubleshoot any issues you might be having. Don’t be afraid to get in there and tinker with things until they’re working just right.
- 7. Finally, let’s add some finishing touches to our console. You can add custom artwork, modify the case to fit your style, or even add some extra features like Wi-Fi or Bluetooth connectivity. The possibilities are endless, and this is where you can really make your console unique and personalized. Just remember to always follow proper safety precautions when working with electronics, and don’t be afraid to experiment and try new things.
Build Retro Gaming Beast

As we dive into building our retro gaming beast, it’s essential to consider the hardware that will bring our project to life. I’m a huge fan of using the Raspberry Pi for retro gaming, and I think it’s the best raspberry pi for retro gaming due to its compact size and impressive performance. When it comes to the Retropie installation, I recommend following a reliable retropie installation guide to ensure a smooth setup process.
Once we have our hardware and software in place, it’s time to think about the gaming experience. Configuring controllers for retropie can be a bit tricky, but trust me, it’s worth the effort. I like to use a combination of wireless controllers and classic gamepads to get that authentic feel. When it comes to adding roms to retropie, make sure you’re only using legitimate sources to avoid any potential issues.
To take our retro gaming console to the next level, let’s talk about optimizing retropie performance. This can be achieved by tweaking the settings and adjusting the emulator configurations. I also like to experiment with different retro gaming console case design options to give my project a unique look. By following these tips and being mindful of our build, we can create a truly one-of-a-kind gaming experience that’s both fun and rewarding.
Raspberry Pi Retro Gaming Mastery
Now that we’ve unleashed Retropie, it’s time to take our retro gaming console to the next level with Raspberry Pi mastery. I’ll show you how to optimize your Raspberry Pi’s performance for seamless retro gaming. We’ll dive into overclocking, cooling, and tweaking settings to get the most out of your tiny powerhouse.
By making a few simple adjustments, you’ll be able to play even the most demanding retro games without a hitch. I’ll share my favorite tips and tricks for getting the best performance out of your Raspberry Pi, from adjusting the GPU memory split to using a cooling system. With these tweaks, you’ll be able to enjoy a lag-free retro gaming experience that’s sure to impress.
Retropie Installation Unleashed
Now that we’ve got our hardware in check, it’s time to unleash the beast – Retropie installation is where the magic happens. I’ll walk you through the process, and trust me, it’s easier than you think. First, grab the latest Retropie image and flash it to your SD card. Don’t worry if you’re not sure what that means, I’ve got you covered – just use a tool like Win32DiskImager or Etcher to get the job done.
With the image flashed, pop that SD card into your Raspberry Pi and boot it up. You’ll be greeted with the Retropie setup wizard, which will guide you through configuring your controllers, setting up your network, and getting your games loaded. I’ll share some tips and tricks for getting the most out of Retropie, from optimizing performance to adding new games and emulators. Let’s get this retro gaming party started!
5 Crucial Tips to Supercharge Your Retropie Retro Gaming Console
- Don’t be afraid to experiment with different Retropie versions and configurations to find the perfect balance for your retro gaming needs
- Choose the right Raspberry Pi model for your project – I recommend the Raspberry Pi 4 for its raw power and improved performance
- Get familiar with the Retropie interface and learn how to customize it to your liking, from button mappings to theme installations
- Invest in a high-quality controller, such as a USB gamepad or a retro-style arcade stick, to elevate your gaming experience
- Keep your Retropie installation up-to-date and regularly back up your game library to prevent data loss and ensure a seamless gaming experience
Key Takeaways for Your Retro Gaming Console Build
By following this guide, you’ll have a fully functional retro gaming console with Retropie, capable of playing a wide range of classic games from various platforms
Mastering the Raspberry Pi for retro gaming purposes unlocks a world of customization and modification, allowing you to tailor your gaming experience to your preferences
With the skills and knowledge gained from this project, you’ll be empowered to tackle more complex DIY tech endeavors, voiding warranties and pushing the boundaries of what’s possible with your own two hands
Building Your Dream Console
The beauty of building a retro gaming console with Retropie lies not just in the nostalgia, but in the freedom to tweak, to modify, and to make it truly yours – it’s not just a project, it’s a rebellion against the disposable nature of modern tech.
Frankie Miller
Conclusion: You're Now a Retro Gaming Master
We’ve come a long way since we first decided to void that warranty and build our own retro gaming console with Retropie. From the initial setup to the _nitty-gritty_ of Retropie installation and Raspberry Pi mastery, we’ve covered it all. You’ve learned how to get your hands dirty, troubleshoot common mistakes, and bring your retro gaming vision to life. Whether you’re a seasoned maker or a DIY newbie, this project has hopefully shown you that building your own tech can be a fun, rewarding experience that puts you in control of your gaming destiny.
Now that you’ve joined the ranks of the retro gaming elite, remember that the true power of DIY tech lies in its customizability and _endless possibilities_. Don’t be afraid to keep experimenting and pushing the limits of what your console can do. With the skills you’ve acquired, you can move on to even more ambitious projects, always remembering that the right to repair and modify your own technology is a fundamental part of the DIY spirit. So go ahead, get creative, and show the world what you’re capable of – the retro gaming community is waiting for you!
Frequently Asked Questions
What are the minimum hardware requirements for a Raspberry Pi to run Retropie smoothly?
For a silky-smooth Retropie experience on Raspberry Pi, you’ll want at least a Raspberry Pi 3 or 4, 2GB of RAM, and a 32GB microSD card. Trust me, I’ve pushed the limits – this setup will get you playing classic games without a hitch!
How do I configure the controls for my retro gaming console to work with different types of games?
Now that we’ve got our retro gaming beast up and running, let’s talk controls. For different types of games, you’ll want to configure your controllers to mimic the original experience. I recommend using the Retropie configuration tool to map your buttons and joysticks – it’s a game-changer. Trust me, I’ve spent hours tweaking mine to perfection!
Can I add additional emulators or games to my Retropie installation after the initial setup?
Absolutely, you can add more emulators or games to your Retropie setup anytime. Just navigate to the Retropie menu, select ‘Manage Packages,’ and browse the available emulators and games. You can also add your own ROMs via USB or network transfer. I’ll cover the details in my next post, but trust me, it’s a breeze – and a great way to keep your retro gaming beast fresh and exciting!