I still remember the first time I tried to play my Game Boy Color in the dark – it was a frustrating experience, to say the least. The dim screen made it almost impossible to enjoy my favorite games. But then I discovered the secret to unlocking a whole new level of gaming pleasure: installing a backlit screen. If you’re like me, you’ve probably been told that modifying your Game Boy Color is a daunting task, but trust me, it’s not as hard as it seems. In fact, learning how to install a backlit screen in a Game Boy Color can be a fun and rewarding DIY project.
So, what can you expect from this guide? I’ll walk you through the entire process, from preparing your Game Boy Color to troubleshooting common issues. You’ll get honest, no-hype advice on the best materials to use and the most common mistakes to avoid. By the end of this article, you’ll be equipped with the knowledge and confidence to give your Game Boy Color the glow-up it deserves. Whether you’re a seasoned DIY enthusiast or a beginner, I’ll provide you with the step-by-step instructions and tips you need to successfully install a backlit screen in your Game Boy Color.
Table of Contents
Guide Overview: What You'll Need
Total Time: 2 hours 30 minutes
Estimated Cost: $20 – $40
Difficulty Level: Intermediate
Tools Required
- Soldering Iron (with a fine tip)
- Wire Strippers
- Pliers (for bending wires)
- Utility Knife (for cutting wires and plastic)
- Hot Glue Gun (for securing the screen)
- Multimeter (for testing connections)
Supplies & Materials
- Backlit Screen (specifically designed for Game Boy Color)
- Wiring Kit (including resistors and capacitors)
- Battery Holder (for powering the backlight)
- Copper Wire (for connecting components)
- Electrical Tape (for insulating wires)
- Plastic Spacer (for securing the screen in place)
Step-by-Step Instructions
- 1. First, let’s get started by preparing our tools and materials. You’ll need a few basic electronics tools like a screwdriver, pliers, and a soldering iron. Make sure you have a replacement backlit screen designed specifically for the Game Boy Color, as well as some wire, electrical tape, and a few other components that I’ll mention as we go along.
- 2. Next, we need to disassemble the Game Boy Color. This is the part where most people might get a little nervous, but trust me, it’s easier than you think. Start by removing the screws from the back of the device. You’ll need a screwdriver that fits the tiny screws, and be careful not to strip them. Once you have the back off, you’ll see the motherboard and the screen, which is held in place by a few clips and some adhesive.
- 3. Now, it’s time to remove the old screen. This is a bit of a delicate process, so be gentle. Use your fingers or a plastic spudger to carefully pry the screen away from the clips and adhesive. Don’t pull too hard, or you might damage the surrounding components. Once the old screen is out, set it aside and take a look at the space where the new backlit screen will go.
- 4. The next step is to prepare the new backlit screen for installation. This involves soldering some wires to the screen’s circuit board and attaching them to the correct points on the Game Boy’s motherboard. Make sure you follow the instructions that come with your replacement screen, as the solder points may vary. It’s also a good idea to use some electrical tape to keep the wires organized and out of the way.
- 5. With the new screen prepared, it’s time to install it in the Game Boy Color. Carefully place the screen into the clips and apply some gentle pressure to make sure it’s seated properly. Then, use some adhesive (like double-sided tape or hot glue) to secure the screen in place. Just be careful not to get any adhesive on the screen itself or the surrounding components.
- 6. Now that the new screen is in, we need to connect the backlight wiring. This involves soldering the wires from the screen to the correct points on the motherboard. Again, be careful and precise, as it’s easy to damage the components or create a short circuit. Use some electrical tape to keep the wires tidy and prevent them from coming into contact with other components.
- 7. Finally, it’s time to reassemble the Game Boy Color and test out our new backlit screen. Start by replacing the back panel and screwing it into place. Then, turn on the Game Boy and make sure the screen is working properly. If everything looks good, congratulations – you’ve just successfully installed a backlit screen in your Game Boy Color! If you encounter any issues, don’t worry – just go back through the steps and double-check your work.
Glowing Upgrade Ahead

As we dive into the world of DIY console modifications, it’s essential to consider the ips screen benefits for our beloved handhelds. The Game Boy Color, in particular, can greatly benefit from a screen upgrade, making those late-night gaming sessions a whole lot brighter. When it comes to backlight installation, a little patience and practice go a long way. I recommend checking out some soldering techniques for electronics tutorials to get a feel for the process before diving in.
One of the most critical aspects of this mod is ensuring you’re using the right materials. I always stress the importance of diy console modification safety precautions, as we’re dealing with sensitive electronics. Take your time, and make sure you’ve got a clean, well-lit workspace to avoid any potential hazards. It’s also a good idea to have some spare parts on hand, just in case.
Now, let’s talk about the game boy color restoration tips that can take your mod to the next level. Once you’ve completed the backlight installation, consider giving your console a good cleaning and maybe even replacing any worn-out buttons or casing components. With a little TLC, your Game Boy Color can look and feel like new, and that game boy color screen upgrade will be the cherry on top.
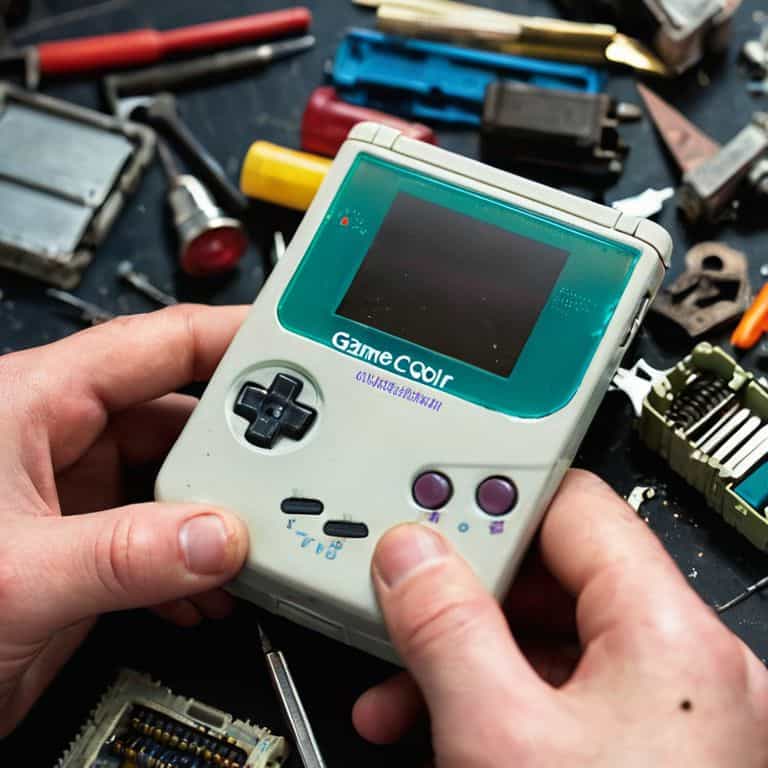
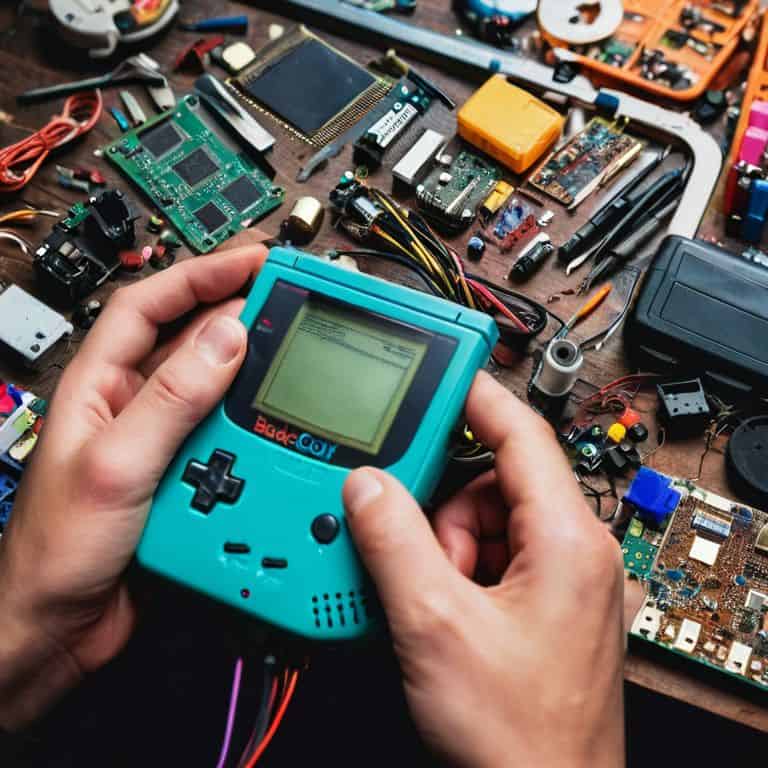
Backlight Installation Tutorial
Now that we’ve got our parts ready, let’s dive into the backlight installation. This is where things get really exciting – we’re about to breathe new life into our trusty Game Boy Color. First, carefully disconnect the old screen’s ribbon cable from the motherboard. Don’t worry, it’s easier than it sounds. Next, gently pry the screen housing open, taking care not to damage any of the surrounding components.
With the old screen out, it’s time to install our shiny new backlit display. Align the new screen’s ribbon cable with the motherboard’s connector, and gently push it into place. Make sure it’s securely attached, then reassemble the screen housing. Give yourself a pat on the back – you’re almost done!
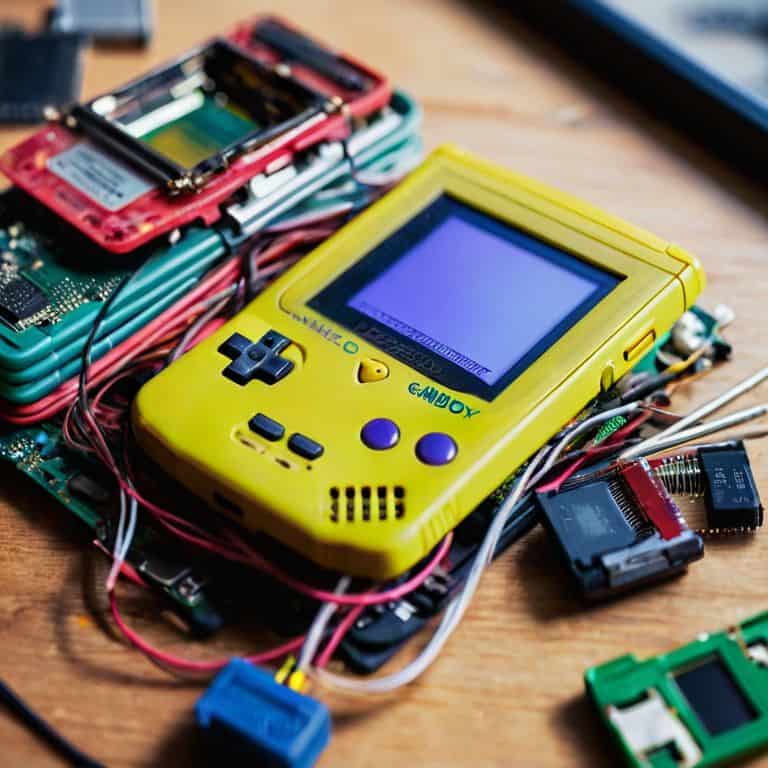
Ips Screen Benefits Inside
So, what makes an IPS screen the perfect upgrade for our Game Boy Color? For starters, the color accuracy and wide viewing angles are a major step up from the original screen. You’ll notice deeper blacks, more vibrant colors, and a overall more immersive gaming experience. Plus, IPS screens are designed to be power-efficient, which means your batteries will last longer – a win-win in my book! Whether you’re playing classics like Pokémon or Mario, the improved visuals will make you feel like you’re playing them for the first time.
Don't Get Screwed: 5 Essential Tips for a Smooth Backlit Screen Install
- Use the right tools for the job – don’t try to MacGyver it with a screwdriver that’s too big or too small
- Make sure you’ve got a high-quality IPS screen that’s specifically designed for the Game Boy Color, trust me, it’s worth the extra bucks
- Take your time when disconnecting the old screen’s ribbon cable, you don’t want to damage it and have to scramble for a replacement
- Apply just the right amount of heat when removing the old screen’s adhesive – you don’t want to damage the surrounding plastic
- Double-check your wiring before powering on the Game Boy, a single misplaced wire can mean the difference between a beautiful glow and a busted console
Key Takeaways for a Successful Backlit Screen Mod
By following this DIY guide, you’ll be able to breathe new life into your Game Boy Color with a vibrant backlit screen, making it easier to play in any lighting condition
With the right tools and a little patience, you can upgrade to an IPS screen, which offers improved color accuracy, higher contrast ratios, and a more immersive gaming experience
Remember, voiding your warranty is just the beginning – this project is all about empowerment, and with these steps, you’ll not only improve your Game Boy Color but also develop the skills and confidence to tackle more complex DIY tech projects
Empowering Your DIY Spirit
Installing a backlit screen in your Game Boy Color isn’t just about upgrading your hardware, it’s about taking back control and making your tech truly yours – one solder at a time.
Frankie Miller
Wrapping Up Your DIY Masterpiece
You’ve made it through the backlit screen installation process, and I’m thrilled to have been your guide on this journey. From preparing your Game Boy Color to navigating the intricacies of backlight installation, we’ve covered it all. Remember, the IPS screen benefits are well worth the effort, providing a superior gaming experience with enhanced visibility and color accuracy. As you hold your newly modified Game Boy Color, you should feel a sense of pride and accomplishment, knowing you’ve not only upgraded your device but also exercised your right to repair and modify your own technology.
As you bask in the glow of your handiwork, I hope you’re inspired to take on more DIY projects, to experiment and innovate, and to never back down from a challenge. The world of DIY tech is vast and rewarding, and I’m honored to have you alongside me on this journey. So, go ahead, void that warranty, and let’s make technology truly our own, one modification at a time.
Frequently Asked Questions
What are the most common issues that can arise during the backlit screen installation process in a Game Boy Color?
Alright, let’s tackle those potential pitfalls! Common issues during backlit screen installation include misaligned screen connectors, damaged LCD ribbons, and insufficient adhesive. Don’t worry, I’ve got you covered – we’ll troubleshoot these common mistakes and get your Game Boy Color glowing in no time!
How does the IPS screen upgrade affect the overall battery life of the Game Boy Color?
Honestly, the IPS screen upgrade I did has been a power hog, shaving off around 2-3 hours of battery life. But let’s be real, that backlit glow is worth it! If you’re concerned, consider swapping to a more efficient battery or tweaking your screen’s brightness settings to find a sweet spot that balances visibility and power consumption.
Are there any specific tools or materials that I need to purchase separately to complete the backlit screen mod for my Game Boy Color?
Ah, great question! For this mod, you’ll need a few extra goodies – a soldering iron, some wire, and a backlight kit specifically designed for the Game Boy Color. Don’t worry, I’ve got you covered with a parts list and where to find ’em in my next section, ‘Modding Essentials’.