I still remember the first time I decided to tackle how to install under-cabinet smart lighting in my own kitchen – it was a game-changer. Not only did it add a warm, inviting ambiance to our cooking and dining area, but it also made our lives easier with automated lighting that adjusted to our daily routines. I’ve heard from many friends and readers who’ve been put off by the idea of smart lighting, thinking it’s too complicated or expensive. But the truth is, with the right guidance, installing under-cabinet smart lighting can be a surprisingly straightforward and rewarding DIY project.
In this article, I’ll share my honest, no-hype advice on how to install under-cabinet smart lighting, covering everything from choosing the right devices to integrating them seamlessly into your existing smart home system. I’ll walk you through the step-by-step process, providing practical tips and real-world examples to help you avoid common pitfalls and achieve a professional-looking result. Whether you’re a seasoned smart home enthusiast or just starting out, my goal is to empower you with the knowledge and confidence to create a beautiful, functional, and effortlessly automated lighting system that enhances your daily life.
Table of Contents
- Guide Overview: What You'll Need
- Step-by-Step Instructions
- Smart Kitchen Ambiance
- Shining Bright: 5 Essential Tips for a Flawless Under-Cabinet Smart Lighting Installation
- Key Takeaways for a Brighter Kitchen
- Shining a Light on Simplicity
- Bringing It All Together: Smart Lighting Made Easy
- Frequently Asked Questions
Guide Overview: What You'll Need
Total Time: 2 hours 30 minutes
Estimated Cost: $50 – $100
Difficulty Level: Intermediate
Tools Required
- Drill (with screwdriver and drill bits)
- Wire Strippers
- Pliers
- Screwdriver (flathead and Phillips)
- Level (to ensure proper alignment)
- Measuring Tape (for accurate measurements in feet and inches)
Supplies & Materials
- Smart Lighting Strip
- Power Adapter (compatible with smart lighting strip)
- Mounting Clips (for under-cabinet installation)
- Wire Nuts (for connecting wires)
- 6 inches of 18-Gauge Wire (for connecting power adapter to smart lighting strip)
- Cable Ties (for organizing wires)
Step-by-Step Instructions
- 1. First, let’s get started with the basics: before you begin installing your under-cabinet smart lighting, make sure you have all the necessary components, including the lights themselves, a power source, and any additional accessories like sensors or controllers. Take a moment to familiarize yourself with the components and read through the manufacturer’s instructions to understand any specific requirements or recommendations.
- 2. Next, plan your layout: decide where you want to place your under-cabinet lights. Consider the areas where you need the most lighting, such as near countertops or cooking stations. You’ll also want to think about the overall aesthetic you’re aiming for – do you want a subtle glow or a more dramatic lighting effect? Take some time to visualize how you want your kitchen to look and feel with the new lighting.
- 3. Now it’s time to prepare your space: clear the area under your cabinets of any clutter, dust, or debris. This will give you a clean slate to work with and ensure that your lights are installed safely and securely. You may also want to cover your countertops with drop cloths or old sheets to protect them from any dust or debris that may fall during the installation process.
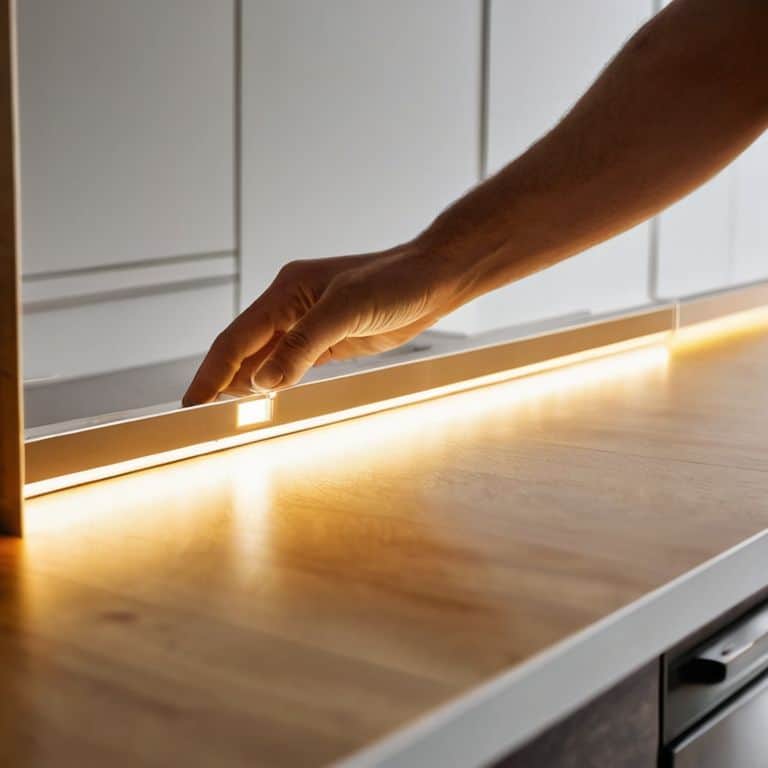
- 4. The fourth step is to install the lights: begin by attaching the lighting strips or individual lights to the underside of your cabinets. Make sure they are securely fastened using the provided clips, screws, or adhesive strips. Be careful not to overtighten or damage the lights or the cabinets. As you work, double-check your placement to ensure the lights are evenly spaced and aligned with your desired layout.
- 5. With the lights in place, it’s time to connect the power: locate a suitable power source, such as a nearby outlet or a USB port, and connect your lights according to the manufacturer’s instructions. If you’re using a smart lighting system, you may need to download an app or connect to a hub to control your lights remotely. Follow the manufacturer’s guidelines for setting up your system and pairing your lights with any controllers or sensors.
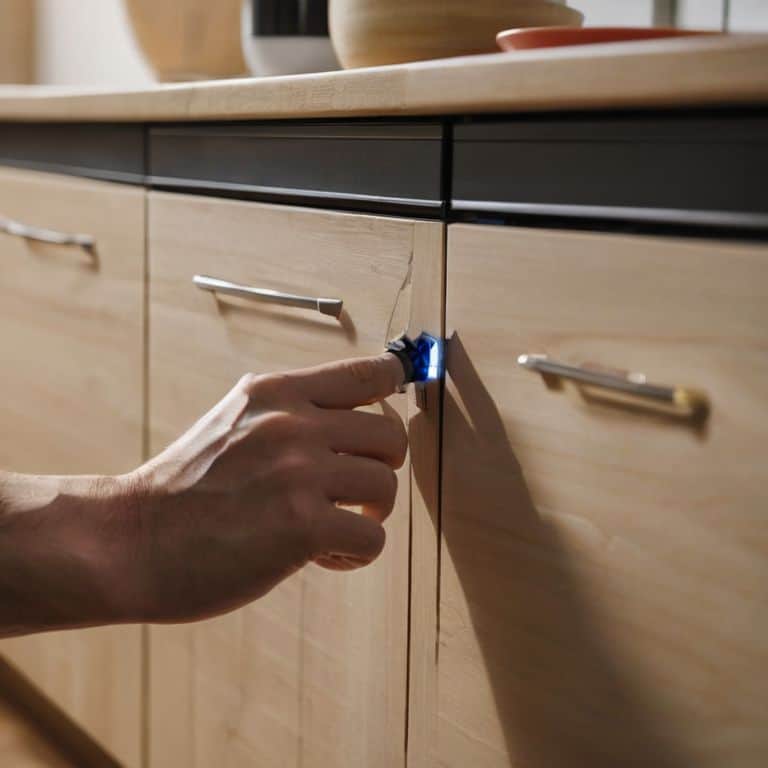
- 6. Next, add any sensors or controllers: if you’re using motion sensors, daylight sensors, or smart controllers, now is the time to install them. These devices can help you automate your lighting system, turning lights on and off or adjusting brightness based on your preferences. Be sure to follow the manufacturer’s instructions for installing and configuring these components.
- 7. Finally, test your system: turn on your lights and test their functionality, including any smart features or automation settings. Make sure everything is working as expected and adjust as needed to get the perfect lighting effect. Take a step back and enjoy your newly illuminated kitchen – you’ve earned it!
Smart Kitchen Ambiance

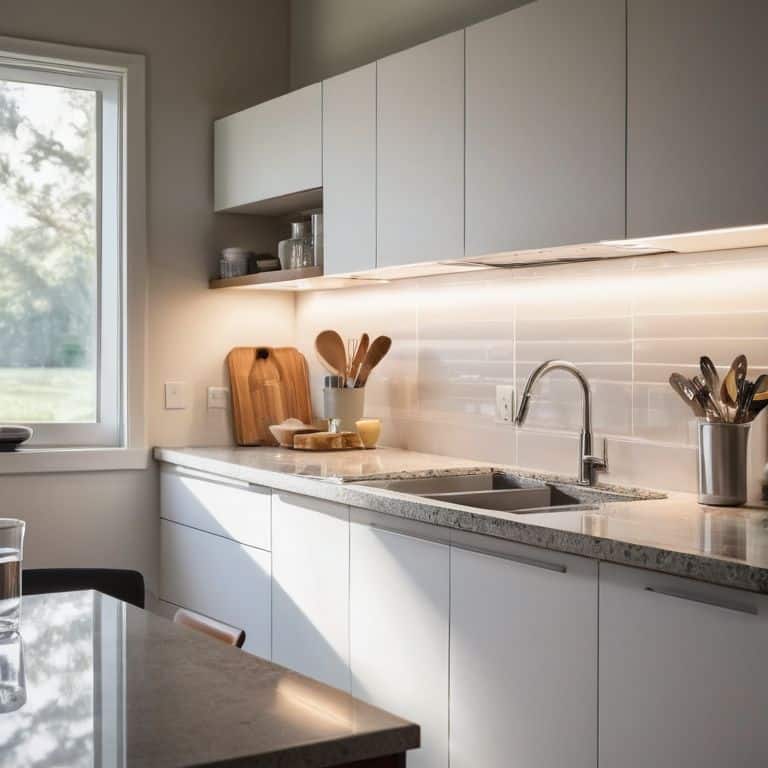
As I always say, smart lighting can make or break the ambiance of a room, and the kitchen is no exception. When it comes to under cabinet lighting ideas, I love exploring different options to create a warm and inviting glow. One of my favorite DIY smart home projects is installing smart LED strips under my kitchen cabinets. Not only does it provide excellent task lighting, but it also adds a touch of elegance to the space.
To take your kitchen lighting design to the next level, consider investing in cabinet lighting wireless options. This will give you the freedom to place lights wherever you need them without being restricted by cords or wires. Plus, it’s a great way to create a seamless look that’s perfect for smart kitchen ambiance. I’ve found that LED lighting for kitchen counters is particularly effective in creating a bright and airy feel, making it perfect for food preparation and cooking.
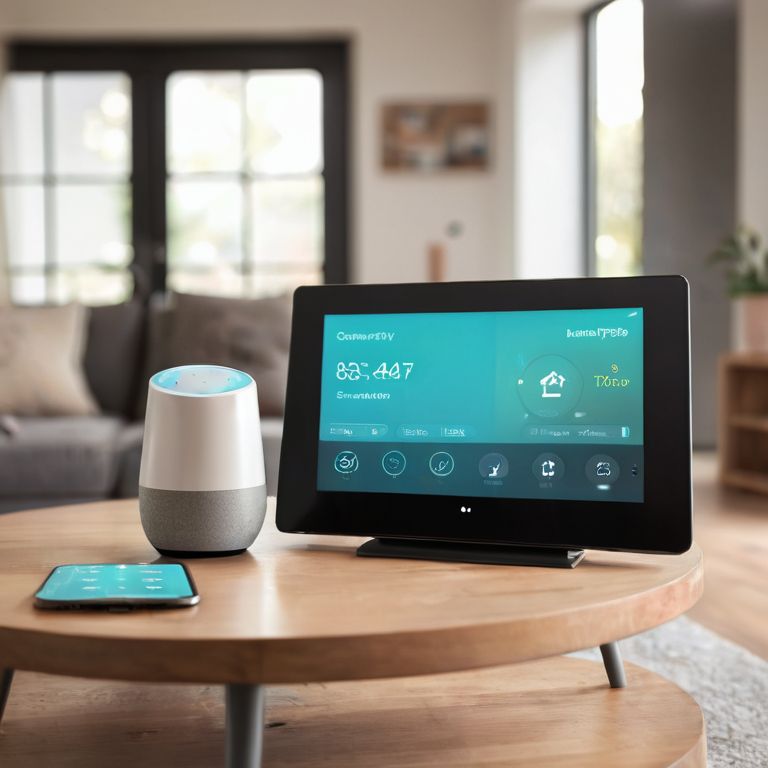
For a truly automated experience, try integrating your under-cabinet lighting with other smart devices in your home. You can create custom scenes, such as a “cooking” mode that adjusts the lighting, temperature, and music to create the perfect atmosphere. With a little creativity, you can turn your kitchen into a smart hub that’s both functional and beautiful. By incorporating smart LED strip installation into your kitchen design, you’ll be amazed at how it can elevate the entire space and make cooking and entertaining a breeze.
Bright Ideas for Under Cabinet Lighting
When it comes to under cabinet lighting, the possibilities are endless. I love experimenting with different color temperatures to set the mood for various activities. For example, a warm white glow can create a cozy atmosphere for dinner parties, while a cool blue tone can provide a refreshing ambiance for morning coffee. You can also program your lights to gradually brighten or dim throughout the day, simulating a natural sunrise and sunset.
One of my favorite features is the ability to sync my under cabinet lights with my music playlist, creating an immersive experience that’s perfect for entertaining. With just one button, my kitchen transforms into a vibrant party space, complete with pulsing lights and upbeat tunes. It’s amazing how such a simple automation can elevate the entire atmosphere of my home.
Diy Smart Led Strip Installation Tips
When installing your smart LED strips, remember to plan the layout carefully to avoid any dark spots. I like to use a combination of under-cabinet and inside-cabinet lighting for a truly immersive ambiance. For a seamless look, consider hiding the strips behind a trim or a decorative panel. This not only protects the LEDs from dust and moisture but also creates a sleek, high-end appearance.
To ensure a flawless installation, peel and stick the strips in small sections, making sure they’re aligned and securely fastened. This will prevent any pesky bubbles or unevenness that can detract from the overall effect. With these simple tips, you’ll be well on your way to creating a warm and inviting kitchen atmosphere that’s perfect for cooking, entertaining, or just relaxing with family and friends.
Shining Bright: 5 Essential Tips for a Flawless Under-Cabinet Smart Lighting Installation
- Plan Your Lighting Layout: Before you start drilling holes, take some time to think about the ambiance you want to create in your kitchen – consider the color temperature, brightness, and where you’ll be placing your smart lights to achieve the perfect glow
- Choose the Right Smart Lighting System: With so many options on the market, selecting the right smart lighting system can be overwhelming – look for one that integrates seamlessly with your existing smart home devices and has a user-friendly app
- Measure Twice, Drill Once: To avoid any costly mistakes, double-check your measurements before drilling into your cabinets – use a level to ensure your lights are straight and evenly spaced
- Consider the Color Temperature: Different color temperatures can dramatically change the mood of your kitchen – warm white lights can create a cozy atmosphere, while cool white lights can make your space feel more modern and energized
- Don’t Forget About Dimming and Scheduling: To get the most out of your under-cabinet smart lighting, make sure to explore the dimming and scheduling features – this will allow you to create custom scenes and automate your lighting to fit your daily routine
Key Takeaways for a Brighter Kitchen
Illuminating your kitchen with under-cabinet smart lighting is easier than you think, and with the right steps, you can achieve a warm and inviting ambiance that enhances your cooking and entertaining experience
By choosing the right smart LED strips and following simple DIY installation tips, you can create a seamless and automated lighting system that adjusts to your needs, making your kitchen not just brighter, but smarter
With these smart lighting solutions, you can simplify your life, enhance your kitchen’s functionality, and create the perfect setting for any occasion, all while moving closer to a truly integrated and intuitive smart home experience
Shining a Light on Simplicity
The beauty of under-cabinet smart lighting lies not just in its ambiance, but in its ability to seamlessly integrate into our daily routines, making our kitchens not just brighter, but more intuitive and enjoyable spaces to be in.
Jenna Gable
Bringing It All Together: Smart Lighting Made Easy
As we’ve explored in this guide, installing under-cabinet smart lighting is a relatively straightforward process that can elevate your kitchen’s ambiance and functionality. From choosing the right LED strips to seamlessly integrating them with your smart home system, we’ve covered the essential steps to get you started. By following these simple, step-by-step instructions, you’ll be able to enjoy the benefits of smart lighting, from energy efficiency to mood-enhancing illumination. Whether you’re a seasoned DIY enthusiast or a smart home newbie, this project is definitely within your reach.
As you complete your under-cabinet smart lighting installation, remember that this is just the beginning of your smart home journey. The true power of smart technology lies in its ability to anticipate and adapt to your needs, making your life easier, more convenient, and more enjoyable. So, don’t be afraid to experiment and explore new possibilities – with smart lighting as your foundation, the possibilities for innovation and automation are endless, and I’m excited to see what bright ideas you’ll come up with next!
Frequently Asked Questions
What are the most energy-efficient options for under-cabinet smart lighting?
For energy-efficient under-cabinet smart lighting, I swear by LED strips – they’re not only eco-friendly but also super customizable. Look for strips with high lumens per watt, like Philips Hue or LIFX, and consider scheduling automations to turn them off when not in use. This way, you can enjoy a warm ambiance while keeping your energy bill in check!
Can I install under-cabinet smart lighting in a kitchen with existing traditional lighting?
Absolutely, you can install under-cabinet smart lighting in a kitchen with existing traditional lighting. It’s a great way to add ambiance and functionality without replacing your current fixtures. I did it in my own kitchen, and it’s been a game-changer for cooking and entertaining. Just ensure your new smart lights are compatible with your kitchen’s power outlets and layout.
How do I ensure that my under-cabinet smart lighting is properly synced with my smart home system?
To sync your under-cabinet smart lighting with your smart home system, I recommend using a hub that integrates all your devices, like Samsung SmartThings or Wink. This way, you can control everything with one app and create custom scenes, like a ‘cook’ mode that adjusts lighting, temperature, and music with just one tap.