

I still remember the first time I tried to capture cinematic footage with an action camera – I was on a solo hike in the Rockies, and I wanted to get cinematic footage with an action camera that would do justice to the breathtaking views. But despite following all the “rules” I’d read online, my footage looked anything but cinematic. It wasn’t until I started experimenting and pushing the limits of my gear that I discovered the secrets to capturing truly stunning footage. It’s not just about the camera, it’s about understanding how to use it to tell a story.
In this article, I’ll share my hard-won tips and tricks for how to get cinematic footage with an action camera. I’ll cut through the hype and give you practical advice on how to choose the right settings, frame your shots, and edit your footage to create a truly cinematic experience. Whether you’re a seasoned adventurer or just starting out, my goal is to help you capture footage that’s not just technically proficient, but also visually stunning and emotionally resonant. So if you’re ready to take your action camera footage to the next level, keep reading – I’m excited to share my knowledge with you.
Table of Contents
Guide Overview: What You'll Need
Total Time: 1 hour 15 minutes
Estimated Cost: $100 – $300
Difficulty Level: Intermediate
Tools Required
- Action Camera (with image stabilization)
- Tripod (for stable footage)
- Smartphone App (for camera control and monitoring)
- Remote Control (for easier camera operation)
- Gimbal (for smoother footage, optional)
Supplies & Materials
- Memory Cards (high capacity, at least 64 gigabytes)
- Battery Packs (extra, for extended shooting)
- Lens Cleaning Kit (for maintaining camera lens)
- Camera Mounts (various, e.g., adhesive, suction cup)
- Neutral Density Filters (for better exposure control, optional)
Step-by-Step Instructions
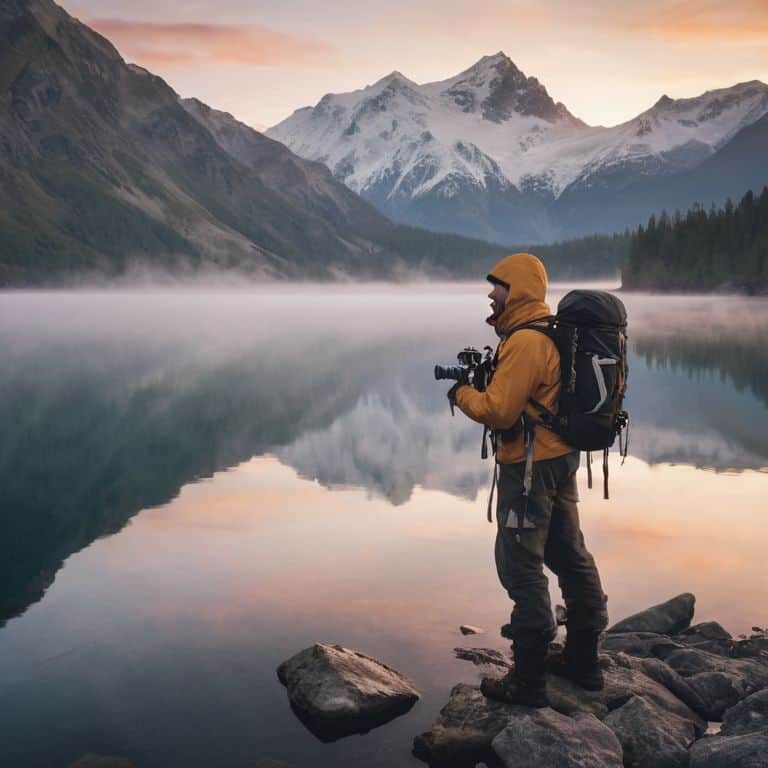
- 1. First, I always start by understanding my environment and planning my shots accordingly. This means scouting out the location, checking the weather forecast, and thinking about the kind of footage I want to capture. For example, if I’m filming a sunrise, I’ll want to position myself to get the best view of the horizon, and I’ll make sure to bring a tripod to stabilize my camera.
- 2. Next, I prepare my action camera by making sure it’s fully charged and that I have all the necessary accessories, such as a memory card, a battery pack, and any additional lenses or mounts I might need. I’m also very particular about minimizing my gear, so I only bring what I absolutely need to get the job done. This helps me stay lightweight and agile, which is essential for capturing cinematic footage on the go.
- 3. Now it’s time to think about camera settings. I always shoot in 4K resolution, as this gives me the most flexibility when it comes to editing and cropping my footage. I also make sure to adjust my frame rate to match the type of shot I’m going for – for example, if I’m capturing a fast-paced action sequence, I’ll use a higher frame rate to get a smoother, more realistic look.
- 4. To get truly cinematic footage, I like to experiment with different angles and perspectives. This might involve using a drone to get an aerial shot, or attaching my action camera to a car or bike to get a dynamic, moving shot. I also love using a handheld stabilizer to get smooth, steady footage – it’s amazing how much of a difference this can make to the overall look and feel of your video.
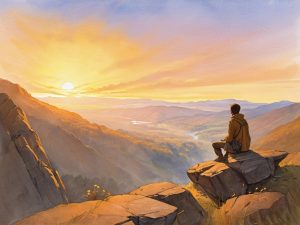
- 5. Once I’ve got my camera settings and angles sorted, it’s time to think about lighting. Natural light is always the best option, so I try to shoot during the golden hour whenever possible. If I’m shooting indoors or in low-light conditions, I’ll use artificial lighting to create a moody, atmospheric look. I’ve also learned to pay attention to shadows, as these can add depth and interest to my footage.
- 6. Now we get to the fun part – capturing the action! This is where all my planning and preparation come together, and I get to see my vision come to life. I always try to be fully present in the moment, whether I’m hiking through the wilderness or exploring a new city. This helps me stay focused and ensures that I don’t miss any of the amazing footage that’s unfolding around me.
- 7. Finally, it’s time to review and edit my footage. I use a combination of desktop and mobile editing software to trim, cut, and arrange my clips into a cohesive narrative. I also add music and sound effects to enhance the mood and atmosphere of my video, and to create a sense of tension or drama. This is where the magic happens, and my raw footage is transformed into a polished, cinematic film.
Action Camera Cinematic Secrets
As I’ve delved deeper into the world of action camera cinematography, I’ve discovered a few action camera cinematic modes that can elevate your footage to the next level. One of my personal favorites is the use of slow motion video techniques, which can add a dramatic flair to even the most mundane scenes. By slowing down the footage, you can emphasize the textures, movements, and emotions of the moment, creating a truly immersive experience.
When it comes to capturing the perfect shot, I always swear by a good wide angle lens for action cameras. This allows me to fit more of the scene into the frame, creating a sense of depth and scale that’s hard to achieve with a standard lens. Plus, it’s amazing for capturing those sweeping vistas and dramatic landscapes that make your footage truly cinematic. Of course, the key is to use it sparingly, as it can sometimes distort the image and detract from the overall quality.
To really give your footage a cinematic look, I recommend experimenting with color grading for cinematic look. This involves adjusting the colors, contrast, and brightness of your footage to create a specific mood or atmosphere. It’s an art form in itself, but with a little practice, you can create a look that’s uniquely yours. Whether you’re going for a warm, sunny feel or a cool, moody vibe, color grading can help take your footage from good to great.
Mastering Action Camera Cinematic Modes
When it comes to capturing cinematic footage, I swear by the specialized modes on my action camera. I’ve spent countless nights in the desert, experimenting with the “Night Lapse” mode to get breathtaking shots of the stars. The “TimeWarp” mode is another favorite of mine – it allows me to compress hours of footage into a few seconds, perfect for showcasing the passage of time in my documentaries. By mastering these modes, I’ve been able to add a new level of depth and creativity to my films.
I’ve found that the key to getting the most out of these modes is to experiment and understand their limitations. For example, the “Slow Mo” mode is perfect for capturing dramatic moments, but it can be tricky to use in low-light conditions. By pushing the boundaries of what’s possible with these modes, I’ve been able to create truly unique and captivating footage that immerses my audience in the world of my films.
Slow Motion Video Techniques Explained
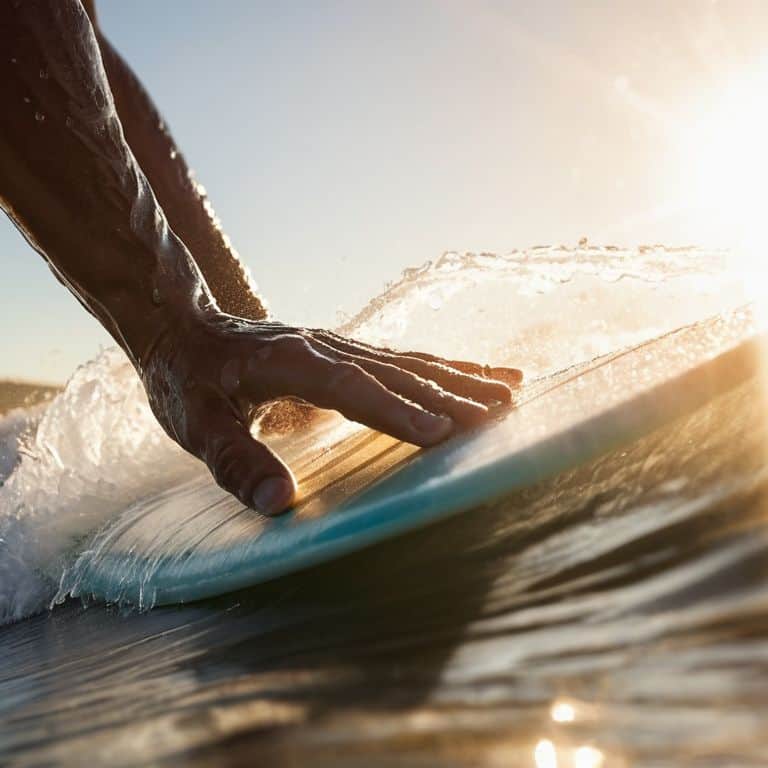
When it comes to adding a touch of drama to my footage, I rely on slow motion video techniques. I’ve found that capturing moments in slow motion can elevate even the most mundane activities, like hiking or surfing, into thrilling cinematic experiences. To achieve this, I typically use my action camera’s built-in slow motion mode, which can shoot at rates of up to 240 frames per second.
I’ve learned to use slow motion strategically, often reserving it for the most intense or pivotal moments of my adventures. By slowing down time, I can draw the viewer’s attention to specific details, like the spray of water or the texture of rock faces, adding depth and emotion to my films. With practice, I’ve developed a keen sense of when to switch to slow motion, and it’s become an essential tool in my storytelling arsenal.
My Top 5 Tips for Capturing Cinematic Gold with Your Action Camera
- Shoot During the Golden Hour: I’ve found that the soft, warm light of dawn and dusk adds a cinematic touch to my footage, and action cameras love this kind of lighting
- Stabilize Your Shot: Whether I’m using a handheld gimbal or a chest mount, keeping the camera stable is crucial for smooth, cinematic footage – it’s worth investing in a good stabilizer
- Play with Angles and Composition: Don’t be afraid to experiment with unique perspectives and framing – getting low, climbing high, or using a POV shot can add a lot of visual interest to your footage
- Edit for Pace and Mood: Once you’ve captured your footage, it’s time to bring it all together in the edit – I like to experiment with different rhythms and color grades to create a cinematic feel that matches the mood of my adventure
- Experiment with Different Frame Rates: Action cameras often allow you to shoot at high frame rates, which can be used to create stunning slow-motion sequences – I love using this technique to emphasize key moments in my adventures, like bursting through a wave or soaring down a mountain
Key Takeaways for Capturing Cinematic Footage
I’ve learned that to achieve truly cinematic footage with an action camera, it’s essential to understand and master the different modes available, from slow motion to time-lapse, and how each can be used to enhance your storytelling
Using the right accessories, such as a gimbal or a external microphone, can significantly improve the quality of your footage, making it more immersive and engaging for your audience, as I’ve experienced firsthand in my adventures
Remember, the best cinematic footage comes from combining great equipment with a deep understanding of your environment and the story you want to tell, so don’t be afraid to experiment and push your action camera to its limits in the most extreme and beautiful locations
Bringing Adventures to Life
To capture truly cinematic footage with an action camera, you need to think beyond the specs and focus on the story you’re trying to tell – it’s not just about the tech, it’s about being present in the moment and letting the camera be an extension of your own eyes.
Rachel Bennett
Bringing Your Vision to Life
As I reflect on my journey to capture cinematic footage with action cameras, I’m reminded that it’s all about embracing the adventure and being willing to push the limits of your gear. From mastering cinematic modes to experimenting with slow motion video techniques, the key to success lies in understanding your camera’s capabilities and creatively leveraging them to tell your story. Whether you’re a seasoned filmmaker or just starting out, the most important thing is to have fun and keep exploring new ways to bring your vision to life.
So, the next time you find yourself in a breathtaking location, don’t be afraid to think outside the box and try something new with your action camera. Remember, the best footage is often the result of taking risks and chasing the unknown. With practice, patience, and a willingness to learn, you’ll be well on your way to capturing cinematic footage that inspires and awes your audience, and leaves them eager for more.
Frequently Asked Questions
What are the best settings to use for capturing cinematic footage with an action camera in low-light conditions?
For low-light conditions, I swear by a combo of 24fps, 1080p, and a wide aperture. I also enable noise reduction and adjust the white balance to match the scene. It’s all about finding that balance between exposure and grain – trust me, it makes all the difference in capturing moody, cinematic footage.
How can I stabilize my action camera footage to achieve a smoother, more professional look?
For silky-smooth footage, I swear by a combo of in-camera stabilization and a handheld gimbal – it’s a game-changer for run-and-gun shooting in wild locations. I also edit out any super-shaky bits and apply a touch of digital stabilization in post-production to really refine the look.
What are some creative ways to use an action camera's unique perspective and mounting options to add visual interest to my cinematic footage?
I love experimenting with unique perspectives and mounts to add some edge to my footage. Try attaching your action cam to a drone, a car mount, or even a helmet for some thrilling POV shots. You can also use a flexible mount to capture surreal footage from unusual angles, like from a rock or a tree branch.