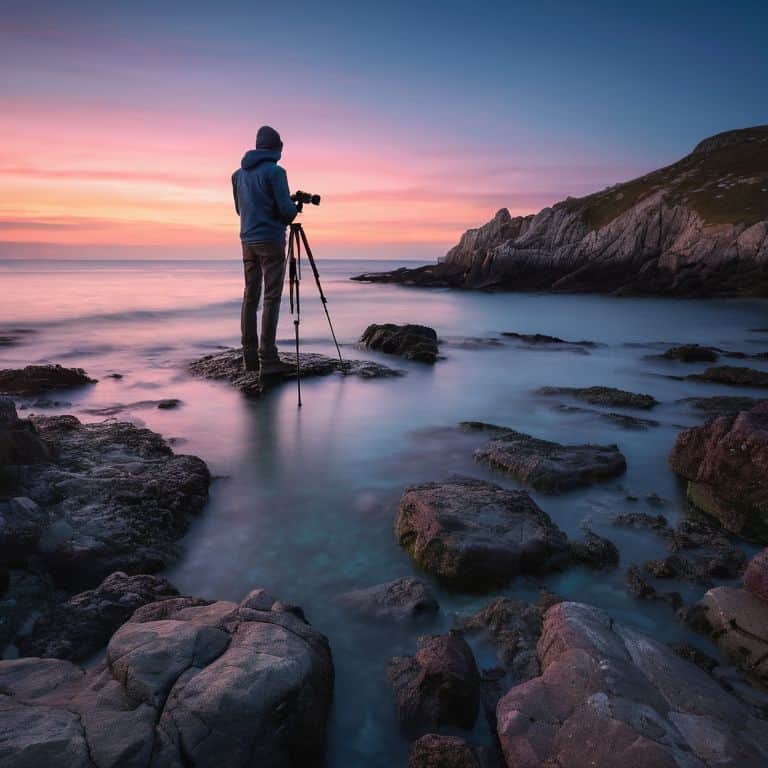
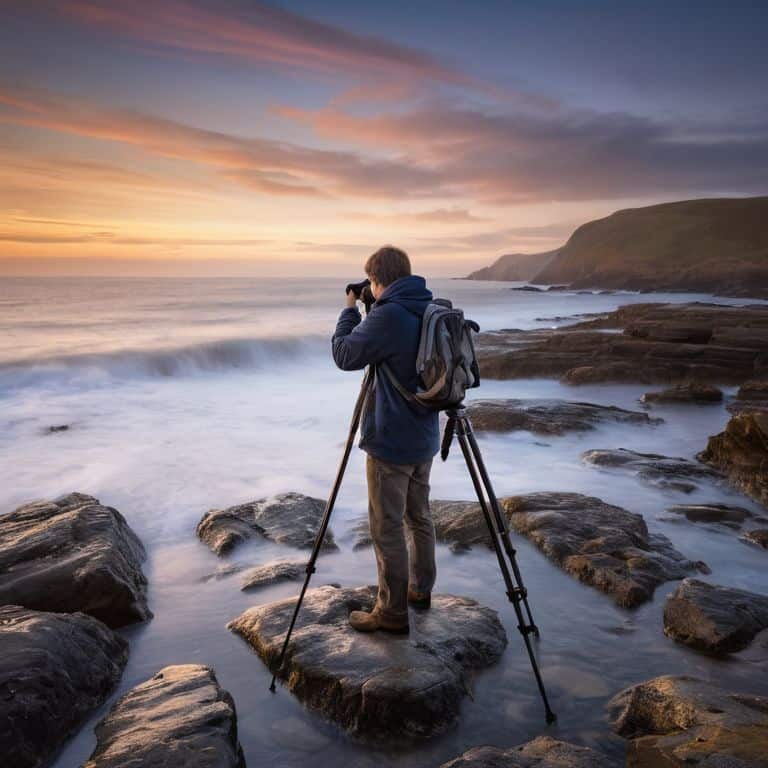
I still remember the first time I attempted how to use a tripod for long exposure photography – I was in the middle of nowhere, trying to capture the perfect shot of the Milky Way. My camera was handheld, and let’s just say the results were less than stellar. It wasn’t until I invested in a good tripod that I was able to nail those silky-smooth long exposures. There’s a common myth that using a tripod for long exposure photography is only for professionals, but I’m here to tell you that’s just not true. With the right gear and a bit of practice, anyone can master this technique.
In this article, I’ll share my honest, no-hype advice on how to use a tripod for long exposure photography, from choosing the right tripod to tips for capturing stunning images in the field. I’ll cut through the technical jargon and give you the practical advice you need to start taking your photography to the next level. Whether you’re a seasoned pro or just starting out, I’ll show you how to use a tripod to unlock the full potential of your camera and capture the shots you’ve always wanted. So, let’s get started and explore the world of long exposure photography together!
Table of Contents
- Guide Overview: What You'll Need
- Step-by-Step Instructions
- Mastering Long Exposure Photography
- Steady Ground: 5 Essential Tips for Mastering Long Exposure Photography with a Tripod
- Key Takeaways for Long Exposure Mastery
- Finding Stability in the Wilderness
- Bringing it All Together: Long Exposure Mastery
- Frequently Asked Questions
Guide Overview: What You'll Need
Total Time: 1 hour 15 minutes
Estimated Cost: $100 – $300
Difficulty Level: Intermediate
Tools Required
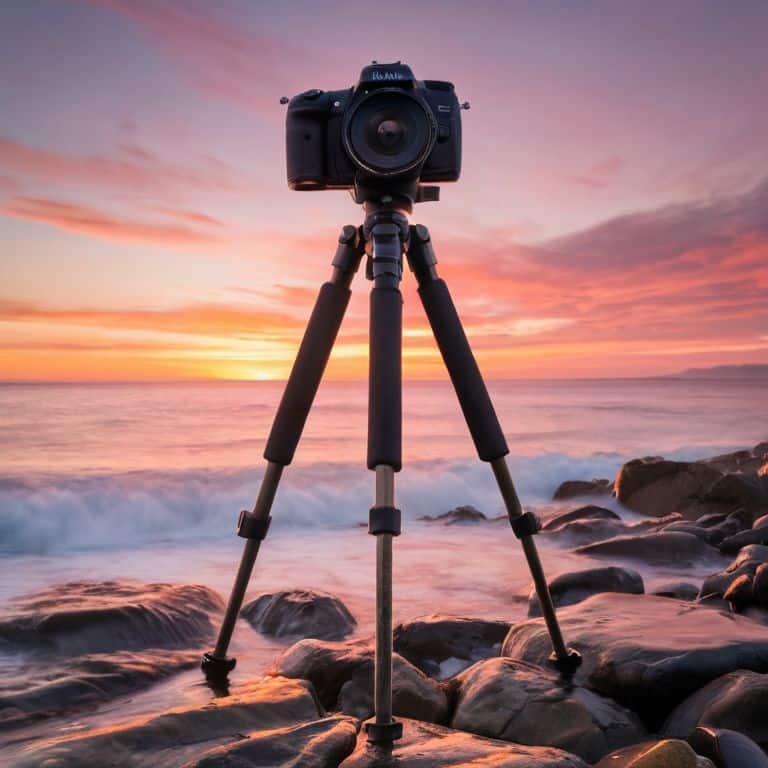
- Tripod Sturdy and heavy-duty
- Camera With manual mode capabilities
- Remote Shutter Release Or camera timer
- Extra Batteries For camera and other equipment
Supplies & Materials
- Memory Cards With sufficient storage space
- Lens Cleaning Cloth For cleaning camera lens
- Weight Bag Optional, for added tripod stability
Step-by-Step Instructions
- 1. First, let’s talk about setting up your tripod – it’s essential to choose a sturdy spot where your tripod can stand firmly without any risk of it toppling over. I’ve learned this the hard way, having had my tripod fall over in the middle of a shoot due to uneven ground. Now, I always make sure to _scan the area_ for any obstacles or hazards before setting up.
- 2. Next, you’ll want to _extend your tripod legs_ to the desired height, making sure they’re locked in place to prevent any accidental adjustments. I like to keep my tripod at a height that allows me to easily access my camera’s controls, but still low enough to maintain stability. Don’t forget to check the level of your tripod to ensure it’s perfectly balanced.
- 3. Now it’s time to _mount your camera_ onto the tripod head. I use a ballhead for its versatility and smooth movement, which allows me to quickly adjust my camera’s position. When attaching your camera, make sure it’s securely fastened to the tripod head to prevent any movement or vibration. I’ve found that a _gentle but firm touch_ is key when tightening the screws.
- 4. With your camera mounted, you can start thinking about your shot composition. I like to take a moment to visualize the scene, considering factors like _lighting_ and _subject placement_. For long exposure photography, it’s essential to plan your shot carefully, taking into account the movement of any elements in the scene, such as water or clouds.
- 5. Once you have your composition in mind, it’s time to set your camera’s exposure settings. I typically start by setting my camera to _manual mode_, which gives me full control over the exposure. For long exposures, you’ll want to use a low ISO and a small aperture to minimize noise and ensure a sharp image. Don’t forget to _check your shutter speed_, as this will have a significant impact on the final result.
- 6. With your exposure settings in place, you can now focus on _focusing your lens_. I use manual focus for long exposure photography, as it allows me to precisely control the focus point. When focusing, I like to use live view to ensure that my subject is _tack sharp_, and then I lock in the focus to prevent any accidental adjustments.
- 7. Finally, it’s time to take your shot. I like to use a remote shutter release or the camera’s self-timer to minimize camera shake and ensure a _sharp image_. When taking the shot, remember to be patient and let the camera do its thing – long exposures can take anywhere from a few seconds to several minutes, so it’s essential to _relax and enjoy the process_.
Mastering Long Exposure Photography

As I’ve delved deeper into long exposure photography, I’ve come to appreciate the importance of tripod stability techniques. A sturdy tripod is essential, but it’s not just about the hardware – it’s also about how you use it. I’ve found that using a tripod with a wide base and a low center of gravity helps to minimize camera shake, allowing for sharper images even in windy conditions. Additionally, I always make sure to secure my camera tightly to the tripod head to prevent any unwanted movement.
When it comes to capturing stunning long exposure shots, low light photography tips are crucial. I often find myself shooting during the golden hour or at night, when the light is soft and muted. To make the most of these conditions, I recommend experimenting with long exposure camera settings. By adjusting the shutter speed and aperture, you can create beautiful, ethereal effects that add depth and atmosphere to your images. Don’t be afraid to push the boundaries of what’s possible – some of my favorite shots have been taken in the darkest of conditions.
To take your long exposure photography to the next level, consider investing in a neutral density filter. This simple accessory can help you achieve smoother, more creative effects, even in bright lighting conditions. By reducing the amount of light that enters the lens, you can create creative long exposure ideas that would be impossible to achieve otherwise. Whether you’re shooting waterfalls, clouds, or cityscapes, a neutral density filter can help you unlock new possibilities and add a unique twist to your photography.
Low Light Secrets With Neutral Density
When shooting in low light, I swear by neutral density (ND) filters to add a whole new dimension to my long exposures. These magical filters reduce the amount of light entering the lens, allowing me to capture silky-smooth water or misty atmospheres even in the darkest conditions. By slowing down my shutter speed, I can create an ethereal ambiance that’s perfect for moody landscapes or dramatic seascapes.
I’ve found that a good ND filter can be a game-changer for my astrophotography shoots, too. It helps me balance the light from the stars with the darkness of the night sky, resulting in photos that are simply out of this world. With the right ND filter, the possibilities for creative long exposure photography are endless – and I’m always excited to see what secrets the low light will reveal.
Tripod Stability for Sharp Shots
To truly master long exposure photography, I’ve found that tripod stability is key. A sturdy tripod can make all the difference in capturing sharp, blur-free shots. I recall a particularly windy night in the Atacama Desert, where my trusty tripod saved the day – or rather, the shot. Its robust legs and solid base kept my camera rock-steady, allowing me to snap a breathtaking photo of the Milky Way.
When it comes to tripod stability, I look for a few essential features: a wide, heavy base, and adjustable legs that can grip uneven terrain. These features have become my non-negotiables after years of testing tripods in extreme conditions. By prioritizing stability, you’ll be able to focus on the creative aspects of long exposure photography, rather than worrying about camera shake or blurry results.
Steady Ground: 5 Essential Tips for Mastering Long Exposure Photography with a Tripod
- Always choose a tripod that’s sturdy enough for your camera and lenses, and make sure it can handle the weight and stress of windy or uneven terrain
- Shoot during the golden hour or overcast skies to minimize harsh light and capture a more even exposure, which is perfect for long exposure photography
- Experiment with different shutter speeds to achieve unique effects, such as silky water or light trails, and don’t be afraid to push your camera’s limits
- Use a remote shutter release or the camera’s timer to avoid camera shake and ensure a sharp, blur-free image, even in low light conditions
- Take your time and review your shots regularly to adjust your settings and composition, and don’t hesitate to try again – practice makes perfect in long exposure photography
Key Takeaways for Long Exposure Mastery
I’ve learned that a sturdy tripod is not just a luxury, but a necessity for capturing breathtaking long exposures – it’s the foundation of my adventure photography kit
Neutral density filters have become my secret sauce for unlocking the full potential of long exposure photography, especially in low-light conditions where the results can be truly magical
By combining a reliable tripod with the right techniques and a dash of creativity, I’ve found that even the most extreme locations can become the backdrop for unforgettable, silky-smooth long exposure shots that tell a story of their own
Finding Stability in the Wilderness
A tripod is more than just a stabilizer – it’s a trusted companion that lets you dance with the stars, freeze the moment, and breathe life into your long exposures, no matter how rugged the terrain or fleeting the light.
Rachel Bennett
Bringing it All Together: Long Exposure Mastery
As I reflect on my journey with long exposure photography, I’m reminded that mastering the basics is crucial for capturing stunning images. From setting up your tripod to experimenting with neutral density filters, each step plays a vital role in the process. I’ve found that low light secrets can be unlocked with the right techniques and equipment, leading to truly breathtaking shots. By following the steps outlined in this guide, you’ll be well on your way to creating your own mesmerizing long exposure photographs.
As you venture out into the world, camera in hand, remember that the journey is just as important as the destination. Don’t be afraid to push your creative boundaries and try new things – it’s often the unexpected shots that end up being the most memorable. With your trusty tripod by your side and a willingness to experiment, you’ll be capturing the essence of your adventures in no time, and reliving those moments for years to come.
Frequently Asked Questions
What are the best tripod materials for withstanding harsh outdoor conditions during long exposure photography?
I swear by tripods made from durable materials like carbon fiber or aircraft-grade aluminum – they’re lightweight, yet can withstand the elements. I’ve put mine through rain, snow, and scorching desert sun, and they still keep my camera steady for those perfect long exposures.
How do I minimize camera shake when adjusting my tripod in low light conditions?
Minimizing camera shake in low light is crucial. I use a remote shutter release or the camera’s self-timer to avoid direct contact. If adjusting the tripod is necessary, I do it slowly and gently, ensuring the legs are firmly planted. A tripod with a smooth, fluid head also helps reduce vibrations.
Can I use a tripod with a remote shutter release or camera timer for sharper long exposure shots?
Absolutely, I swear by combining my tripod with a remote shutter release or camera timer for razor-sharp long exposures. It eliminates any camera shake, ensuring my shots are crisp and clean, even in the darkest skies.