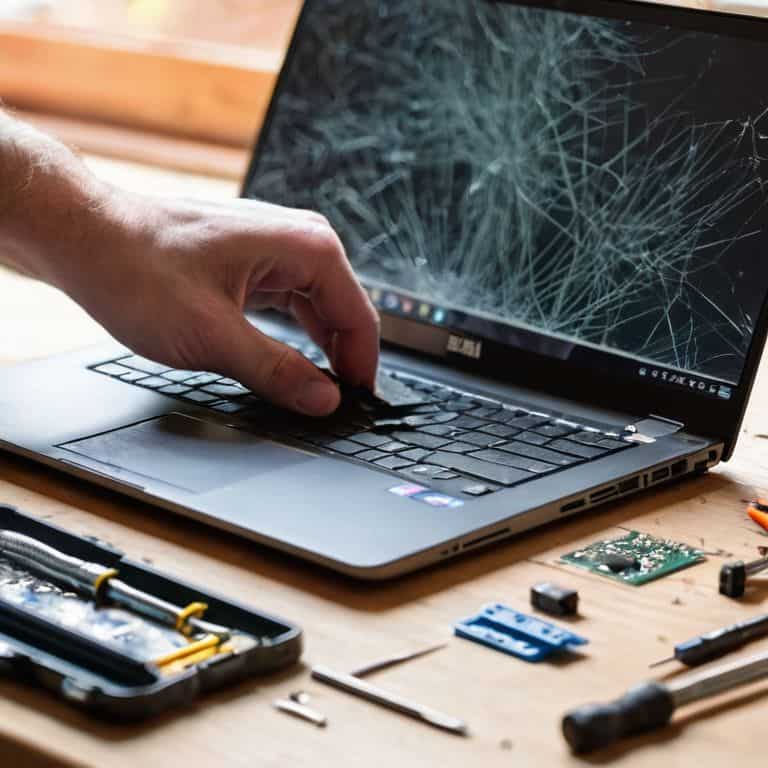
I still remember the day my laptop screen cracked – it was like a punch to the gut. I was in the middle of a critical project, and suddenly my trusty sidekick had turned against me. But as I delved into the world of a guide to replacing a cracked laptop screen, I realized that it wasn’t as daunting as it seemed. In fact, the biggest hurdle was the fear of voiding my warranty – a concept that, to me, is more like a challenge than a warning.
As someone who’s passionate about empowering others to take control of their technology, I’m excited to share my knowledge with you. In this article, you’ll get honest, no-hype advice on how to replace your laptop’s cracked screen, from preparation to completion. I’ll walk you through the process, highlighting common pitfalls and sharing tips to make the journey smoother. By the end of this guide, you’ll be equipped with the confidence to tackle the repair yourself, saving you time and money in the process. So, let’s get started and show that cracked screen who’s boss!
Table of Contents
Guide Overview: What You'll Need

Total Time: 2 hours 30 minutes
Estimated Cost: $200 – $500
Difficulty Level: Intermediate
Tools Required
- Torx Screwdriver (for removing laptop screws)
- Plastic Spudger (for prying open laptop case)
- Prying Tool (for removing screen bezel)
- Phillips Screwdriver (for removing screen mounts)
Supplies & Materials
- New Laptop Screen (compatible with laptop model)
- Screen Adhesive (for securing new screen)
- Laptop Screen Protector (optional)
- Anti-Static Wrist Strap (for grounding yourself)
Step-by-Step Instructions
- 1. First, let’s get started by preparing our workspace – a clean and well-lit area is essential for this kind of project. Clear any clutter, and make sure you have all the necessary tools within arm’s reach. I like to use a magnetic parts tray to keep all the tiny screws and components organized.
- 2. Next, we need to purchase a replacement screen that’s compatible with our laptop model. This is where things can get a bit tricky, so make sure to double-check the specifications before making a purchase. You can usually find the model number on the bottom of your laptop or in the user manual. I recommend buying from a reputable supplier to avoid any potential issues.
- 3. Now that we have our replacement screen, it’s time to disassemble the laptop. This will vary depending on the model, but generally, you’ll need to remove the back panel to access the screen. Be careful not to damage any of the surrounding components, and take note of the screw locations and types. I like to use a screwdriver with a built-in LED light to help illuminate the area.
- 4. With the back panel removed, we can now access the screen’s mounting brackets. These are usually held in place by small screws or clips. Gently remove the screws or release the clips, and carefully lift the screen away from the laptop’s frame. Be mindful of any cables or wires that may be attached to the screen, and take care not to damage them.
- 5. Next, we need to disconnect the screen’s cable from the motherboard. This is usually a delicate process, so be patient and take your time. Use a plastic spudger to gently pry the connector loose, and then carefully pull the cable out of its socket. I like to use a cable tie to keep the cable organized and out of the way.
- 6. Now that the old screen is removed, we can install the new one. Make sure it’s properly aligned with the mounting brackets, and then reattach the screws or clips. Be careful not to overtighten, as this can damage the screen or the laptop’s frame. I recommend using a torque screwdriver to ensure the screws are tightened evenly.
- 7. Finally, let’s reassemble the laptop and test the new screen. Make sure all the screws are tightened securely, and then plug in the power cord and turn it on. The new screen should be fully functional, with no dead pixels or other issues. If you encounter any problems, don’t worry – we can troubleshoot together to find a solution.
Cracked Screen No Problem
When it comes to laptop screen repair cost, it’s often a significant factor in deciding whether to repair or replace the laptop altogether. However, with the right DIY mindset, you can save a substantial amount of money by tackling the repair yourself. By using DIY laptop screen replacement tools, you can ensure a seamless and efficient process.
One of the most common issues people face during the repair process is identifying the correct laptop display panel type. It’s essential to choose a compatible replacement screen to avoid any further complications. Common laptop screen problems can be easily diagnosed with the right knowledge and tools, and I’ve found that having a refurbished laptop screen options can be a great way to save money without compromising on quality.
In my experience, the key to a successful laptop screen replacement lies in the laptop screen replacement tutorials you follow. By paying close attention to the step-by-step instructions and using the right tools, you can ensure a professional-grade repair. With a little patience and practice, you’ll be able to tackle even the most complex repairs with ease, and voiding that warranty will be a thing of the past.
Diy Repair Tools and Tricks
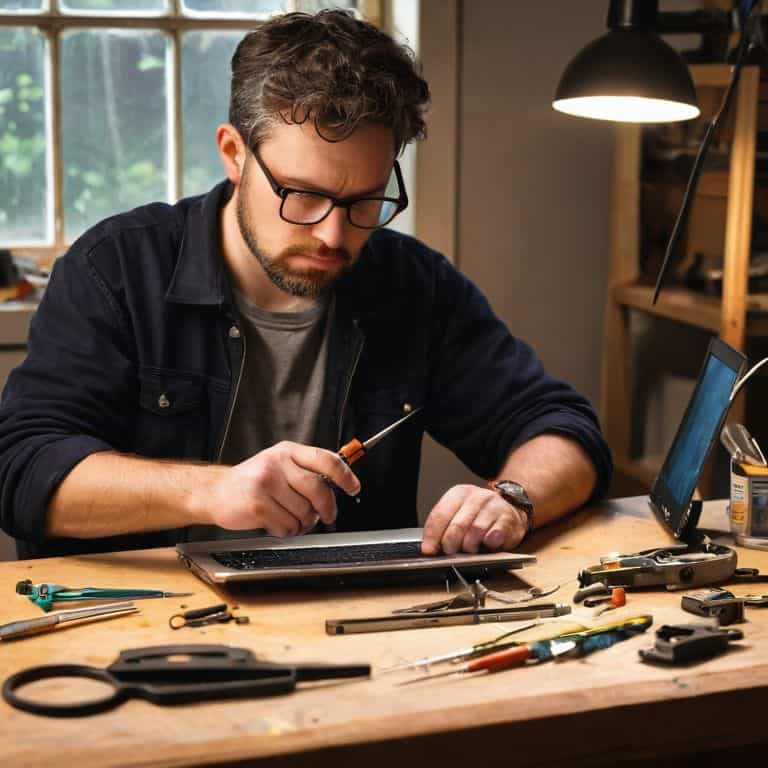
Now that we’ve got the basics covered, let’s talk about the tools and tricks that’ll make this DIY repair a breeze. I’m a firm believer in being prepared, which is why I always have a stash of spare parts and tools lying around. For this job, you’ll need a few essentials like a screwdriver, pry bars, and a screen removal tool. Don’t worry if you don’t have these lying around – they’re easy to find online or at your local electronics store.
My top tip is to invest in a good quality screwdriver set – it’ll make all the difference when it comes to removing those tiny screws. And, if you’re feeling extra handy, consider keeping a “repair kit” with all the basics, so you’re always ready to tackle any DIY project that comes your way. Trust me, it’s a game-changer.
Refurbished Panels the Cheap Fix
When it comes to replacing a cracked laptop screen, one of the most cost-effective options is to opt for a refurbished panel. These panels are often salvaged from old or broken laptops, repaired, and then resold at a fraction of the cost of a brand new screen. I’ve had great success with refurbished panels in my own workshop, and I’ve found that they can be just as reliable as their brand new counterparts. Plus, you’ll be reducing electronic waste, which is a win in my book.
I’ve picked up refurbished panels for as low as $50, which is a steal compared to the $200 or more you’d pay for a brand new screen. Just make sure to do your research and buy from a reputable seller, as some refurbished panels can be hit or miss. With a little patience and the right tools, you can have your laptop looking and functioning like new again, all without breaking the bank.
Screen Savior: 5 Essential Tips for a Smooth Replacement
- Prepare for Battle: Before you start, make sure you have all the necessary tools and a clean, static-free workspace to prevent any damage to your laptop’s internal components
- Panel Pandemonium: When selecting a replacement screen, ensure it’s compatible with your laptop model and has the correct resolution, backlight type, and connector to avoid any potential issues
- Disconnect with Care: When disconnecting the old screen, be gentle with the cables and connectors to prevent damage, and take note of any screws, clips, or other fasteners that hold the screen in place
- Inspection Time: Before installing the new screen, inspect it for any defects or damage, and make sure all the connectors and cables are securely attached to prevent any issues down the line
- Test and Triumph: Once the new screen is installed, test it thoroughly to ensure it’s working properly, and don’t hesitate to reach out if you encounter any issues or have questions about the replacement process
Key Takeaways: Replacing Your Cracked Laptop Screen
By following these steps and using the right tools, you can replace your cracked laptop screen without voiding the warranty (or at least, not worrying about it)
With refurbished panels and a bit of DIY magic, you can save hundreds of dollars compared to buying a brand new laptop or hiring a professional repair service
Remember, fixing your own tech is not just about saving money – it’s about taking control, learning new skills, and joining the rebellion against closed-ecosystem products
Screen Repair Wisdom
The only thing more broken than a cracked laptop screen is the mindset that says you can’t fix it yourself – with the right tools and a bit of courage, you can shatter the myth of disposable tech and breathe new life into your device.
Frankie Miller
Empowered to Repair: A New Era of Tech Freedom

We’ve covered the basics of replacing a cracked laptop screen, from the step-by-step guide to the DIY repair tools and tricks that’ll make you a pro in no time. We’ve also explored the world of refurbished panels, a cost-effective solution for those on a budget. Remember, the key to a successful repair is not just about following instructions, but also about being mindful of common mistakes and taking your time. By empowering yourself with the right knowledge and skills, you’ll be able to tackle even the most daunting tech challenges with confidence.
As you close this guide and look at your newly repaired laptop, remember that you’re not just a consumer, you’re a maker and a creator. You’ve taken the first step towards a world where technology is no longer a black box, but a tool that you can shape and mold to your needs. So, go ahead and void that warranty, not because you’re reckless, but because you’re empowered to take control of your tech. The world of DIY repair is full of possibilities, and I’m excited to see what you’ll create next.
Frequently Asked Questions
What if my laptop's cracked screen is also damaged internally, will replacing the screen fix other issues?
Not so fast, friend! If your laptop’s screen is cracked and there’s internal damage, swapping the screen might not be a magic fix. You might need to tackle those internal issues first, like a loose connection or damaged backlight. Let’s troubleshoot together and get your laptop back in action!
Can I use a screen from a different laptop model if it's the same size and resolution?
Ah, the age-old question – can I mix and match screens? The short answer is, it’s possible, but beware – even if the size and resolution match, the connector and mounting points might not. You’ll need to double-check the specs and possibly get creative with adapters or mods to make it work.
How do I ensure the new screen is properly calibrated and aligned with the laptop's hardware after replacement?
Calibration is key. After installing the new screen, boot up your laptop and adjust the display settings to ensure proper alignment. You may need to tweak the resolution, brightness, and orientation to get it just right. Don’t worry if it takes a few tries – with a little patience, your new screen will be humming like new.