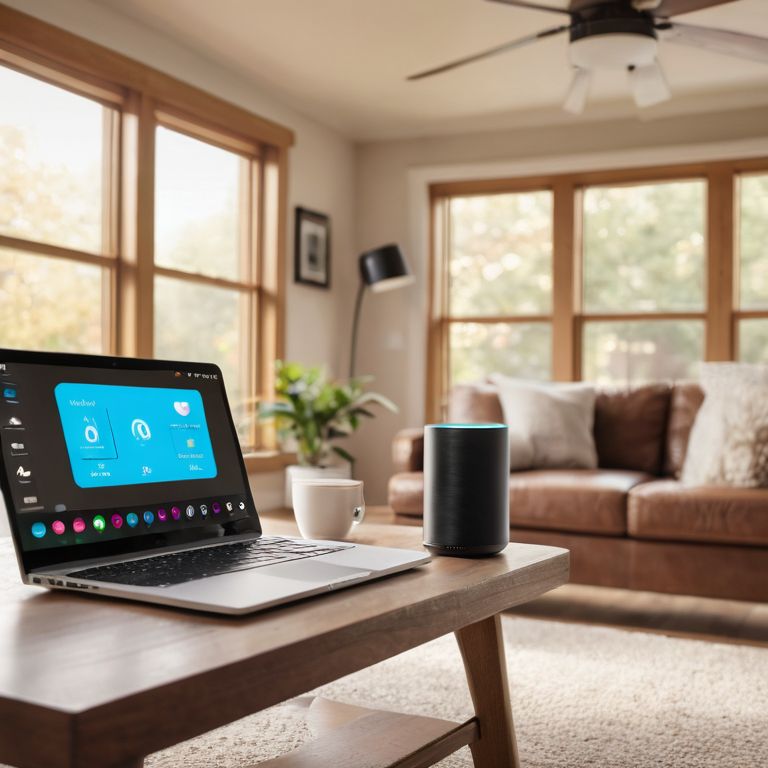
I still remember the day I stumbled upon what is esphome and how to use it with home assistant – it was like finding the missing piece to my smart home puzzle. I had been tinkering with Home Assistant for a while, but something was off. The moment I discovered Esphome, I knew I had to dive in and explore its potential. The common myth that Esphome is only for advanced users is simply not true. With the right guidance, anyone can unlock its power and take their smart home to the next level.
In this article, I’ll share my hands-on experience with what is esphome and how to use it with home assistant, cutting through the noise and giving you the practical advice you need to get started. I’ll walk you through the process of setting up Esphome, integrating it with Home Assistant, and troubleshooting common issues. By the end of this guide, you’ll be empowered to create a smarter, more automated home that truly works for you. So, let’s get started and void that warranty – it’s time to take control of your smart home and make it a reality!
Table of Contents
- Guide Overview: What You'll Need
- Step-by-Step Instructions
- Unlocking Esphome Secrets
- 5 Essential ESPHome Hacks to Supercharge Your Home Assistant
- 3 Key Takeaways to Supercharge Your ESPHome and Home Assistant Setup
- Empowering Your Smart Home
- Unlocking the Full Potential of ESPHome with Home Assistant
- Frequently Asked Questions
Guide Overview: What You'll Need

Total Time: 2 hours 30 minutes
Estimated Cost: $20 – $50
Difficulty Level: Intermediate
Tools Required
- Computer (with internet connection)
- Microcontroller (e.g., ESP32 or ESP8266 board)
- USB Cable (for flashing the microcontroller)
- Text Editor (or IDE for editing configuration files)
Supplies & Materials
- ESPHome Software (free, open-source)
- Home Assistant Software (free, open-source)
- Sensor Components (optional, depending on project requirements)
- Jumper Wires (for connecting components, 6 inches long)
Step-by-Step Instructions
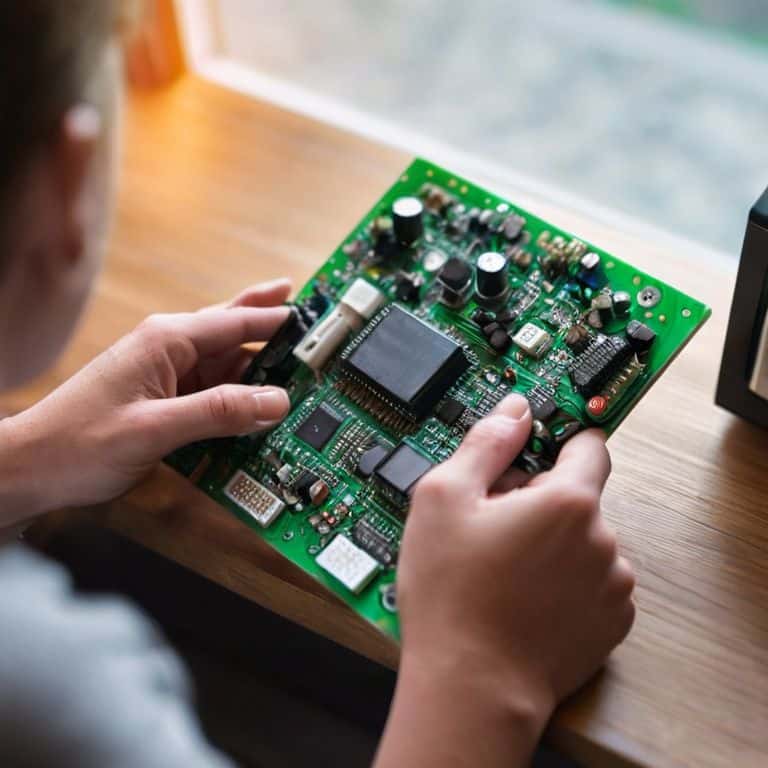
- 1. First, let’s get familiar with ESPHome and what it can do for our Home Assistant setup. ESPHome is an open-source solution that allows us to connect various devices to Home Assistant, making our smart home automation more comprehensive and customizable. To start, we need to download the ESPHome dashboard, which will be our central hub for configuring and managing our devices.
- 2. Next, we need to flash the ESPHome firmware onto our device. This step is crucial as it enables our device to communicate with the ESPHome dashboard and, subsequently, with Home Assistant. We’ll use a USB cable to connect our device to our computer and then use the ESPHome dashboard to flash the firmware. Don’t worry if this sounds complex; the ESPHome dashboard guides us through the process with ease.
- 3. Now, let’s add our device to the ESPHome dashboard. After flashing the firmware, our device should be recognizable by the ESPHome dashboard. We’ll navigate to the dashboard, click on “Add Device,” and follow the prompts to set up our device. This step is straightforward and involves naming our device and setting up its basic configuration.
- 4. With our device added, it’s time to configure the device settings. This is where we get to customize how our device interacts with Home Assistant. We’ll delve into the device settings, configure the device type, and set up any necessary sensors or actuators. The ESPHome dashboard provides detailed documentation and examples to help us through this process.
- 5. Next up, we need to integrate ESPHome with Home Assistant. To do this, we’ll enable the ESPHome integration within Home Assistant. This involves navigating to the Home Assistant configuration panel, searching for the ESPHome integration, and following the setup instructions. Once integrated, our devices will start appearing in Home Assistant, and we can begin automating tasks.
- 6. Now that our devices are integrated, let’s create some automations. We’ll use the Home Assistant automation panel to create custom automations based on our devices. For example, we might create an automation that turns on the lights when we enter a room or adjusts the thermostat based on the time of day. The possibilities are endless, and ESPHome makes it easy to tap into the full potential of our smart devices.
- 7. Finally, let’s test our setup and troubleshoot any issues. With everything configured and automated, it’s time to put our setup to the test. We’ll go through each device and automation, ensuring they’re working as expected. If we encounter any issues, the ESPHome and Home Assistant communities are incredibly resourceful, providing ample documentation and forums where we can find help and solutions to common problems.
Unlocking Esphome Secrets

As we dive deeper into the world of ESPHome, it’s essential to understand the importance of YAML configuration. This is where the magic happens, and you can customize your devices to work seamlessly with Home Assistant. By tweaking the ESPHome YAML configuration, you can unlock advanced features and tailor your smart home setup to your specific needs. For instance, you can create custom device templates to simplify the integration process and make it easier to manage multiple devices.
When it comes to integrating ESPHome with Home Assistant, a key aspect to consider is the role of MQTT. This lightweight messaging protocol enables efficient communication between your devices and the Home Assistant hub. By leveraging MQTT, you can create a robust and scalable home automation system that’s both reliable and efficient. Furthermore, ESPHome’s support for MQTT makes it an attractive option for those looking to build a custom home automation platform.
To ensure your ESPHome setup remains secure and up-to-date, it’s crucial to stay on top of firmware updates and security patches. By regularly updating your devices, you can protect yourself against potential vulnerabilities and ensure that your smart home system remains stable and secure. This is particularly important when using ESPHome in conjunction with other devices and platforms, as a single weak link can compromise the entire system. By prioritizing security and updates, you can enjoy a seamless and worry-free home automation experience with ESPHome and Home Assistant.
Busting Esphome Yaml Configuration Myths
Let’s tackle one of the most intimidating parts of ESPHome: YAML configuration. I’ve seen many makers shy away from it, thinking it’s too complex or restrictive. But trust me, once you grasp the basics, you’ll be configuring like a pro. The key is to understand that YAML is all about simplicity and readability. It’s not about writing code, but rather defining how your devices interact with each other. I’ve found that breaking it down into smaller, manageable chunks makes it much easier to work with.
By doing so, you’ll unlock a world of customization possibilities, from tweaking sensor settings to creating custom automations. Don’t be afraid to experiment and try new things – it’s all part of the DIY spirit. And remember, the ESPHome community is always willing to lend a helping hand, so don’t hesitate to reach out if you get stuck.
Integrating Esphome With Home Assistant Like a Pro
Now that we’ve cracked open the YAML configuration, let’s dive into seamlessly merging ESPHome with Home Assistant. This is where the magic happens, folks! By integrating these two powerhouses, you’ll unlock a world of automation possibilities. I’m talking about total control over your smart home, from tweaking sensor settings to crafting custom automations.
To get started, you’ll need to enable the ESPHome integration within Home Assistant. Don’t worry, it’s a breeze – just head to the configurations page, click on “Integrations,” and search for ESPHome. Once you’ve linked your devices, you can start exploring the endless possibilities of automated bliss. Trust me, the sense of satisfaction you’ll get from fine-tuning your smart home is unbeatable!
5 Essential ESPHome Hacks to Supercharge Your Home Assistant
- Start with a solid foundation: flash your ESP32/ESP8266 board with the latest ESPHome firmware to ensure compatibility and stability
- Master the art of YAML configuration: don’t be afraid to experiment and tweak your ESPHome config files to unlock custom features and device integrations
- Integrate like a pro: use the ESPHome dashboard to seamlessly connect your devices to Home Assistant, and discover new automation possibilities
- Monitor and optimize: keep an eye on your device’s performance and energy consumption using ESPHome’s built-in metrics and logging tools
- Join the community: share your ESPHome projects and learn from others on forums and social media to stay up-to-date with the latest developments and best practices
3 Key Takeaways to Supercharge Your ESPHome and Home Assistant Setup
By harnessing the power of ESPHome, you can breathe new life into old devices and create a seamless smart home experience that’s tailored to your unique needs and preferences
Mastering ESPHome’s YAML configuration is easier than you think, and with a few simple tweaks, you can unlock a world of customization options and automation possibilities
With ESPHome and Home Assistant working together in perfect harmony, you’ll be able to monitor, control, and automate every aspect of your smart home, from lighting and temperature to security and entertainment
Empowering Your Smart Home
ESPHome is more than just a tool – it’s the key to unlocking a world of limitless possibilities in home automation, and with Home Assistant, we’re not just building smart homes, we’re building a movement of makers who refuse to be limited by what’s ‘allowed’
Frankie Miller
Unlocking the Full Potential of ESPHome with Home Assistant
We’ve covered a lot of ground in this journey to mastering ESPHome with Home Assistant. From the basics of what ESPHome is and how it integrates with Home Assistant, to diving deep into YAML configuration and pro tips for a seamless integration, you’re now equipped with the knowledge to take your smart home to the next level. Remember, the key to unlocking the full potential of ESPHome lies in understanding its configuration secrets and not being afraid to experiment and void those warranties. With great power comes great responsibility, so use your newfound skills wisely and keep pushing the boundaries of what’s possible in DIY smart home automation.
As you close this guide and head back to your workshop or lab, I want to leave you with a final thought: the true power of technology lies not in its complexity, but in its accessibility. By embracing the DIY spirit and taking control of your smart home, you’re not just building a more efficient living space – you’re building a community, a movement, and a future where technology serves us, not the other way around. So, keep tinkering, keep pushing, and most importantly, keep sharing your knowledge with others. Together, we can make a difference, one DIY project at a time.
Frequently Asked Questions
What are the minimum system requirements to run ESPHome and integrate it with Home Assistant?
To run ESPHome and integrate it with Home Assistant, you’ll need a device with at least a 1GHz CPU, 256MB of RAM, and a spare USB port – think Raspberry Pi or an old computer. Don’t worry, I’ve run it on some pretty low-end hardware, and it still works like a charm!
Can I use ESPHome with devices that don't have native Home Assistant support?
Absolutely, you can use ESPHome with devices that don’t have native Home Assistant support. That’s one of the beauties of ESPHome – it can breathe new life into older or more obscure devices, making them compatible with your Home Assistant setup. I’ve done it with old thermostats, door sensors, and more – the possibilities are endless, and I’ll show you how.
How do I troubleshoot common issues when integrating ESPHome with Home Assistant, such as device discovery or configuration errors?
Troubleshooting ESPHome and Home Assistant integration can be a breeze. For device discovery issues, check your YAML config and ensure your devices are properly listed. Configuration errors usually mean a typo or incorrect syntax – double-check your code and refer to the ESPHome docs for troubleshooting guides.