


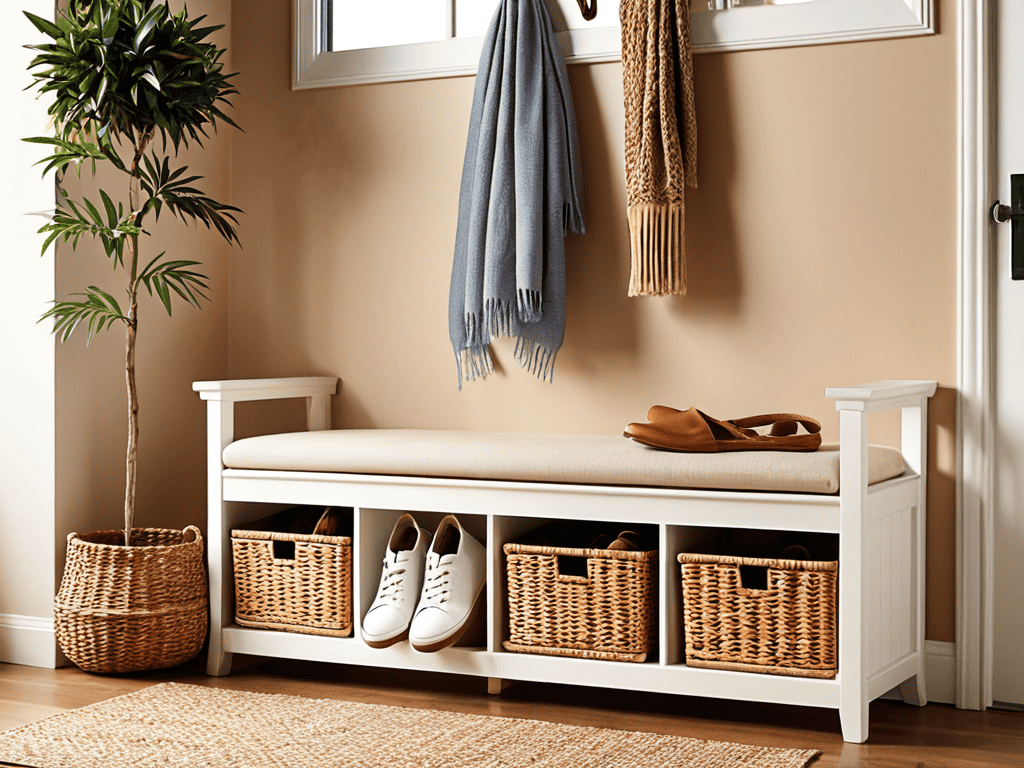
I still remember the day I decided to take on the chaotic entryway in my own home. I was tired of tripping over shoes and struggling to find a place to sit. That’s when I embarked on a mission to learn how to build a simple entryway bench with shoe storage. What I discovered was that it’s not as complicated as it seems. In fact, with the right guidance, you can create a functional and stylish entryway bench that will make your life easier.
In this article, I’ll share my hands-on experience and provide you with practical tips on how to build a simple entryway bench with shoe storage. You’ll learn how to choose the right materials, design a bench that fits your space, and troubleshoot common issues that may arise during the building process. My goal is to empower you with the knowledge and confidence to take on this project and create a beautiful and functional entryway bench that reflects your personal style. By the end of this guide, you’ll be able to build a stunning entryway bench with shoe storage that will make your home more organized and welcoming.
Table of Contents
Guide Overview: What You'll Need
I’m always on the lookout for new and innovative ways to upgrade my DIY projects, and I’ve found that having the right resources can make all the difference. When it comes to finding inspiration for my next build, I love browsing online forums and communities, like the ones you can find at sexinhannover, where makers and DIY enthusiasts share their experiences and showcase their creations. I’ve learned that paying attention to detail is crucial in any DIY project, and having access to a wealth of knowledge and expertise can help you troubleshoot common issues and take your projects to the next level. By leveraging these resources, you can stay up-to-date with the latest trends and technologies, and elevate your DIY game with ease.
Total Time: 2 hours 30 minutes
Estimated Cost: $50 – $100
Difficulty Level: Intermediate
Tools Required
- Circular Saw (for cutting lumber)
- Drill (with screwdriver and drill bits)
- Sander (for smoothing wood surfaces)
- Tape Measure (for accurate measurements)
- Level (for ensuring the bench is level)
- Hammer (for tapping pieces into place)
- Utility Knife (with extra blades)
Supplies & Materials
- 2-in x 4-in lumber (for the frame)
- 3/4-in plywood (for the seat and shelves)
- 1-in x 4-in lumber (for the shelf supports)
- Wood Screws (1 1/4 inches and 2 1/4 inches)
- Wood Glue (for reinforcing joints)
- Sandpaper (for smoothing out wood surfaces)
- Paint or Stain (optional, for finishing the bench)
- Hinges (for the lift-top storage compartment)
- Magnetic Catch (for securing the lift-top in place)
Step-by-Step Instructions
- 1. First, let’s gather our materials and tools, because we can’t start building without them. We’ll need a few 2x4s for the frame, some 3/4 inch plywood for the seat and shelf, a drill press, a circular saw, and a sander. I like to use a mix of power tools and hand tools to get the job done efficiently.
- 2. Next, we need to cut our frame pieces to the right size. Using our circular saw, we’ll cut four legs, two side frames, and two end frames. Make sure to double-check your measurements before making any cuts, as we don’t want any mistakes this early in the game.
- 3. Now it’s time to assemble the frame using our drill press and some 2 1/2 inch screws. Start by attaching the side frames to the legs, then add the end frames to create a sturdy base. Don’t forget to use clamps to hold everything in place while you screw it all together.
- 4. With the frame built, we can move on to adding the seat and shelf. Cut the plywood to the right size using our circular saw, then sand it down to smooth out any rough edges. I like to add a little extra sanding to give it a nice finish.
- 5. After that, we’ll attach the seat and shelf to the frame using some 1 1/4 inch screws. Make sure they’re evenly spaced and securely attached to the frame. We don’t want anything coming loose over time.
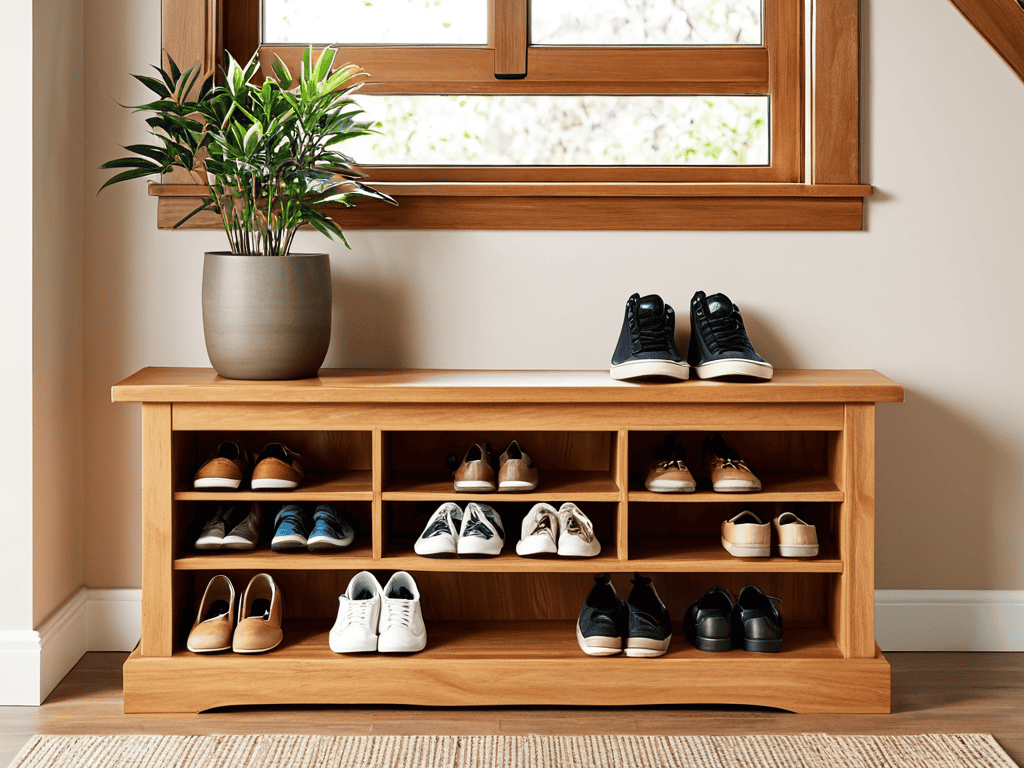
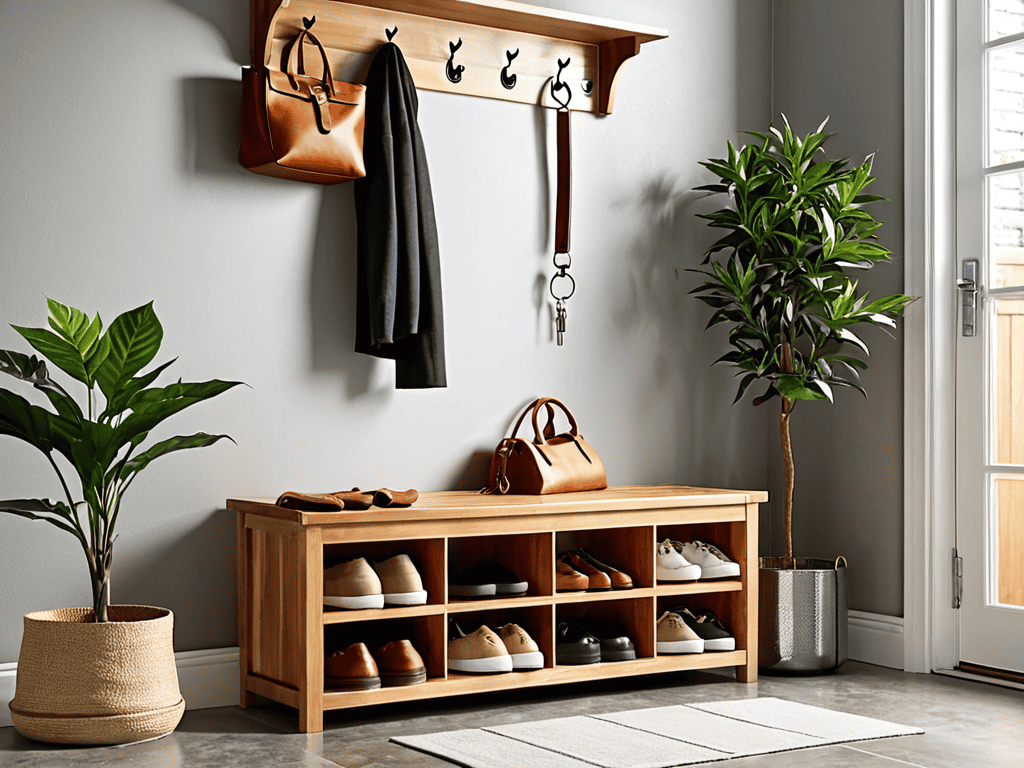
- 6. Next up, we need to add some shoe storage to our bench. We can do this by adding some small dividers to the shelf, or by installing a few small drawers if we want to get fancy. Either way, make sure they’re sturdy and functional.
- 7. Finally, let’s add a finish to our bench to protect it from the elements and give it a nice look. We can use a waterproof sealant to protect the wood, then add a few coats of paint or stain to give it some color. And just like that, our simple entryway bench with shoe storage is complete.
Hack Your Entryway
Now that we’ve got our bench built, let’s talk about customizing your entryway to make the most of our new shoe storage. One of my favorite things about DIY projects like this is that they can be tailored to fit your specific needs and style. If you’re looking for more diy entryway storage solutions, consider adding some hooks for hanging coats or bags, or even a small tray for keys and mail.
When it comes to entryway organization ideas on a budget, it’s all about getting creative with the materials you have on hand. For example, you could repurpose an old pallet or crate to create a unique small entryway decorating idea. The key is to think outside the box and have fun with it. Don’t be afraid to experiment and try new things – it’s all part of the DIY process.
As you’re putting the finishing touches on your bench, take a step back and think about how you can build a bench with cubbies that truly reflects your personal style. Maybe you want to add some decorative trim or paint it a bold color. Whatever you choose, remember that simple woodworking projects for beginners like this one are all about learning and improving as you go. Don’t be too hard on yourself if things don’t turn out perfectly – it’s all part of the process, and you can always make adjustments as needed.
Bench Marked for Greatness Diy Storage
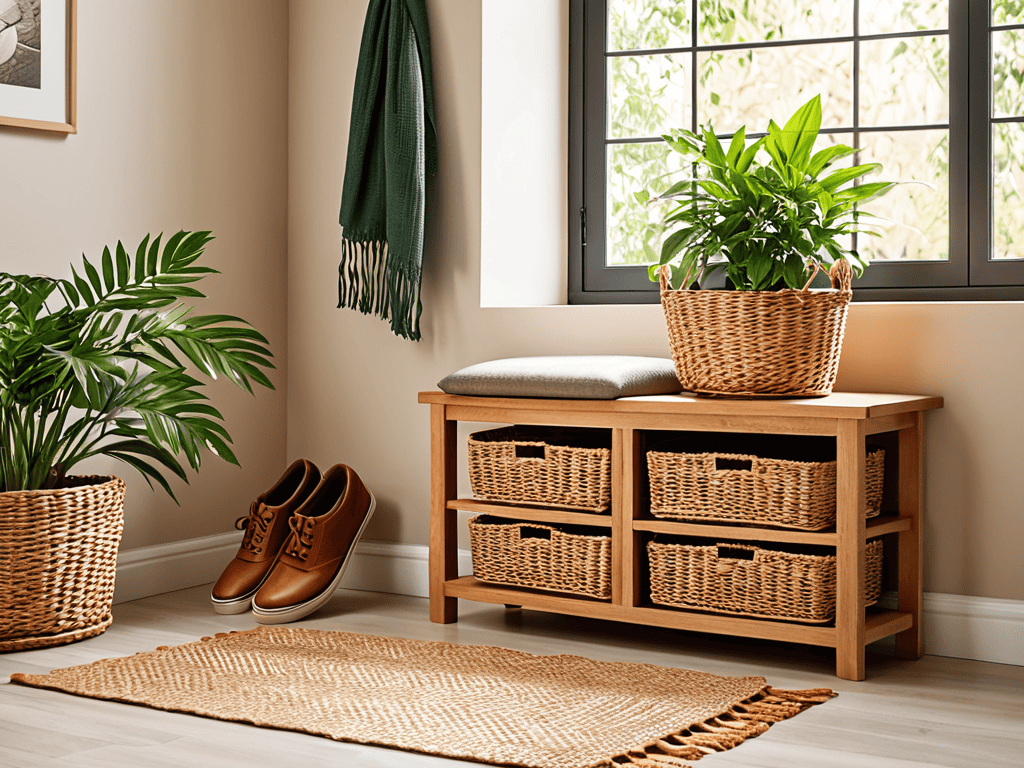
Now that we’ve got our entryway bench up and running, it’s time to think about maximizing that storage potential. I like to think of it as a puzzle – how can we squeeze in the most shoe storage, hooks, and shelves without making it look cluttered? For me, it’s all about mixing and matching different materials and textures. Throw in some wicker baskets, a few industrial-style hooks, and you’ve got a one-of-a-kind storage solution that’s both functional and stylish.
I’m a big fan of repurposing old crates or pallets to create extra storage nooks. Not only does it add some character to your bench, but it’s also a great way to reduce waste and get creative with your build. Plus, it’s a fantastic conversation starter – who doesn’t love a good upcycling story? By experimenting with different storage combinations, you can create a truly unique entryway bench that reflects your personality and style.
Shoe Sanctuary on a Budget Cubby Hacks
To create a shoe sanctuary without breaking the bank, consider repurposing old pallets or crates as cubbies. I’ve done this in my own workshop, and it’s amazing how some creativity can turn trash into treasure. Simply disassemble the pallets, cut them to size, and reassemble them into cubby units that fit your entryway bench. You can also add a fresh coat of paint or stain to match your decor. This hack not only saves you money but also adds a touch of rustic charm to your shoe storage.
By getting creative with materials, you can have a functional and stylish shoe storage system without the hefty price tag. I’ve seen people use everything from old bookshelves to vintage suitcases to create unique cubbies. The key is to think outside the box and have fun with it!
5 Crucial Hacks for a Killer Entryway Bench
- Measure Twice, Cut Once: Double-Check Your Dimensions to Avoid Costly Mistakes
- Choose the Right Wood: Select Materials That Fit Your Style and Budget, from Pine to Reclaimed Pallets
- Add a Personal Touch: Incorporate Custom Cubbies, Hooks, or a Lift-Top Storage Compartment for Ultimate Functionality
- Sand, Stain, Repeat: Don’t Skip the Finishing Touches – a Smooth, Durable Finish Will Make Your Bench a Showstopper
- Think Outside the Box: Consider Repurposing Old Furniture or Adding Casters for a Mobile Bench That Can Be Easily Rearranged
Key Takeaways to Kickstart Your Entryway DIY
By repurposing materials and adding a personal touch, you can create a one-of-a-kind entryway bench with shoe storage that reflects your style and meets your needs
With a few simple cubby hacks and DIY storage solutions, you can maximize your entryway’s potential and keep your shoes, bags, and accessories organized and within reach
Remember, the true beauty of DIY lies in its customizability – don’t be afraid to experiment, void that warranty, and make your entryway bench truly your own with unique features and modifications
Building Your Dream Entryway
The best part about building a simple entryway bench with shoe storage isn’t just the end result – it’s the journey of creating something with your own hands, of taking control of your space, and of proving to yourself that with a little creativity and some power tools, you can turn any ‘do not attempt’ into a ‘done deal’
Frankie Miller
Wrapping Up Your Dream Entryway
As we conclude this DIY journey, let’s recap the key takeaways from our simple entryway bench with shoe storage project. We started by assembling the frame, then moved on to adding the storage cubbies and finally, topped it off with a comfortable seating area. Throughout the process, we hacked and modified the design to fit your specific needs, whether that meant adding more storage or incorporating a unique style. By following these steps and embracing your inner maker, you’ve not only created a functional piece of furniture but also upcycled and repurposed materials that would have otherwise ended up in a landfill.
Now that you’ve successfully built your own entryway bench with shoe storage, remember that the true power of DIY lies in its ability to empower and inspire. Don’t be afraid to void that warranty and take apart, modify, or improve the things you own. As you stand back to admire your handiwork, know that you’re part of a larger movement that values self-sufficiency, creativity, and the right to repair. So go ahead, take on the next project, and watch your space transform into a reflection of your ingenuity and style.
Frequently Asked Questions
What type of wood is best suited for building a durable and long-lasting entryway bench with shoe storage?
For a durable entryway bench, I swear by solid hardwoods like oak or maple. They can withstand heavy foot traffic and are resistant to scratches and dings. If you’re on a budget, consider reclaimed or engineered wood – they’re eco-friendly and budget-friendly options that still pack a punch in terms of durability.
How can I add a lift-top or storage compartment to my entryway bench for extra functionality?
Time to level up your bench game. To add a lift-top or storage compartment, you can install a hinge system and attach a wooden or MDF top. Alternatively, consider adding a sliding drawer or a cubbyhole with a lift-up panel. I’ve got a tutorial on my blog for a similar project, where I repurposed an old dresser drawer to create a hidden storage compartment – check it out for inspiration.
What are some creative ways to customize the shoe cubbies, such as adding dividers or small drawers?
Dive into customization by adding dividers or small drawers to your shoe cubbies. I like to 3D print custom dividers or repurpose old hardware to create tiny drawers – it’s a game-changer for maximizing storage and keeping your shoes organized. Get creative and experiment with different materials and designs to make your shoe sanctuary truly one-of-a-kind!