I still remember the day my favorite Pokémon game cartridge stopped working – the dead battery had finally caught up with me. But instead of tossing it in the trash, I decided to take matters into my own hands and learn how to replace the battery in a pokemon game cartridge. It’s amazing how often we’re led to believe that these tiny devices are impenetrable fortresses, meant to be discarded and replaced when they fail. But I’m here to tell you that’s just not true – with a little patience and the right guidance, you can breathe new life into your old cartridge and get back to catching ’em all.
In this article, I’ll walk you through the simple, step-by-step process of replacing the battery in your Pokémon game cartridge. You won’t find any technical jargon or confusing instructions here – just honest, straightforward advice from someone who’s been in your shoes. I’ll show you exactly what you need to get the job done, from the tools to the replacement battery, and provide you with some valuable troubleshooting tips along the way. By the end of this guide, you’ll be empowered to take control of your own gaming hardware and make repairs with confidence – no more throwing away perfectly good cartridges or shelling out for expensive replacement parts.
Table of Contents
Guide Overview: What You'll Need

Total Time: 30 minutes to 1 hour
Estimated Cost: $5 – $10
Difficulty Level: Easy
Tools Required
- Screwdriver a small Phillips head screwdriver
- Pliers for gripping small components
- Tweezers for handling the battery
Supplies & Materials
- CR2025 Battery or equivalent replacement battery
- Electrical Tape for securing the new battery
Step-by-Step Instructions
- 1. First, let’s get started by preparing our tools – you’ll need a screwdriver, preferably a precision one, to open up the Pokémon game cartridge. Don’t worry, it’s easier than it sounds, and I’ll guide you through each step. Make sure your workspace is clean and well-lit to avoid any mishaps.
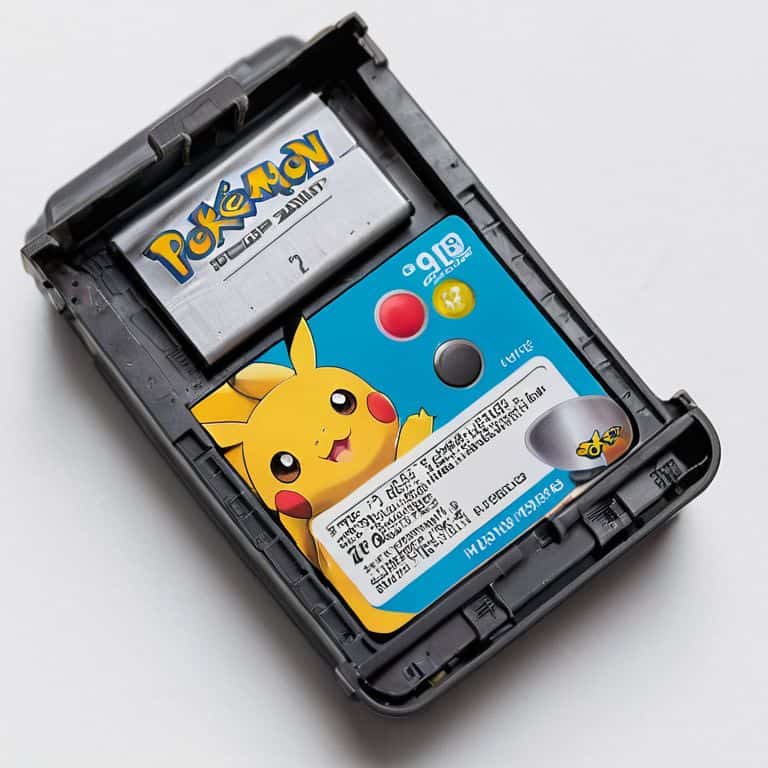
- 2. Next, we need to locate the screws that hold the cartridge together. These are usually found on the back or sides of the cartridge, and they might be hidden under a label or a sticker. Use your screwdriver to carefully remove these screws, and set them aside in a safe place where they won’t get lost.
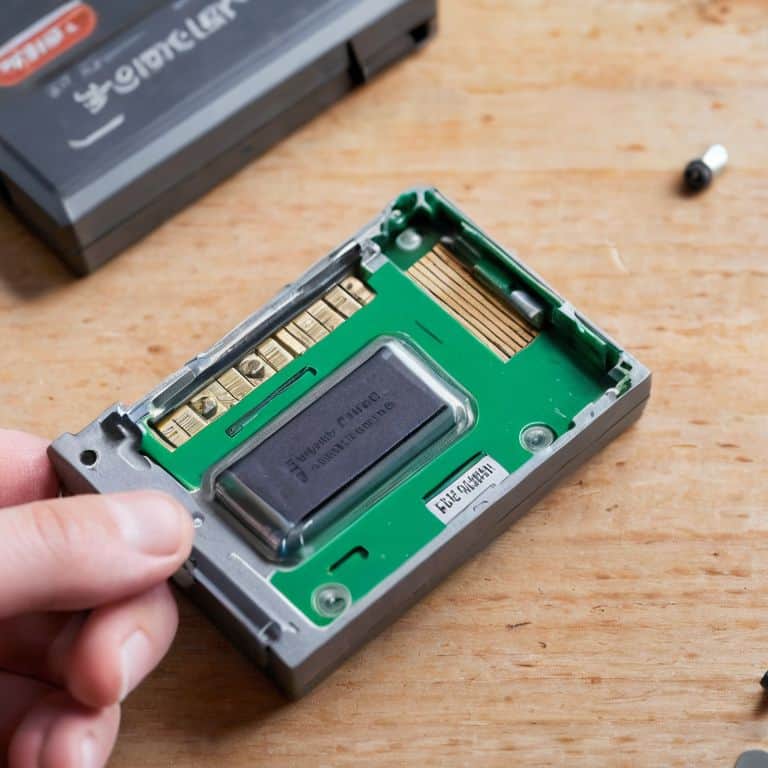
- 3. Now, it’s time to open the cartridge. Gently pry it open using your screwdriver or a plastic spudger, being careful not to damage any of the internal components. You might need to apply a bit of force, but don’t worry, it’s designed to come apart. Once you’ve opened it, you’ll see the battery and the circuit board inside.
- 4. The next step is to identify the battery type and its location. In most Pokémon game cartridges, the battery is a small, round CR2025 or CR2032 lithium coin cell. It’s usually held in place by a small clip or soldered to the circuit board. Take note of how it’s secured so you can reverse the process when installing the new battery.
- 5. Carefully remove the old battery from its holder or desolder it from the circuit board if necessary. If it’s soldered, use a soldering iron to melt the solder, and then gently lift the battery out. Be cautious, as the soldering iron can get very hot and cause burns.
- 6. Now that the old battery is out, it’s time to install the new one. Take your replacement battery and insert it into the holder, making sure it’s securely seated. If your battery was soldered, apply a small amount of solder to the terminals and carefully place the new battery, ensuring it’s properly aligned before soldering it into place.
- 7. With the new battery installed, it’s time to reassemble the cartridge. Make sure all the internal components are in their original positions, and then close the cartridge. Use your screwdriver to replace the screws you removed earlier, tightening them firmly but avoid overtightening, which could damage the plastic.
- 8. Finally, test your cartridge to make sure everything is working as expected. Insert it into your game console, and the game should now function properly, with your new battery providing the power it needs. If you encounter any issues, double-check your work, ensuring all connections are secure and the battery is properly installed.
Void Warranty Pokmon Battery Swap
Now that we’ve got the battery swapped out, let’s talk about some best practices for keeping your Pokémon cartridge in top shape. Regularly cleaning the cartridge contacts can help prevent issues down the line, and it’s a simple process that requires just a few basic tools. I like to use a soft brush and some compressed air to gently remove any debris that may have accumulated.
When it comes to retro game console battery maintenance, it’s all about being proactive. Consider setting reminders to check the battery level in your Pokémon cartridge every few months, and don’t be afraid to replace the battery if you notice it’s getting low. You can also explore game boy battery upgrade options to ensure you’ve got a reliable power source for your gaming sessions.
In addition to keeping your cartridge’s battery in check, it’s also a good idea to look into pokemon save file backup methods. This can give you peace of mind and prevent any potential data loss. By taking these extra steps, you can enjoy your Pokémon games without worrying about technical issues getting in the way.
Pokmon Cartridge Battery Replacement Tutorial
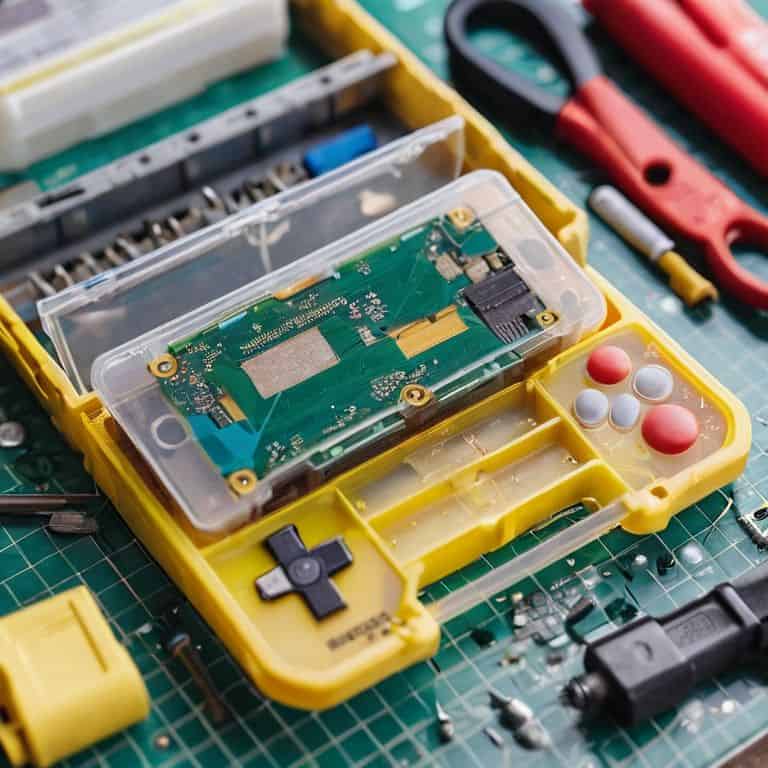
Now that we’ve embracing the thrill of voiding that warranty, let’s dive into the nitty-gritty of replacing the battery in your Pokémon game cartridge. This is where things get really hands-on, and I love it! You’ll need a few basic tools like a screwdriver and some tweezers. Don’t worry, I’ll walk you through every step. We’ll carefully disassemble the cartridge, locate the dead battery, and swap it out with a brand new one. It’s surprisingly straightforward, and you’ll be back to catching Pokémon in no time.
I’ll share some pro tips I’ve learned from doing this myself, like how to handle the tiny components and avoid any potential pitfalls. With these simple steps and a bit of patience, you’ll have your Pokémon cartridge up and running like new.
Retro Game Console Battery Hacks
Now that we’ve tackled the Pokémon cartridge, let’s explore more retro game console battery hacks. I’ve got a soft spot for restoring old consoles to their former glory, and that often involves swapping out dead batteries. From the Sega Game Gear to the original Game Boy, these classic devices often rely on coin cell batteries or other power sources that can be easily replaced.
I’ve found that with a little creativity and the right tools, you can breathe new life into these retro consoles. Whether it’s soldering in a new battery holder or wiring in a more modern power source, the possibilities are endless. And the best part? You get to keep playing your favorite childhood games without worrying about the battery dying on you. It’s all about taking control of your tech and making it last.
5 Crucial Tips for a Successful Pokémon Cartridge Battery Swap
- Use the right tools for the job – you’ll need a screwdriver that fits the tiny screws on your Pokémon cartridge, and don’t even think about using a drill, we’re keeping it precise here
- Make sure you purchase the correct replacement battery, as using the wrong type can lead to damage or even a fire hazard – I’ve got a spare parts drawer full of mistakes, don’t make the same errors I did
- Before you start, take a clear photo of the cartridge’s wiring and components, it’s a simple step that can save you a ton of hassle when it’s time to reassemble everything
- Keep your work area clean and static-free, the last thing you want is for a stray dust particle or static shock to damage your cartridge’s electronics – trust me, I’ve learned this one the hard way
- When reassembling, double-check that all screws are securely tightened, but avoid overtightening, which can lead to stripped screws or even damage to the cartridge’s casing – it’s all about finding that sweet spot
Key Takeaways: Reviving Your Pokémon Cartridge
By following the step-by-step guide, you can successfully replace the battery in your Pokémon game cartridge and get back to gaming without having to purchase a new one.
Remember, swapping out the battery yourself will indeed void the warranty, but it’s a small price to pay for the satisfaction of DIY repair and the extended life of your cartridge.
With the right tools and a bit of confidence, you can apply the skills learned from this project to other retro game console battery hacks, breathing new life into your old favorites and keeping them playable for years to come.
Empowering DIY Spirit
The moment you swap out that dead battery in your Pokémon game cartridge is the moment you realize you’re not just a gamer, you’re a maker – you’re taking control of your tech and breathing new life into the things you love.
Frankie Miller
Breathing New Life into Your Pokémon Cartridge
You’ve made it through the step-by-step guide and have successfully replaced the battery in your Pokémon game cartridge. By following the Retro Game Console Battery Hacks and the Pokémon Cartridge Battery Replacement Tutorial, you’ve not only given your cartridge a new lease on life but have also exercised your right to repair and modify your own technology. This is what it means to void that warranty and take control of your devices. Remember, the process might seem daunting at first, but with the right mindset and a bit of patience, you can overcome any obstacle and emerge victorious.
As you put your newly revived Pokémon cartridge back into your retro game console and hear the familiar sounds of the Pokémon theme song, remember that this is just the beginning. The world of DIY tech is vast and incredibly rewarding, full of projects waiting to be tackled and challenges to be overcome. So, don’t be afraid to get your hands dirty and explore the limitless possibilities that come with building, repairing, and improving your own technology. The maker spirit is alive and well, and with every successful project, you’ll become more confident in your ability to shape your own tech destiny.
Frequently Asked Questions
What type of battery do I need to replace the one in my Pokémon game cartridge?
Don’t worry, buddy! You’ll need a CR2025 or SR716SW battery, depending on your Pokémon cartridge model. These 3-volt batteries are easy to find at most electronics stores or online. Just make sure to get the right one, or you might end up with a cartridge that’s deader than a Pokedex without batteries!
Can I use a battery from a different Pokémon game cartridge if it's the same type?
Absolutely, if it’s the same type, you can swap batteries between Pokémon cartridges. I’ve done it myself with a few of my old Game Boy games. Just make sure it’s the exact same battery model, like an SR41 or LR41, to avoid any issues. It’s a great way to breathe new life into an old favorite, and it’s a simple hack to get you back to catching Pokémon in no time!
Will replacing the battery in my Pokémon game cartridge cause me to lose my saved game data?
Don’t worry, replacing the battery won’t wipe your saved game data. The battery only powers the cartridge’s memory, so as long as you don’t touch the internal components, your Pokémon progress is safe. Just be gentle and careful during the swap, and you’ll be back to catching ’em all in no time.