I still remember the first time I tried to solder electronics – I was a teenager, eager to upgrade my old gaming PC, and I ended up with a burnt circuit board and a bunch of useless components. The problem was, all the guides I found online were either too vague or too intimidating, making me feel like I needed a degree in engineering to even attempt it. But the truth is, learning how to solder electronics is not rocket science – it just requires some patience, the right tools, and a willingness to get your hands dirty.
In this article, I’ll share my own experiences and tips on how to solder electronics like a pro, without any fancy jargon or overly complicated instructions. You’ll learn how to choose the right soldering iron, prepare your components, and avoid common mistakes that can ruin your project. I’ll also show you some tricks of the trade that I’ve picked up over the years, from using flux to remove oxidation to troubleshooting common issues that can arise during the soldering process. By the end of this guide, you’ll be confident in your ability to solder electronics and take your DIY projects to the next level.
Table of Contents
Guide Overview: What You'll Need
Total Time: 1 hour 30 minutes
Estimated Cost: $20 – $50
Difficulty Level: Intermediate
Tools Required
- Soldering Iron (with adjustable temperature)
- Soldering Iron Stand (for safe storage)
- Wire Stripper (for stripping insulation)
- Pliers (for gripping small components)
- Tweezers (for handling small parts)
- Safety Glasses (for protecting eyes from debris)
- Work Light (for illuminating the work area)
Supplies & Materials
- Solder (60/40 tin-lead or lead-free)
- Flux (for promoting solder flow)
- Circuit Board (or other electronic component)
- Electrical Wire (in various gauges and colors)
- Heat Shrink Tubing (for insulating connections)
- Desoldering Wick (for removing excess solder)
Step-by-Step Instructions
- 1. First, let’s get our safety gear on and make sure we’ve got a clean, well-ventilated workspace to avoid any accidents. I like to keep a fire extinguisher nearby, just in case things get a little too hot. It’s also a good idea to wear some anti-static wrist straps to prevent any damage to our components.
- 2. Next, we need to prepare our soldering iron and make sure it’s at the right temperature. I always use a _temperature-controlled_ soldering iron, as it gives me more precision and control over the soldering process. Set the temperature to around 350-400°C, depending on the type of solder you’re using.
- 3. Now, let’s talk about solder. There are many types of solder out there, but for most electronics projects, you’ll want to use a 60/40 tin-lead solder or a lead-free alternative. Make sure you’ve got some _flux_ on hand as well, as it’ll help the solder flow smoothly and prevent any oxidation.
- 4. With our iron hot and our solder ready, it’s time to start tinning our components. This means applying a small amount of solder to the legs of our components, such as resistors or capacitors, to help them stick to the circuit board. Use a small amount of flux to help the solder flow, and make sure to wipe off any excess with a damp sponge.
- 5. Now it’s time to start soldering our components to the circuit board. Start by placing a small amount of solder on the pad, then carefully place the component on top. Use your iron to heat the solder and component, making sure to keep the iron moving to avoid applying too much heat to one spot. Once the solder has flowed and the component is secure, remove the iron and let it cool.
- 6. As we continue to solder our components, it’s essential to check our work regularly to make sure everything is properly connected and there are no _short circuits_. Use a multimeter to test for continuity and make any necessary adjustments. It’s also a good idea to keep a _schematic diagram_ of our circuit nearby to reference.
- 7. Finally, once we’ve finished soldering all of our components, it’s time to inspect and test our circuit. Use a visual inspection to make sure all of the solder joints are clean and secure, then use our multimeter to test the circuit for any errors or defects. If everything checks out, we can power up our circuit and see it in action.
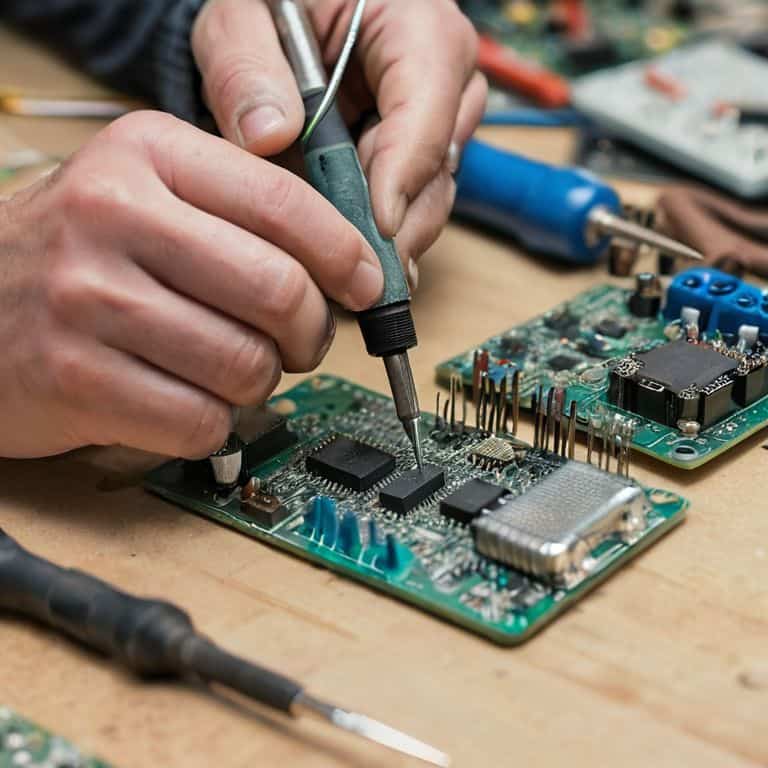
How to Solder Electronics
As you dive into electronic circuit assembly, it’s essential to understand the importance of soldering techniques for small components. When working with tiny parts, a steady hand and the right tools are crucial. I always recommend using a soldering iron temperature control device to ensure the perfect temperature for the job. This will help you avoid damaging the components or the circuit board.
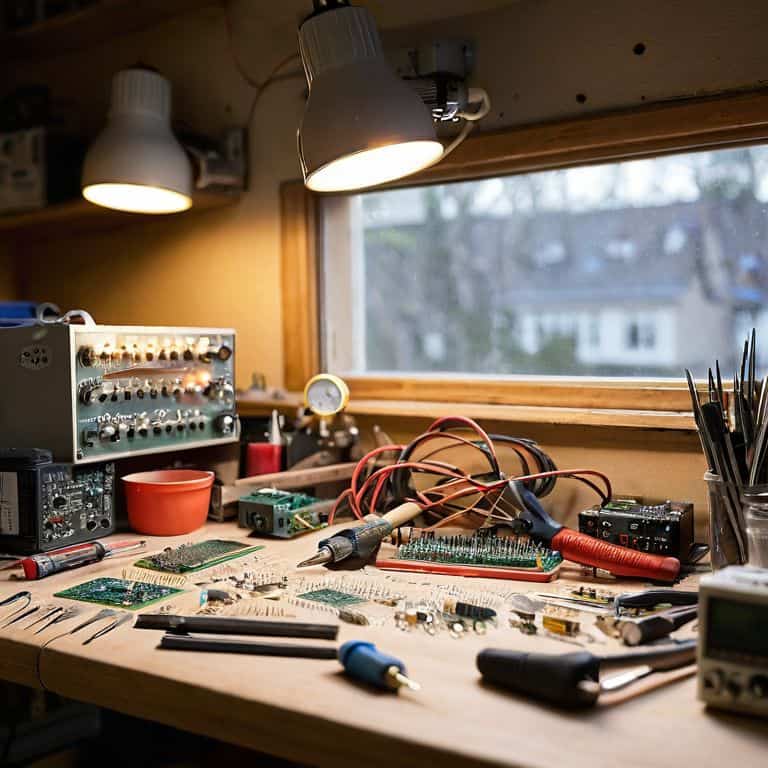
One of the most common mistakes beginners make is not preparing their workspace properly. Before you start soldering, make sure you have all the necessary tools and materials within reach. This includes a fire extinguisher, safety glasses, and a well-ventilated area. It’s also a good idea to have some beginner friendly soldering projects to practice on before moving on to more complex tasks. This will help you build confidence and develop your skills.
When it comes to desoldering and rework methods, it’s all about being gentle and patient. You don’t want to damage the surrounding components or the board itself. I always say, practice makes perfect, so don’t be discouraged if it takes a few tries to get it right. With time and experience, you’ll become a pro at soldering and desoldering, and you’ll be tackling even the most complex electronic soldering safety precautions with ease.
Electronic Circuit Assembly Hacks
When assembling electronic circuits, I’ve found that a little creativity can go a long way. One of my favorite hacks is to use a breadboard as a temporary testbed for my circuit before committing to a permanent PCB. This allows me to tweak and refine my design without wasting valuable board space or components. I also like to keep a stash of jumper wires in various lengths and colors to help me navigate complex circuits and keep my wiring organized.
Another trick I use is to label my components and wires as I go, using a marker or a label maker to keep track of what’s what. This might seem like a no-brainer, but trust me, it’s a lifesaver when you’re working with a dozen identical-looking resistors or trying to debug a tricky circuit. By taking the time to organize and document my work, I can focus on the fun stuff – bringing my project to life!
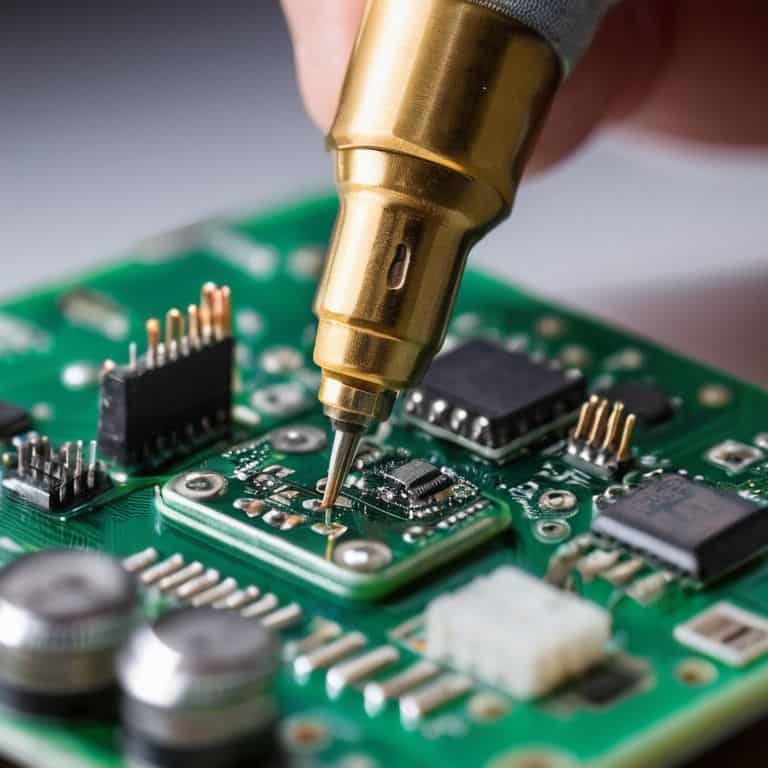
Soldering Iron Temperature Control
Now that we’ve got our soldering iron up and running, let’s talk temperature control. This is where the magic happens, folks! You want to make sure your iron is at the right temperature for the job, or you’ll end up with a messy joint or, worse, damaged components. I like to think of temperature control as the secret ingredient in my soldering recipe. For most electronics, you’ll want to aim for a temperature between 300°C to 350°C.
To get the perfect temperature, I recommend using a thermometer or a temperature-controlled soldering iron. Trust me, it’s worth the investment. With a temperature-controlled iron, you can dial in the exact temperature you need, and it’ll stay consistent throughout the soldering process. This is especially important when working with sensitive components or delicate PCBs. Remember, temperature control is key to a clean, strong solder joint.
Soldering Like a Pro: 5 Tips to Get You Started
- Use the right soldering iron temperature for your project – too high and you’ll damage your components, too low and the solder won’t flow properly
- Keep your workspace clean and organized, it’s easy to lose small parts or mix up components when you’re in the zone
- Use a soldering iron stand to prevent accidents and keep your work surface clear, trust me, you don’t want to be that guy who sets the kitchen table on fire
- Practice soldering on scrap materials before working on your actual project, it’s better to make mistakes on a worthless piece of circuit board than on your brand new Raspberry Pi
- Inspect your solder joints carefully, a good joint should be smooth, shiny, and have a nice ‘fillet’ where the solder meets the components – if it looks like a messy blob, you might need to rework it
Soldering Like a Pro: 3 Key Takeaways
Always remember to calibrate your soldering iron to the optimal temperature for the type of solder you’re using – it’s a game-changer for avoiding cold joints and solder bridges
Keep your workspace organized and your components labelled, it’s a huge time-saver when you’re in the middle of a complex electronic circuit assembly and need to troubleshoot
Don’t be afraid to experiment and try new things – soldering is an art that requires practice, and the best way to learn is by doing, so don’t be discouraged if your first few attempts don’t turn out perfectly
Soldering Wisdom
Soldering isn’t just about joining two pieces of metal, it’s about understanding the heartbeat of your electronics and bringing your ideas to life, one melted connection at a time.
Frankie Miller
Soldering Like a Pro: The Final Touches

That’s it, folks! You’ve made it through the nitty-gritty of soldering electronics. By now, you should have a solid grasp of temperature control, circuit assembly hacks, and the general know-how to tackle your own soldering projects. Remember, practice makes perfect, so don’t be discouraged if your first few attempts don’t turn out exactly as planned. The key is to keep at it and learn from your mistakes. With time and patience, you’ll be soldering like a pro in no time, taking on more complex projects and pushing the boundaries of what’s possible with DIY electronics.
As you put down your soldering iron and step back to admire your handiwork, I want you to remember that you are the master of your own tech. Don’t be afraid to void that warranty and take control of your devices. The sense of accomplishment you’ll get from building and repairing your own electronics is incredibly empowering, and it’s a feeling that will stay with you long after you’ve finished your project. So go ahead, get out there, and start building – the world of DIY electronics is waiting for you, full of endless possibilities and opportunities to innovate and create.
Frequently Asked Questions
What are the most common mistakes to avoid when soldering electronics to prevent damage to the components or the circuit board?
Alright, let’s get real – when soldering, most mistakes happen from rushing or poor prep. Avoid applying too much heat, using the wrong solder type, or not cleaning your iron. Also, don’t solder with worn-out tips or touch components with your bare hands – static electricity is a killer. Double-check your connections before heating up, trust me, it’s a game-changer.
How do I choose the right type of solder for my electronics project, considering factors such as melting point and conductivity?
Choosing the right solder is crucial. I always say, ‘the right solder makes the job a whole lot easier.’ For most electronics projects, you’ll want a solder with a moderate melting point, around 180-220°C. I recommend a 60/40 tin-lead solder for its great conductivity and ease of use.
What safety precautions should I take when working with soldering irons and electronics to minimize the risk of injury or fire?
Alright, safety first! When soldering, make sure you’ve got a fire extinguisher nearby, wear heat-resistant gloves, and keep loose clothing tied back. Keep your work area clear of flammable materials and avoid touching electrical components to prevent shocks. Let’s get messy, but responsibly!