


I still remember the first time I tried to set up a new Roku device – it was a frustrating experience, to say the least. The manual was confusing, and I found myself searching online for hours, trying to figure out why my device wouldn’t connect to the internet. But here’s the thing: it doesn’t have to be that way. Setting up a Roku device can be a breeze, if you have the right guidance. I’ve helped countless friends and family members through this process, and I’m excited to share my expertise with you. Whether you’re a tech novice or just looking for a hassle-free experience, this guide is for you.
In this article, I’ll walk you through the step-by-step process of how to set up a new Roku device, from unboxing to streaming your favorite shows. I’ll provide you with clear instructions, screenshots, and troubleshooting tips to ensure a smooth setup experience. My goal is to empower you with the knowledge and confidence to take control of your Roku device, so you can start enjoying your favorite content without any hassle. By the end of this guide, you’ll be able to set up your Roku device like a pro, and start streaming your favorite movies and TV shows in no time.
Table of Contents
Guide Overview: What You'll Need

Total Time: 30 minutes to 1 hour
Estimated Cost: $0 – $100
Difficulty Level: Easy
Tools Required
- Roku remote control (included with the device)
- TV with HDMI port (required for connection)
- Power source (for the Roku device)
- Internet connection (for streaming services)
Supplies & Materials
- HDMI cable (usually included with the Roku device)
- Roku device (the actual device to be set up)
- Batteries for the remote (if not already included)
Step-by-Step Instructions
- 1. First, don’t panic! Let’s get started with the physical setup of your new Roku device. Carefully unpack the device from its box, and make sure you have all the included accessories such as the remote control, power cord, and HDMI cable. Take a moment to familiarize yourself with the device’s ports and buttons.
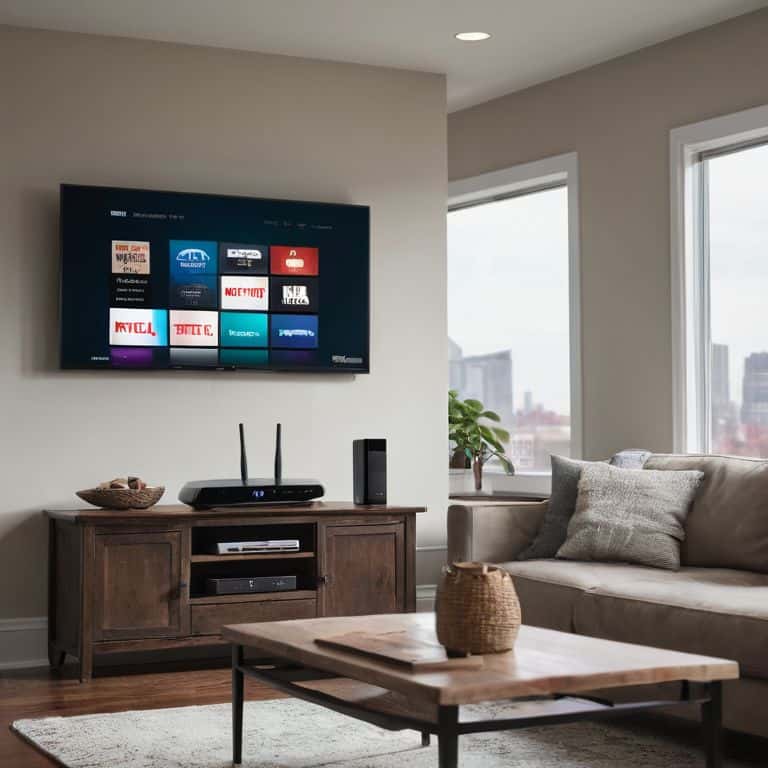
- 2. Next, connect your Roku device to your TV using the HDMI cable. Think of it like connecting a new passenger to your TV’s “vehicle” – you need to make sure they’re securely seated and ready for the ride. Ensure the HDMI cable is firmly plugged into both the Roku device and your TV’s HDMI port.
- 3. Now, plug in the power cord to a nearby power outlet, and turn on your TV. Use the TV’s remote control to select the correct HDMI input channel that corresponds to the port where you connected the Roku device. You might need to refer to your TV’s user manual for this step, but don’t worry, it’s easier than changing a car’s oil.
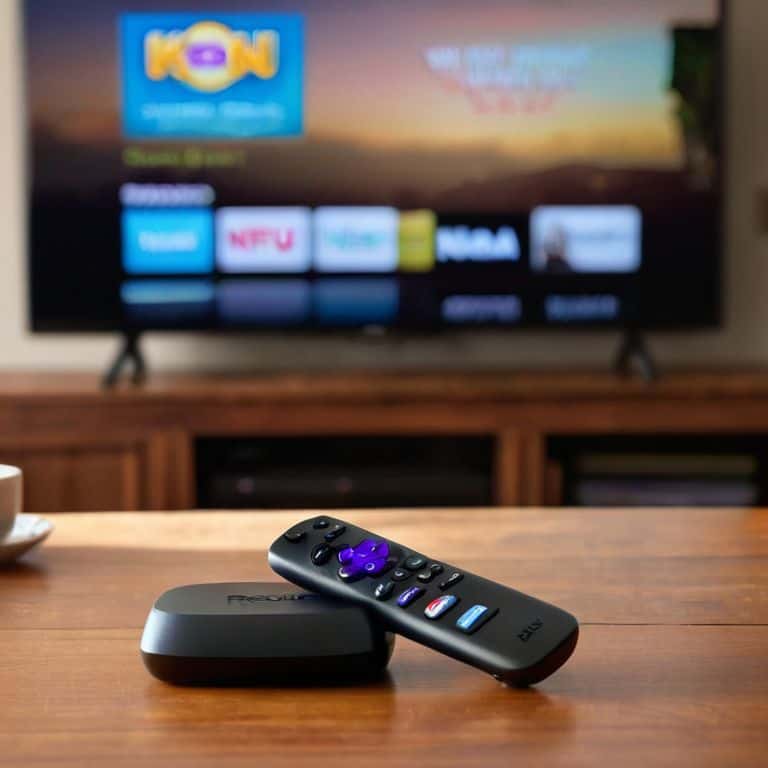
- 4. Once you’ve selected the correct HDMI channel, you should see the Roku logo appear on your screen, followed by a setup wizard. This wizard will guide you through the process of connecting your Roku device to your Wi-Fi network. Use your Roku remote control to navigate through the on-screen menus and select your Wi-Fi network from the list of available options.
- 5. After connecting to your Wi-Fi network, the Roku device will download and install any available software updates. This process might take a few minutes, so be patient and let it complete. You can think of it like getting a car tune-up – it’s essential for optimal performance.
- 6. Next, you’ll be prompted to create a Roku account or sign in to an existing one. This step is crucial for accessing various streaming services and customizing your Roku experience. Don’t worry if you’re not tech-savvy; the process is straightforward, and you’ll be guided through it with easy-to-follow instructions.
- 7. Finally, you’ll be asked to link your Roku device to your TV and set up the remote control. This step allows you to control your TV’s power and volume using the Roku remote. It’s like programming a car’s garage door opener – it’s a convenient feature that makes your life easier. Once you’ve completed this step, you’re ready to start exploring the world of streaming on your new Roku device!
How to Set Up a New Roku Device
As you’re going through the Roku TV installation steps, keep in mind that a stable internet connection is crucial for seamless streaming. I recommend checking your router’s placement and ensuring it’s close enough to your Roku device to maintain a strong signal. This simple step can significantly impact your overall viewing experience.
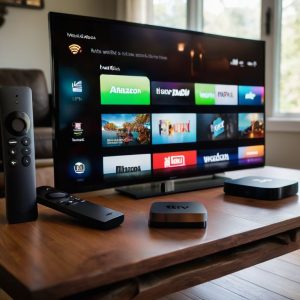
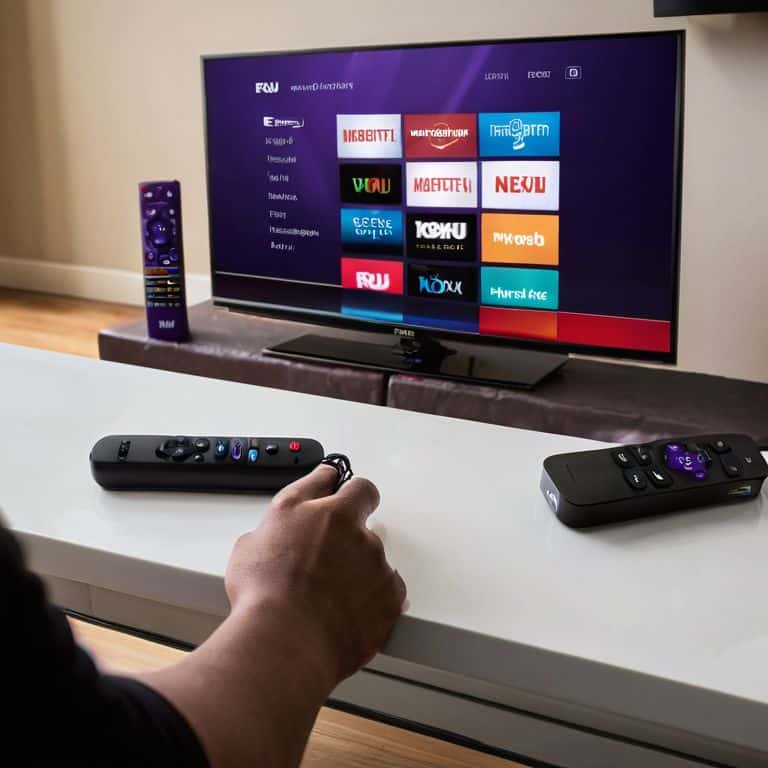
When activating your Roku device for streaming, you’ll be prompted to create a Roku account or sign in if you already have one. This account will give you access to the Roku channel store navigation, where you can browse and add your favorite channels. Take some time to explore the various categories and genres available, and don’t hesitate to try out new channels – you can always remove them later if you don’t like them.
To get the most out of your Roku device, consider customizing Roku settings for better performance. This might involve adjusting the display settings or tweaking the audio output to suit your home entertainment system. If you encounter any issues during setup or later on, don’t panic – troubleshooting common Roku issues is often simpler than you think, and there are plenty of resources available online to help you resolve problems quickly.
Activating Roku for Streaming Joy
Now that we’ve got the basics covered, let’s activate your Roku for streaming joy. Think of this step like turning the key in your car – it’s what gets everything moving. To activate your Roku, you’ll need to link it to your Roku account. Don’t worry, this is a straightforward process. Simply go to the Roku website, sign in or create an account, and follow the prompts to link your device.
Once you’ve completed the activation process, you’ll be ready to start exploring the world of streaming. Your Roku will automatically update to the latest software, and you can begin adding your favorite channels. I like to think of this part as tuning into your favorite radio stations – you get to pick and choose what you want to listen to, or in this case, watch.
Navigating Roku Tv Installation Steps
Now that we’ve activated our Roku, let’s dive into the installation steps for Roku TV. Don’t Panic! This process is relatively straightforward, and I’ll guide you through it. First, ensure your TV is turned on and set to the correct input for your Roku device. You’ll see the Roku logo on your screen, followed by a series of on-screen instructions. Simply follow these prompts to connect your Roku to your Wi-Fi network and create a Roku account if you haven’t already.
Think of this process like tuning into your favorite radio station – you need to select the right frequency to get the best signal. In this case, we’re selecting the right Wi-Fi network and account settings to get our Roku up and running smoothly. I’ll provide a simple checklist to help you stay on track: connect to Wi-Fi, create or sign in to your Roku account, and choose your preferred language and location settings.
5 Essential Tips for a Seamless Roku Setup
- Don’t Panic! Start by ensuring your Roku device is properly connected to your TV and power source, just like checking your car’s oil and gas before a road trip
- Use the included HDMI cable to connect your Roku to your TV, and if you have a 4K TV, make sure to use an HDMI port that supports 4K resolution
- During the initial setup, choose your language and country, and then connect your Roku to your Wi-Fi network – think of it like setting up your car’s GPS for the first time
- Activate your Roku device by linking it to your Roku account, which is similar to registering your car – it’s a one-time process that unlocks all the features
- Take a few minutes to explore the Roku interface, customize your home screen, and add your favorite streaming channels, just like organizing your car’s dashboard for a comfortable drive
3 Key Takeaways for a Smooth Roku Setup
Don’t Panic! With these simple steps, you’ll be streaming your favorite shows in no time, just like filling up your car’s gas tank – you need to follow the right sequence to get moving
Remember, setting up your Roku is like tuning a car radio – you need to find the right channels and settings to get the best experience, and our checklist will guide you through it
By following our friendly walkthrough, you’ll be empowered to troubleshoot common issues and make the most out of your Roku device, just like a trusty GPS navigation system helps you find your way, even when you’re not sure where you’re going
Setting Up Your Roku with Ease
Think of setting up your new Roku device like tuning up your car – you need to make sure all the parts are working together smoothly, and with a few simple checks, you’ll be streaming like a pro in no time!
David Fletcher
Wrapping Up Your Roku Setup Journey
Now that we’ve gone through the steps together, from unboxing to activating your Roku device, you should be all set for a fantastic streaming experience. Remember, the key to a smooth setup is taking it one step at a time and not hesitating to refer back to the checklists we created along the way. If you ever feel lost, just recall that setting up a Roku is somewhat like tuning a car – you need to make sure all the parts are working together in harmony. By following the step-by-step guide, you’ve successfully navigated the Roku TV installation steps and are ready to enjoy your favorite shows and movies.
As you sit back to enjoy your newly set-up Roku, remember that technology is your ally, and with a little patience and practice, you can master any device. Don’t be afraid to explore more features and customization options on your Roku – it’s all part of the fun! And if you ever need a helping hand or just some reassurance, that’s what I’m here for. Congratulations on taking the first step into a world of streaming bliss, and I hope our journey together has been as enjoyable as it has been informative.
Frequently Asked Questions
What if my Roku device won't connect to my Wi-Fi network?
Don’t Panic! If your Roku won’t connect to Wi-Fi, let’s try a simple restart – think of it like jump-starting a car. Unplug the Roku, wait 10 seconds, and plug it back in. Then, try reconnecting to your network. If that doesn’t work, we can check the Wi-Fi password or try moving the Roku closer to your router for a stronger signal.
How do I add my favorite channels to the Roku home screen?
Don’t Panic! To add your favorite channels to the Roku home screen, simply navigate to the Channel Store, find the channel you want, and click ‘Add Channel’. Then, press the Home button, select the channel, and choose ‘Move Channel’ to place it on your home screen for easy access. Think of it like adding a favorite radio station to your car’s presets!
Can I use my Roku device with an older TV that only has composite inputs?
Don’t Panic! If your older TV only has composite inputs, you can still use your Roku. You’ll just need a Roku model with composite output, like the Roku Express+, or an adapter to convert the HDMI signal to composite. Think of it like using a special connector to hook up an old cassette player to a new car stereo – it’s a simple workaround!