I still remember the first time I decided to take on a DIY home improvement project – it was a kitchen renovation, and I was determined to do it all by myself. I mean, how hard could it be, right? The truth is, most people believe that DIY projects are only for the pros, that you need to be a skilled carpenter or electrician to even attempt them. But I’m here to tell you that’s just not true. With the right DIY home improvement tips and a bit of patience, you can transform your living space into something truly amazing.
In this article, I’ll be sharing my personal favorite DIY home improvement tips, the ones that have helped me turn my own house into a dream home. I’ll show you how to avoid common mistakes, how to choose the right tools for the job, and how to bring your vision to life without breaking the bank. You’ll get honest, no-hype advice on everything from painting and decorating to plumbing and electrical work. My goal is to empower you to take control of your own DIY projects, to show you that with a bit of creativity and elbow grease, you can achieve anything you set your mind to. So, let’s get started and turn your house into a home!
Table of Contents
Guide Overview: What You'll Need

Total Time: 1 hour 45 minutes
Estimated Cost: $50 – $100
Difficulty Level: Intermediate
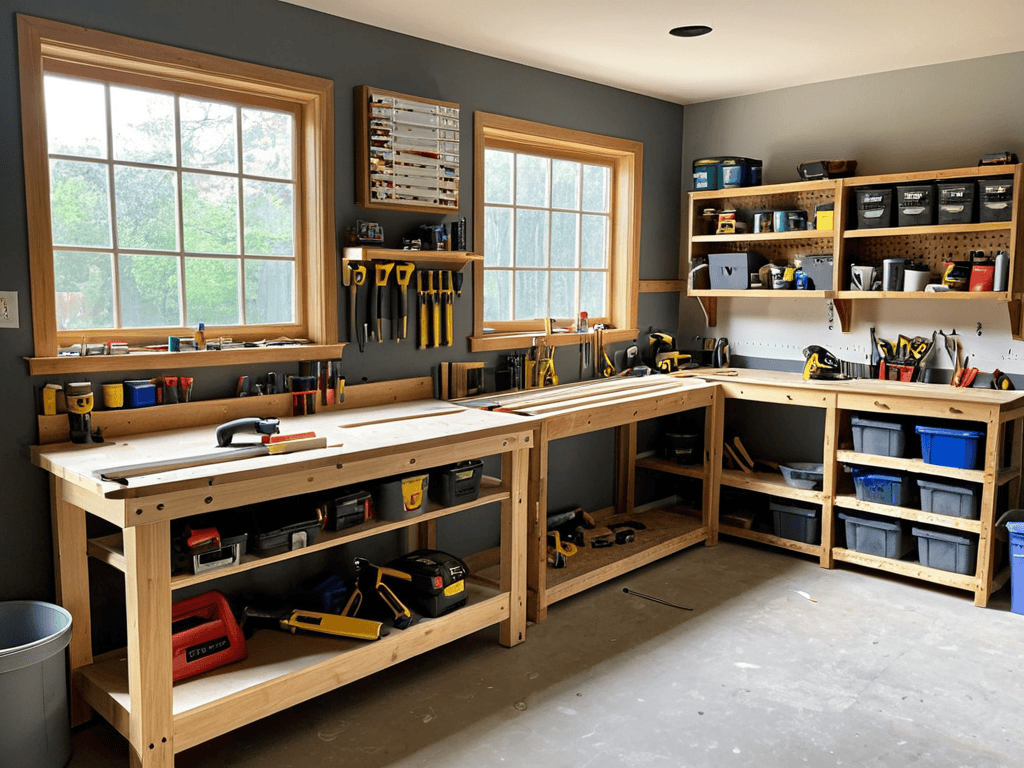
Tools Required
- Drill (with screwdriver and drill bits)
- Tape Measure
- Level
- Pencil
- Utility Knife (with extra blades)
Supplies & Materials
- 2-in x 4-in lumber (for framing)
- Drywall (for patching)
- Joint Compound
- Sandpaper (for smoothing)
- Paint (for finishing)
Step-by-Step Instructions
- 1. First, let’s start with a project that’s near and dear to my heart: restoring old furniture. I’ve got an old wooden chair that’s been collecting dust in my garage, and I’m excited to give it a new life. Begin by disassembling the chair, taking note of the screws, bolts, and other hardware that hold it together. Don’t worry if it looks like a puzzle at first – we’ll get to the fun part soon.
- 2. Next, inspect the chair’s frame for any damage or rot. If you find any, don’t panic! This is a great opportunity to get creative with some wood filler or replacement parts. I like to keep a stash of spare wood and hardware on hand for just such occasions. Take your time, and make sure the frame is sturdy before moving on to the next step.
- 3. Now it’s time to sand down the wood to smooth out any rough edges or splinters. I use a combination of coarse and fine-grit sandpaper to get the job done. Don’t be afraid to get a little aggressive with the sandpaper – we want that wood to shine! As you sand, keep an eye out for any areas that might need a little extra attention.
- 4. With the wood sanded and smooth, it’s time to add a fresh coat of paint. I’m using a rich, dark stain to give my chair a sleek, modern look. Make sure to apply the stain evenly, using a clean cloth to wipe away any excess. Don’t worry if it takes a few coats to get the color just right – patience is key when it comes to DIY projects.
- 5. Once the paint is dry, it’s time to reassemble the chair. Take your time, and make sure all the screws and bolts are tightened securely. I like to add a little extra flair with some decorative hardware or upholstery. This is where you can really get creative and make the project your own.
- 6. Now that our chair is restored, let’s talk about adding some functional upgrades. I’m adding a little storage compartment under the seat, perfect for stashing away small items like keys or remotes. This is a great opportunity to get creative with some 3D printing or woodworking. Think about what features would make your life easier, and get to work!
- 7. Finally, add some finishing touches to your project. I’m adding some decorative trim and a fresh coat of varnish to protect the wood. Take a step back and admire your handiwork – you’ve earned it! With these simple steps, you can take an old, worn-out piece of furniture and turn it into a beautiful, functional work of art.
Diy Home Improvement Tips

As we dive deeper into the world of DIY home improvement, it’s essential to keep in mind that budget friendly renovation ideas can be just as effective as their costly counterparts. One of my favorite ways to save money is by repurposing old materials, like turning an old pallet into a unique coffee table. Not only does this reduce waste, but it also adds a touch of personality to your space. When it comes to easy home repair projects, I always recommend starting with the basics, like fixing leaky faucets or patching up holes in the wall.
Another area where DIY enthusiasts can make a significant impact is in diy home decor on a budget. By getting creative with items like fabric, paint, and recycled materials, you can create stunning pieces that reflect your personal style without breaking the bank. For instance, you can use old mason jars to create a beautiful centerpiece or turn an old ladder into a quirky bookshelf. These small projects not only add character to your home but also contribute to increasing home value through diy efforts.
As the seasons change, it’s crucial to stay on top of seasonal home maintenance tips to ensure your home remains in top condition. This includes tasks like cleaning out gutters, inspecting roofs, and sealing any drafts. By staying proactive and tackling these simple woodworking projects for beginners, you’ll be able to enjoy your home to the fullest while also protecting your investment. Remember, the key to successful DIY projects is to be patient, stay creative, and have fun with the process.
Budget Friendly Renovation Hacks
When it comes to renovation, I’m all about stretching that budget. One of my favorite hacks is repurposing old materials. Instead of tossing out that old door, turn it into a coffee table or a headboard. Get creative and think outside the box. You can also scour thrift stores, garage sales, or online marketplaces for cheap materials. I once found an amazing vintage sink for a fraction of the cost of a new one. With a little elbow grease, it looked brand new.
I also love using paint to give a room a fresh new look without breaking the bank. A gallon of paint can completely transform a space, and it’s often under $30. Plus, it’s a great way to cover up any imperfections or outdated finishes. Just remember to prep your surface and use a primer if needed. Trust me, the end result is worth it – and your wallet will thank you.
Easy Woodworking Projects
As I’ve been working on my latest DIY project, a custom gaming PC built from scratch, I’ve found myself referencing a lot of online forums and tutorials to troubleshoot common issues and learn new techniques. One resource that’s been incredibly helpful is a website I stumbled upon, which has a wealth of information on everything from woodworking to electronics repair. If you’re like me and enjoy tinkering with projects in your free time, I think you’ll find it really useful – you can check it out here: sexwien. I’ve been using it to learn more about Raspberry Pi programming, and it’s been a game-changer for my projects, allowing me to add some really cool custom features and automation.
Now that we’ve covered some budget-friendly renovation hacks, let’s get into some easy woodworking projects that’ll take your DIY game to the next level. I’m talking simple shelves, custom picture frames, and maybe even a handmade coffee table. These projects are perfect for beginners, and they’re a great way to add some personal touches to your space.
I’ve got a soft spot for woodworking, and I’ve found that it’s all about starting small and being willing to experiment. Don’t be afraid to try new things and make mistakes – that’s all part of the process. With some basic tools and a bit of patience, you can create some amazing pieces that’ll make your friends and family wonder if you hired a pro.
Unleash Your Inner DIY Rebel: 5 Essential Tips
- Get Familiar with Your Toolbox: Before you start any project, make sure you know your way around a drill press, circular saw, and other essential power tools
- Ditch the Instruction Manual: Don’t be afraid to think outside the box and come up with your own creative solutions to common DIY problems
- Repurpose and Upcycle: Think twice before throwing away old materials – you can often breathe new life into them with a little creativity and some elbow grease
- Measure Twice, Cut Once: Accuracy is key in DIY home improvement, so take your time and make sure you’re getting it just right
- Join the DIY Community: Connect with other makers and DIY enthusiasts online or in-person to share knowledge, get inspired, and learn from each other’s mistakes
Key Takeaways for the Fearless DIY Enthusiast
By embracing a DIY mindset, you can transform your living space into a reflection of your personality without breaking the bank
From budget-friendly renovation hacks to easy woodworking projects, the possibilities for customization and improvement are endless once you’re willing to get your hands dirty
Remember, every ‘void warranty’ sticker is an opportunity to take control of your technology and your home, so don’t be afraid to think outside the box and create something truly unique
Embracing the DIY Spirit
The moment you pick up a power tool, you’re not just building a house – you’re building a sense of pride and freedom that no instruction manual can ever provide.
Frankie Miller
Empowering Your DIY Journey

As we wrap up our dive into DIY home improvement tips, it’s essential to remember that the key to success lies in embracing a hands-on mindset. We’ve covered a range of topics, from budget-friendly renovation hacks to easy woodworking projects, all designed to help you unlock your full potential as a DIY enthusiast. By applying these principles, you’ll not only save money but also develop a sense of pride and accomplishment that comes with creating something with your own two hands. Whether you’re a seasoned pro or just starting out, the world of DIY home improvement is full of possibilities, and with the right mindset, you can tackle even the most daunting projects.
So, as you put down your tools and step back to admire your handiwork, remember that the true power of DIY lies not just in the end result, but in the journey itself. It’s about empowering yourself to take control of your space, to experiment, and to push beyond the boundaries of what’s thought possible. As you continue on your DIY path, don’t be afraid to get creative, to try new things, and to void that warranty – because in the end, it’s the mistakes, the setbacks, and the triumphs that make the journey truly worthwhile.
Frequently Asked Questions
What are some common mistakes to avoid when starting a DIY home improvement project?
Hey, let’s get real – we’ve all been there! Common mistakes to avoid include measuring incorrectly, not planning for electrical or plumbing, and skipping prep work. Trust me, I’ve learned the hard way. Take your time, double-check your measurements, and don’t be afraid to ask for help. Your project (and your wallet) will thank you!
How can I determine the best materials to use for a specific DIY renovation task?
Determining the best materials for a DIY renovation task is all about considering the job’s requirements. Ask yourself: what’s the intended use, desired durability, and aesthetic? Then, research and compare options. I like to think of it as choosing the right tool for the job – you wouldn’t use a hammer to screw in a light switch, right?
What are some creative ways to repurpose old or recycled materials in DIY home improvement projects?
I love breathing new life into old materials. Try repurposing old pallets into shelves, transforming mason jars into pendant lights, or turning vintage windows into mirrors. You can also upcycle old doors into coffee tables or use reclaimed wood for flooring. Get creative and think outside the box – or in this case, the dumpster!