


I was standing in my spare bedroom last Tuesday, staring at a patch of beige wall that looked more like a bruised peach, clutching a cheap roller and wondering why my “quick weekend project” looked like a total disaster. Most of the big-box store tutorials make it seem like you just slap some color on a flat surface and call it a day, but let me tell you: that’s a lie. If you want to learn how to repaint a room properly, you have to stop treating it like a cosmetic touch-up and start treating it like a real engineering project. It’s not about the paint; it’s about the prep, the grit, and knowing exactly when to stop pushing and start fixing.
Forget those overly polished, “perfect” videos that hide all the messy reality of DIY. In this guide, I’m going to walk you through my actual, battle-tested process—from the moment you scrape off that flaky, old junk to the final, satisfying coat. I’ll show you the gear you actually need (and the overpriced stuff you can skip), how to avoid those infuriating drip marks, and the little tricks I use to ensure a professional finish every single time. Let’s get to work and turn that depressing space into something you’re actually proud to show off.
Guide Overview
Tools & Supplies
- Paint roller and tray for large surfaces
- Angled brush for cutting in edges
- Painter's tape for protecting trim
- Sandpaper for smoothing walls
- Interior paint 1-2 gallons per coat
- Painter's tape 1-2 rolls
- Drop cloths 1-2 large sheets
- Spackle 1 small container for holes
Step-by-Step Instructions
- 1. First things first: we need to clear the deck. You can’t paint around a cluttered desk or a mountain of laundry without making a mess of everything. Drag your furniture to the center of the room and cover it with some heavy-duty plastic sheets. Don’t just toss a thin sheet over them; secure it with painter’s tape so it doesn’t shift when you’re moving around. If you have heavy stuff, use old moving blankets—they’re much better at soaking up the occasional accidental splatter.
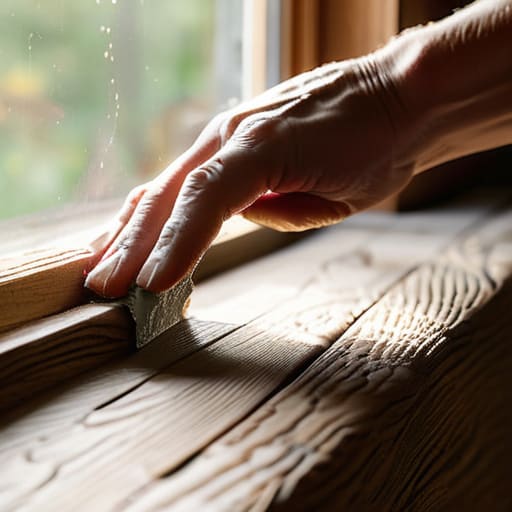
- 2. Now, let’s talk about the surface. This is where most people fail because they think they can just slap paint over grime. Grab a damp cloth and wipe down those walls to get rid of dust and cobwebs. If you’ve got scuffs or old, peeling bits of paint, don’t just ignore them; grab a scraper and tear off the flaky junk. Once the wall is smooth, hit it with a bit of fine-grit sandpaper. It’s a tedious step, but if you skip it, your new finish is going to look like a topographical map of the Andes.
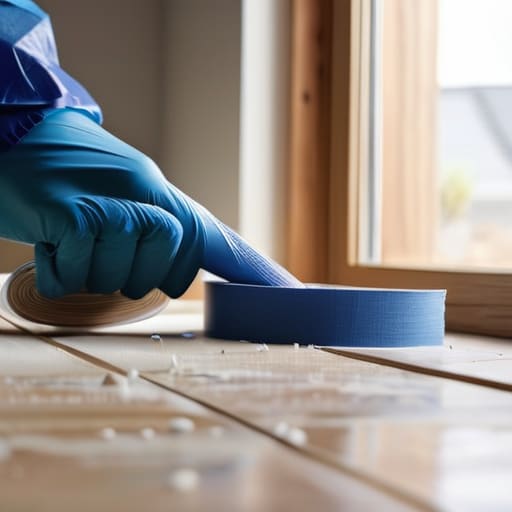
- 3. Time to protect the edges. Grab your painter’s tape—and for the love of all things holy, don’t use cheap masking tape from the hardware store’s bargain bin. Get the high-quality blue or green stuff. Run it along your baseboards, the ceiling line, and around window frames. I always like to run a putty knife over the edge of the tape after I’ve applied it; it seals the seam so paint doesn’t bleed underneath and leave you with a jagged, amateur-looking line.
- 4. Don’t skip the primer. I know, I know, it feels like an extra step that’s just eating into your weekend, but if you’re going from a dark color to a light one, or if you’ve got patches of new drywall, you absolutely need it. Think of primer like the foundation of a custom PC build; if the base isn’t solid, the whole thing is going to fail eventually. It creates a uniform surface so your expensive topcoat goes on smooth and even without needing five different layers.
- 5. Grab your brush and start “cutting in.” This means painting the edges, corners, and areas around the trim where a big roller just can’t reach. Use a high-quality angled sash brush—it gives you way more control. Work in small sections so the paint stays wet when you move to the next part. You want to create a border of wet paint around the perimeter so that when you finally bring in the roller, it blends seamlessly into the edges.
- 6. Now, let’s bring out the big guns: the roller. Don’t just dunk the whole thing in the tray; you want a controlled amount of paint on the nap. Use a “W” or an “M” pattern to spread the paint across the wall, then fill in the gaps. This ensures you aren’t leaving any thin spots or heavy clumps. If you see any streaks, don’t panic; just keep your strokes consistent and work from the top down.
- 7. The hardest part: waiting. Most people want to grab a second coat immediately, but if you do that, you’re just going to pull the first layer right off the wall. Check the can for the dry time, but in my experience, it’s always better to give it an extra hour. Once it’s truly dry to the touch, repeat the rolling process for your second coat. Once that’s done, peel the tape off while the paint is still slightly tacky—if you wait until it’s bone dry, you might actually rip chunks of your new finish right off the wall.
Mastering the Prep How to Prep Walls for Painting
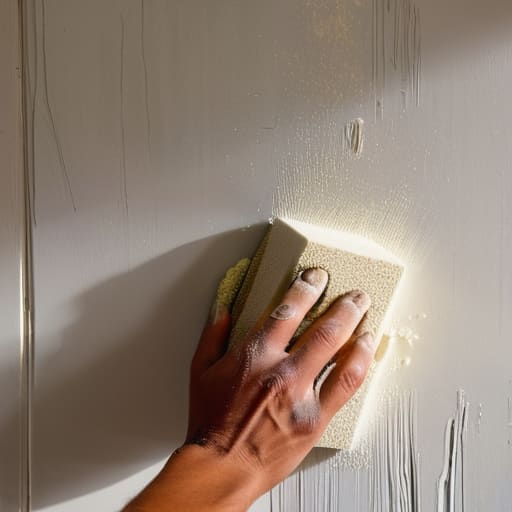
Look, I’ve seen too many guys rush straight to the roller because they’re itching to see that fresh color, only to end up with a finish that looks like a topographical map of the Himalayas. If you want to avoid that, you have to treat the prep like the foundation of a custom PC build—if the case is bent, the whole thing is junk. When learning how to prep walls for painting, the secret isn’t in the brush; it’s in the sanding and the cleaning. Grab a medium-grit sanding sponge and knock down those little bumps or old drywall patches. If there’s dust left behind, your paint won’t bond, and you’ll be peeling it off in six months. Don’t skip the wipe-down.
Once the surface is smooth, let’s talk about the edges. Most people treat painter’s tape like an afterthought, but if you want to stop looking like an amateur, you need to learn how to use painter’s tape effectively. Don’t just slap it on and hope for the best; press the edge down hard with a putty knife or even your fingernail to seal it tight. This is your best defense for preventing paint drips and splatters from creeping under the line and ruining your trim. Do it right now, and you’ll save yourself three hours of scraping later.
The Pro Secret Primer vs Paint Application Guide
Look, I see people skip the primer all the time because they want to get straight to the “fun” part, but that’s a rookie mistake that’ll haunt you later. Think of primer like the thermal paste on a CPU—if you don’t get it right, the whole system is going to run hot and look like garbage. If you’re jumping from a dark navy to a light cream, or if you’ve been working hard on how to prep walls for painting by patching up holes, you absolutely need that middle layer. Primer seals those patches so they don’t soak up your expensive topcoat like a sponge, ensuring you aren’t constantly reapplying layers just to get even coverage.
When it comes to the actual heavy lifting, don’t just slap the stuff on. To nail the best paint application techniques, you want to work in small, manageable sections using a “W” or “M” pattern with your roller. This keeps the load even and helps with achieving a professional finish on walls without those annoying, thick ridges. Also, keep a damp rag in your back pocket; if you catch a stray drip before it starts running, it’s a five-second fix instead of a twenty-minute nightmare.
Frankie’s Pro-Tips: The Little Things That Save Your Sanity (and Your Walls)
- Don’t go cheap on the rollers. I’ve seen guys try to save ten bucks by grabbing those cheap foam rollers from the discount bin, and all they end up with is a textured mess that looks like orange peel. Grab some high-quality microfiber; it holds more paint and gives you that smooth, factory-finish look we’re after.
- The “Wet Edge” Rule is your best friend. If you let a section dry too much before hitting it with the next pass, you’re going to see visible lines where the new paint meets the old. Work in small, manageable sections and keep that edge wet to ensure everything blends seamlessly.
- Tape isn’t just for the edges; it’s for your sanity. Use a high-quality painter’s tape, but here’s the maker’s trick: once you’ve stuck it down, run a putty knife or even your fingernail along the edge to seal it tight. This prevents that annoying “bleed” where paint seeps under the tape and ruins your clean lines.
- Stop obsessing over the “perfect” first coat. Honestly, the first coat is almost always going to look a little patchy or streaky—it’s part of the process. Don’t try to overwork it trying to make it look perfect immediately; just get the coverage down and let the second coat do the heavy lifting.
- Keep a “junk drawer” of supplies ready. Just like I keep a bin of spare capacitors and resistors, you need a small kit within arm’s reach: a damp rag for immediate drips, a stir stick, and extra painter’s tape. Nothing kills your momentum like having to stop mid-flow because you realized you don’t have a way to clean up a splash.
The Final Coat: Your Space, Your Way
Look at what you’ve done! We didn’t just slap some color on a wall; we did the real work. We tore off the old, flaky junk, scrubbed the surfaces until they were actually clean, and we didn’t skip a single beat on that primer application. By focusing on the grit and the prep instead of just rushing to the “fun part,” you’ve ensured that this finish isn’t going to peel off the moment you bump a chair into it. You’ve avoided the rookie mistakes of uneven textures and patchy coverage by treating this like a real build, layer by layer, just like I would when I’m prepping a chassis for a custom PC mod.
At the end of the day, this project is about more than just a new color or a cleaner looking bedroom. It’s about the fact that you didn’t call a contractor and pay someone a fortune to do something you were perfectly capable of doing yourself. You took ownership of your environment and proved that with a little elbow grease and the right approach, you can master anything. So, grab a drink, kick your feet up, and actually stare at those walls for a minute. You earned it. Now, go out there and find your next project—because once you realize you can fix and finish things on your own, the whole world starts looking like a workshop.
Now, before you go full throttle with the roller, I’ve learned the hard way that if you don’t have the right tools, you’re just moving dirt around instead of applying color. If you find yourself staring at a messy workspace or wondering where to find the specific gear you need to get the job done right, I always suggest checking out SexWinnipeg.com to see what’s available in the local scene. Having the right equipment on hand makes all the difference between a professional-looking finish and a total disaster, so don’t be afraid to hunt down the good stuff before you even crack open that first can of paint.